 Note: if you don’t see the ADO option in your tenant, reach out to your Augment Solution Architect or send Augment a note: [https://www.augmentcode.com/contact](https://www.augmentcode.com/contact)
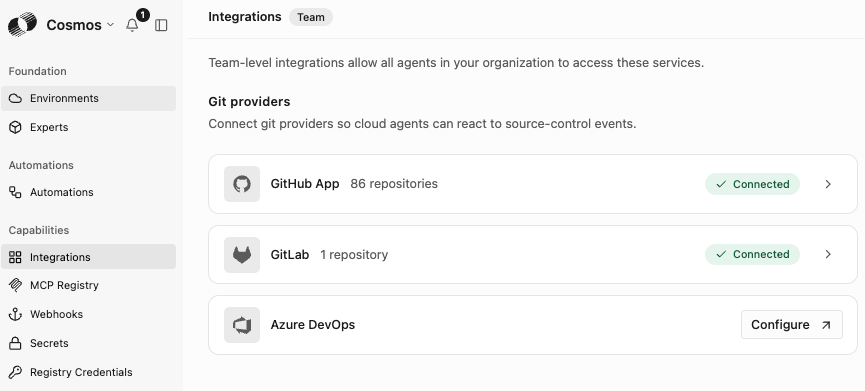
You should land on that page:
Note: if you don’t see the ADO option in your tenant, reach out to your Augment Solution Architect or send Augment a note: [https://www.augmentcode.com/contact](https://www.augmentcode.com/contact)
You should land on that page:
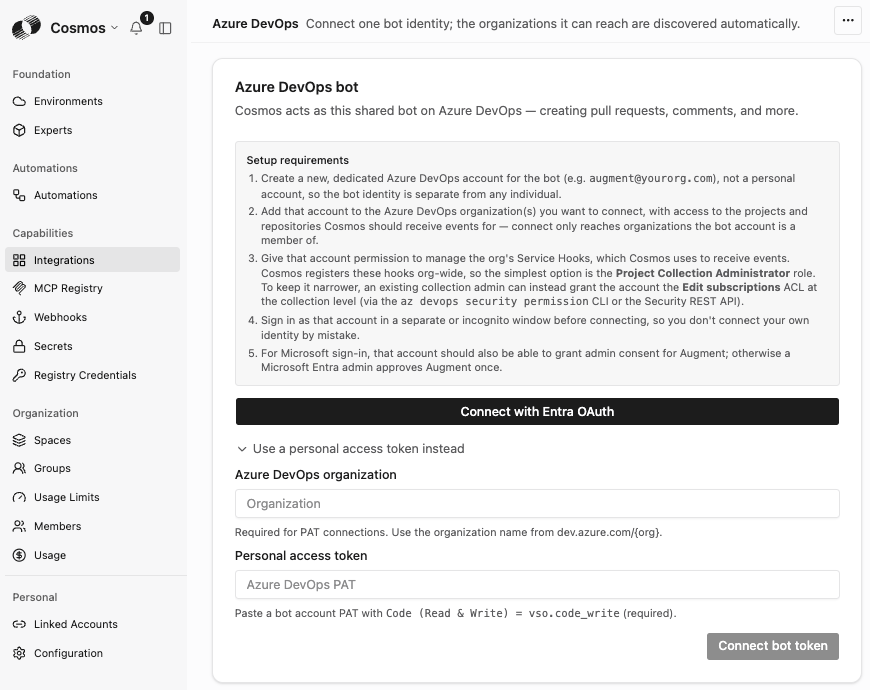 2 options:
1. EntraID OAuth route
2. ADO PAT token route
### Option1: Connecting to ADO via EntraID OAuth
Let’s create a new EntraID user with Project Collection Administrator role on the corresponding ADO projects.
Go to your EntraID admin portal [https://entra.microsoft.com/](https://entra.microsoft.com/) > Entra ID > Users > New user > Create new user:
* UPN: ex: [augmentcode@mycompany.com](mailto:augmentcode@mycompany.com)
* Display name: Augment Code
Click on Review + create
Now go to each ADO organization (`https://dev.azure.com/
2 options:
1. EntraID OAuth route
2. ADO PAT token route
### Option1: Connecting to ADO via EntraID OAuth
Let’s create a new EntraID user with Project Collection Administrator role on the corresponding ADO projects.
Go to your EntraID admin portal [https://entra.microsoft.com/](https://entra.microsoft.com/) > Entra ID > Users > New user > Create new user:
* UPN: ex: [augmentcode@mycompany.com](mailto:augmentcode@mycompany.com)
* Display name: Augment Code
Click on Review + create
Now go to each ADO organization (`https://dev.azure.com/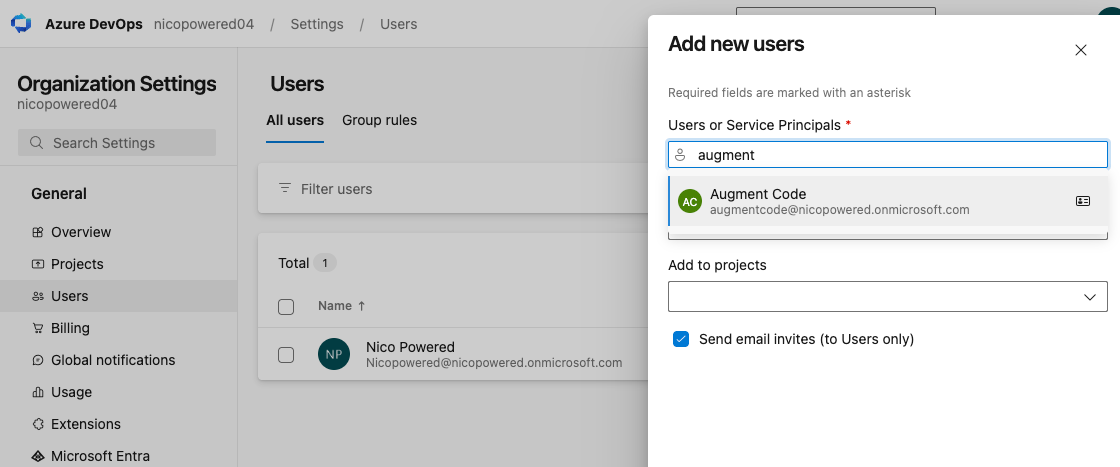
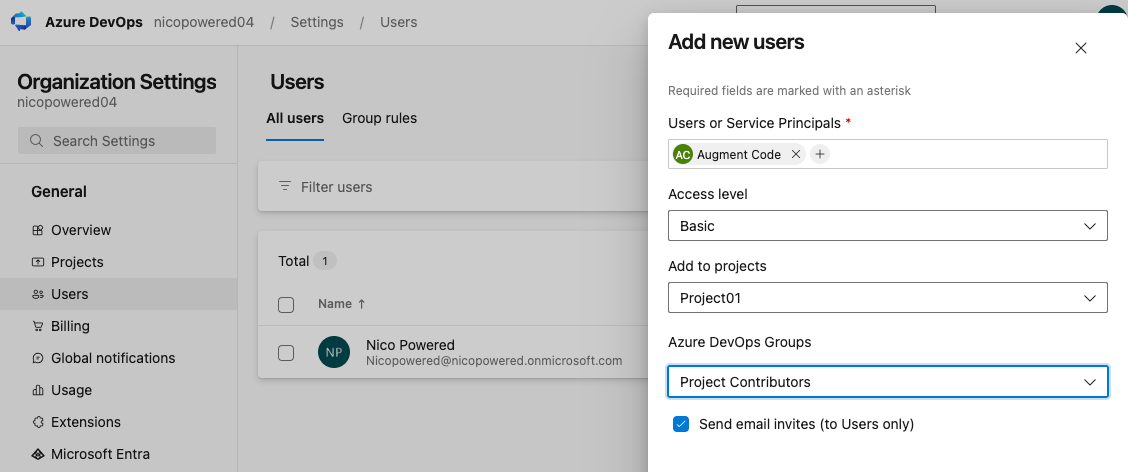 Then navigate to Organization Settings > Permissions, you should see this:
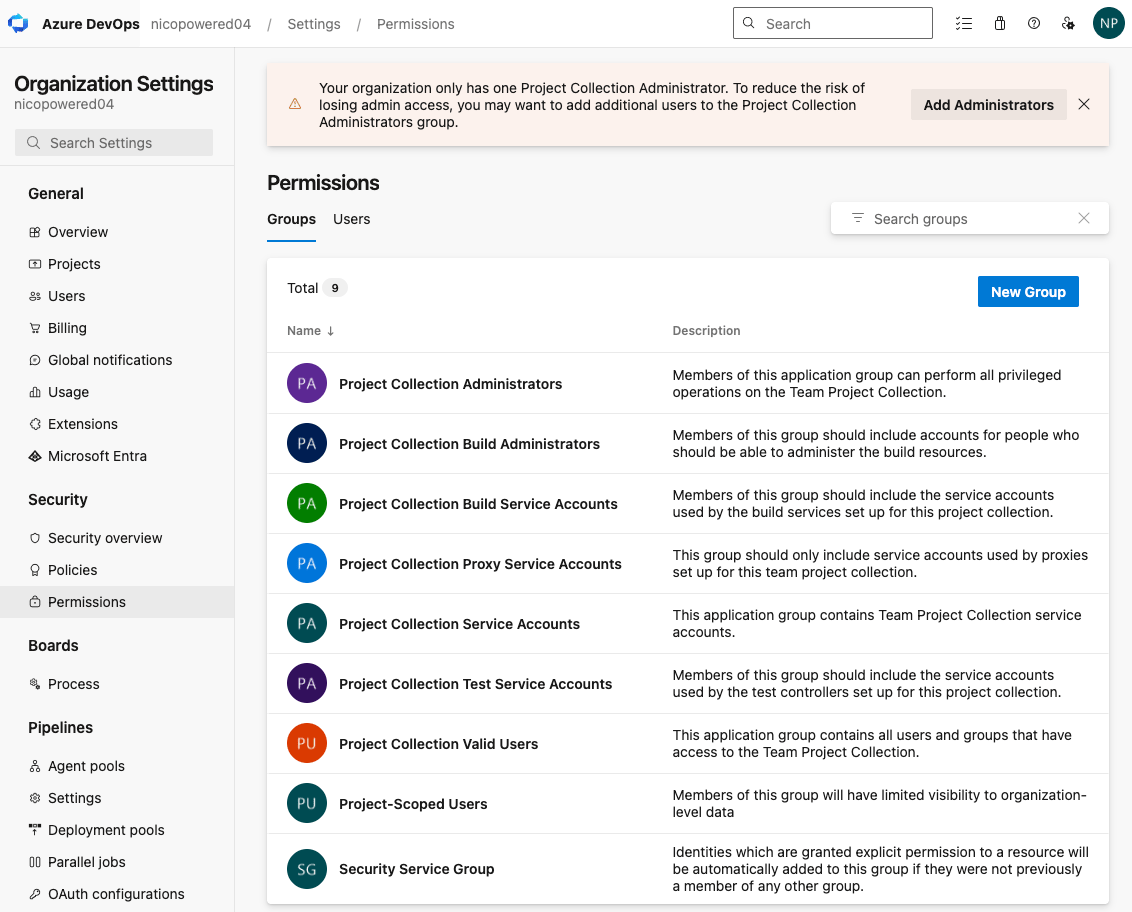 Click on Project Collection Administrators > Members tab > Add > type in the name of your EntraID service account user and select the matching user, then click on Save
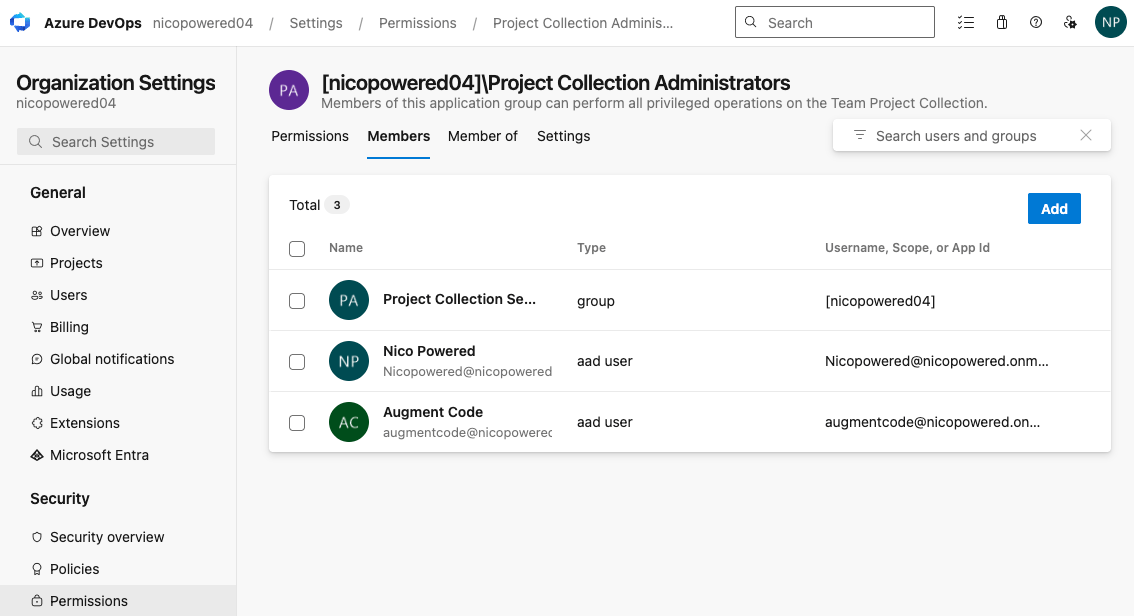
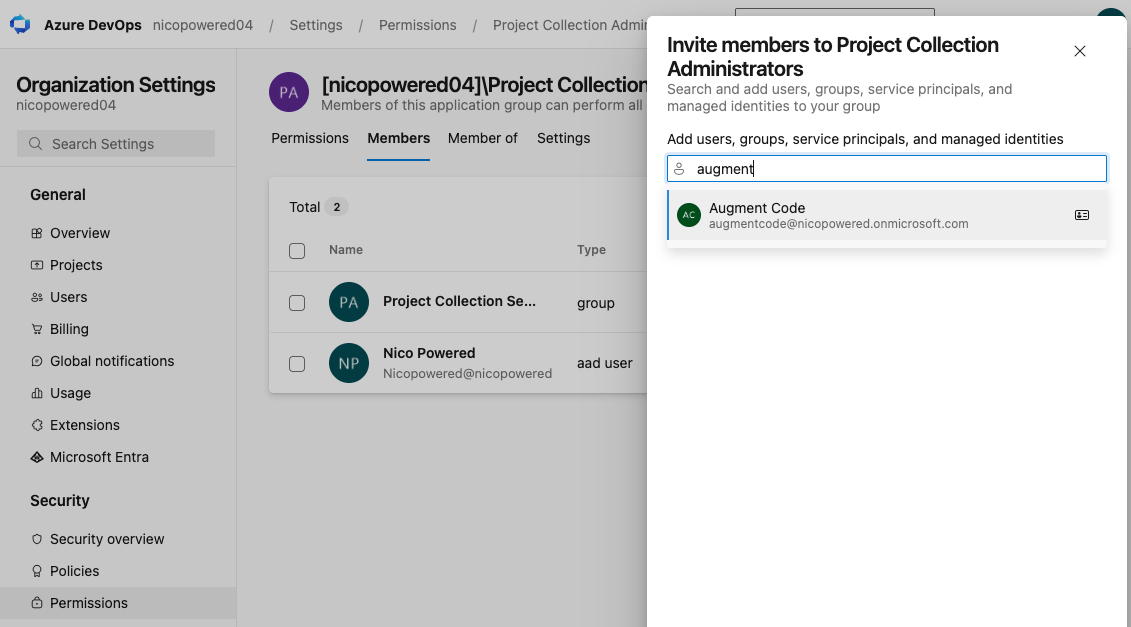 You should see this:
 At this point, your EntraID service account user should be able to access your ADO project. Let’s test this out: open a new browser session (or new incognito window) > sign in using your EntraID service account user, and navigate to your ADO organization (`https://dev.azure.com/
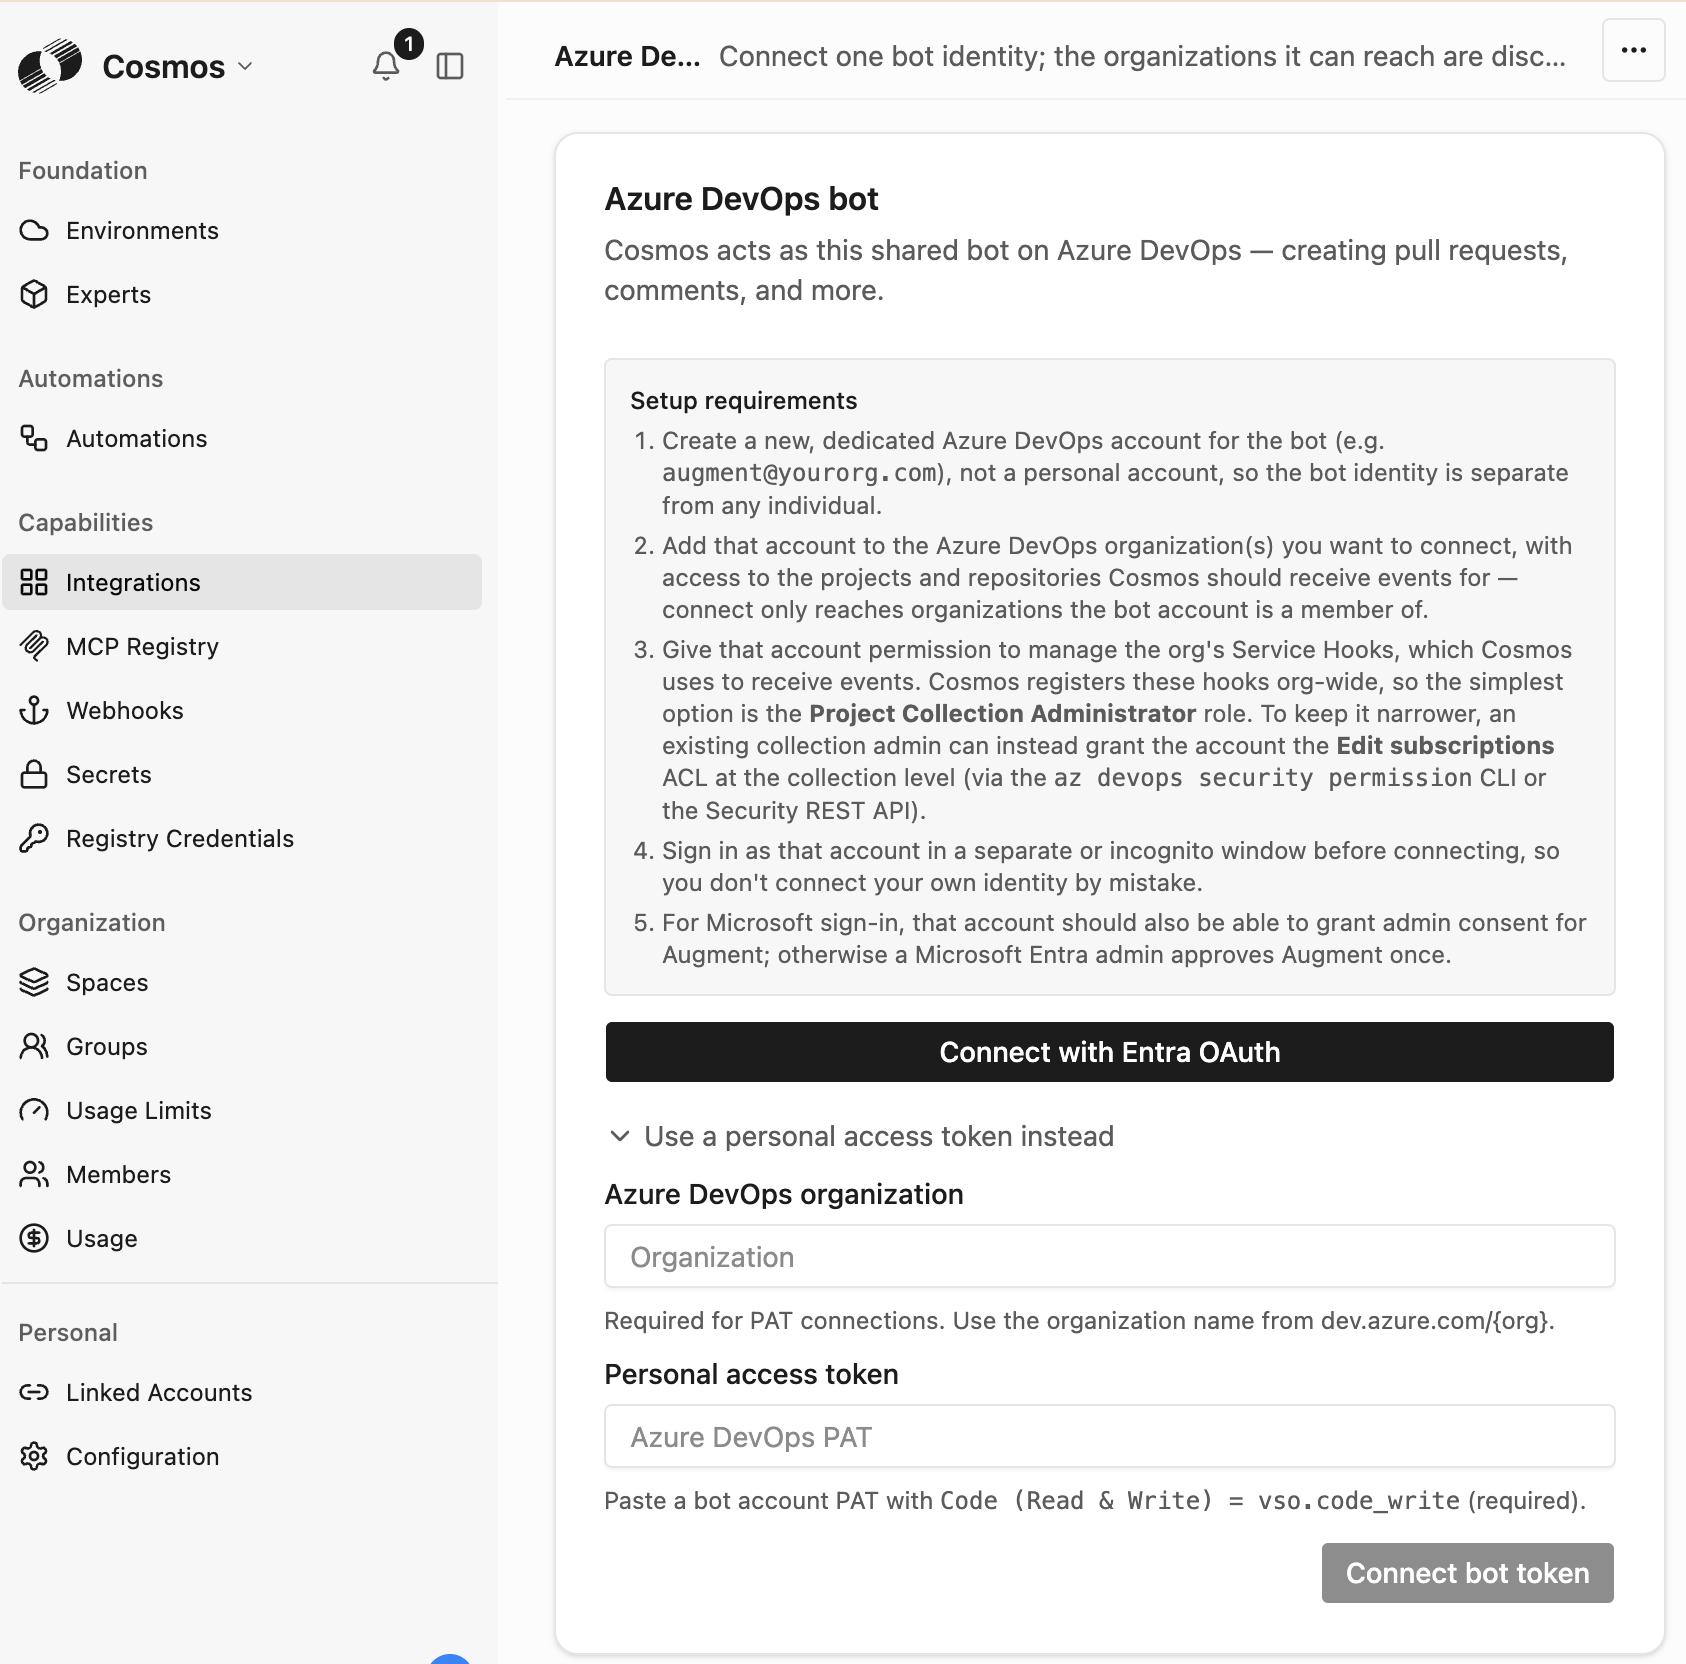
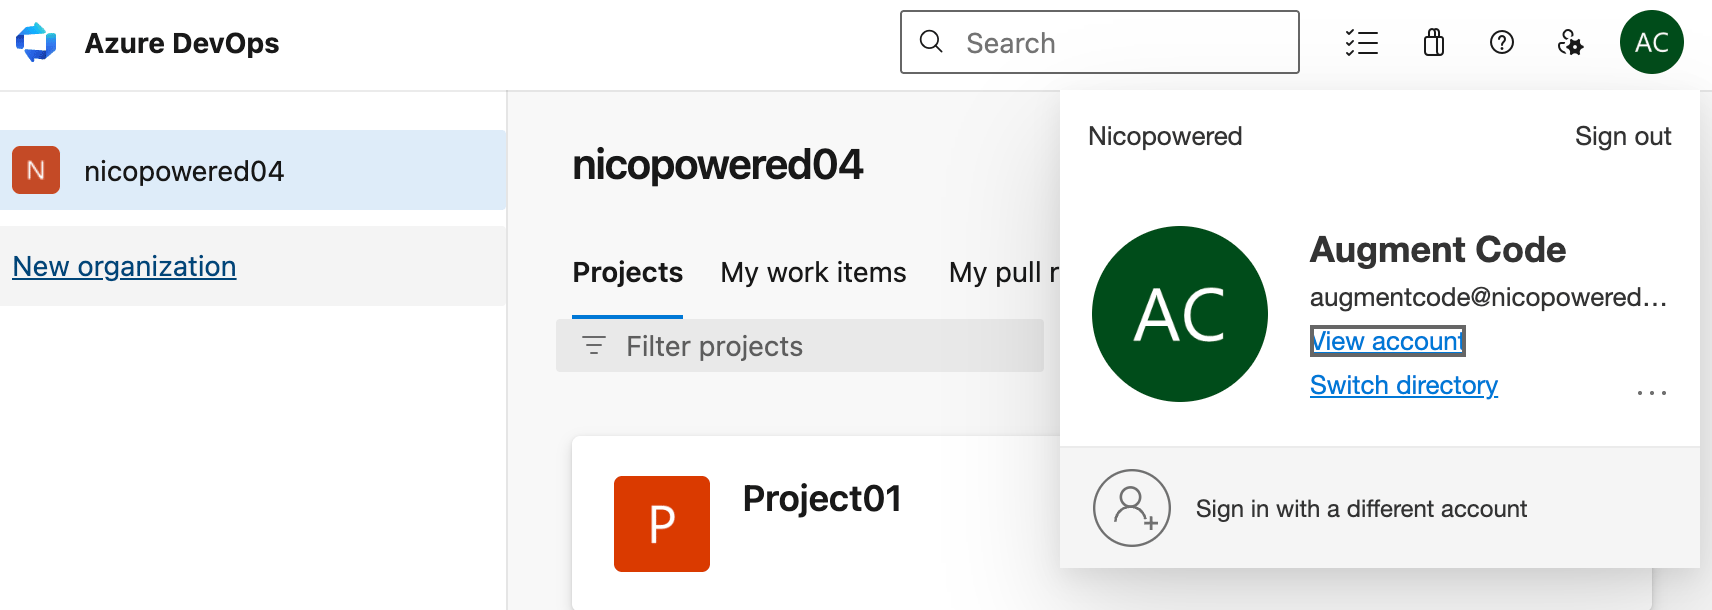 In that same browser session, re-authenticate to Cosmos as an admin and go to Settings > Integrations > Azure DevOps > and click on Connect with Entra OAuth:
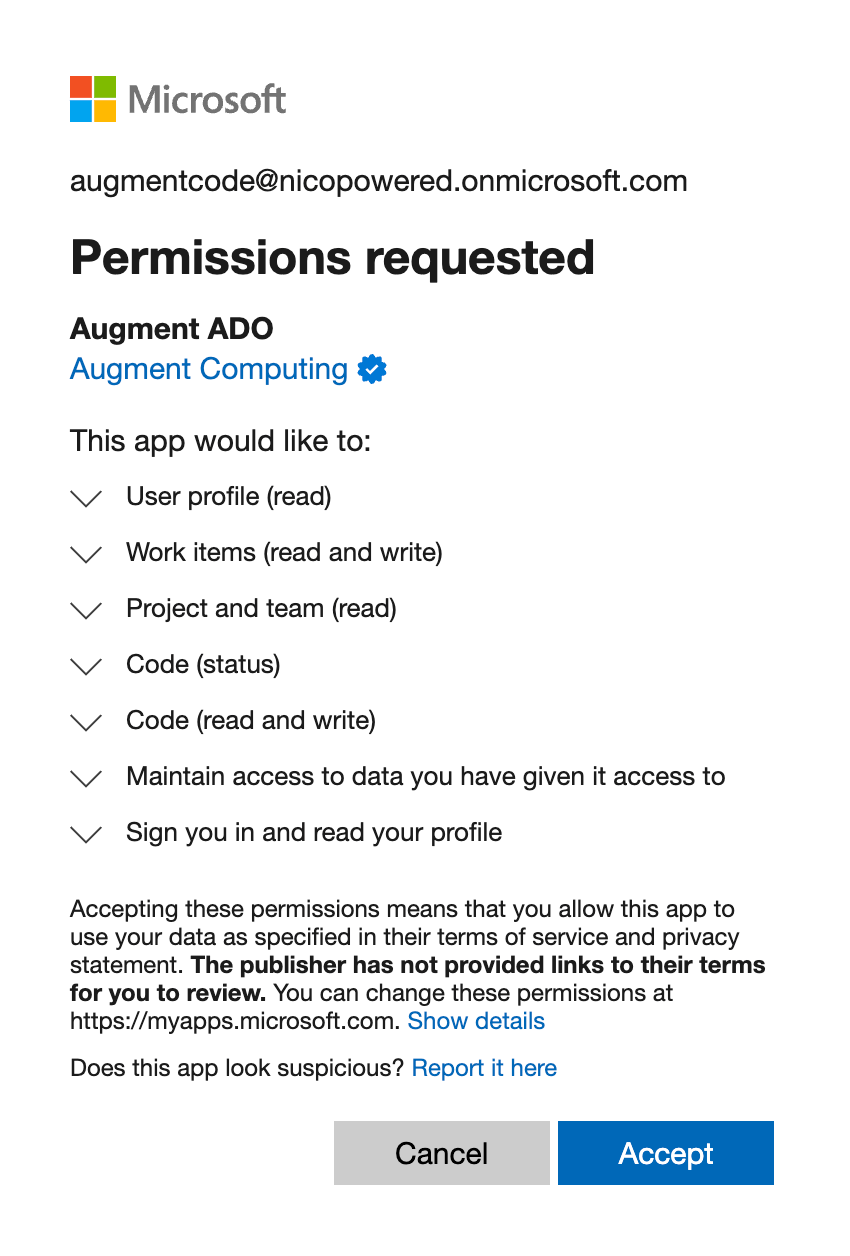
 You should see this OAuth consent screen, click on Accept:
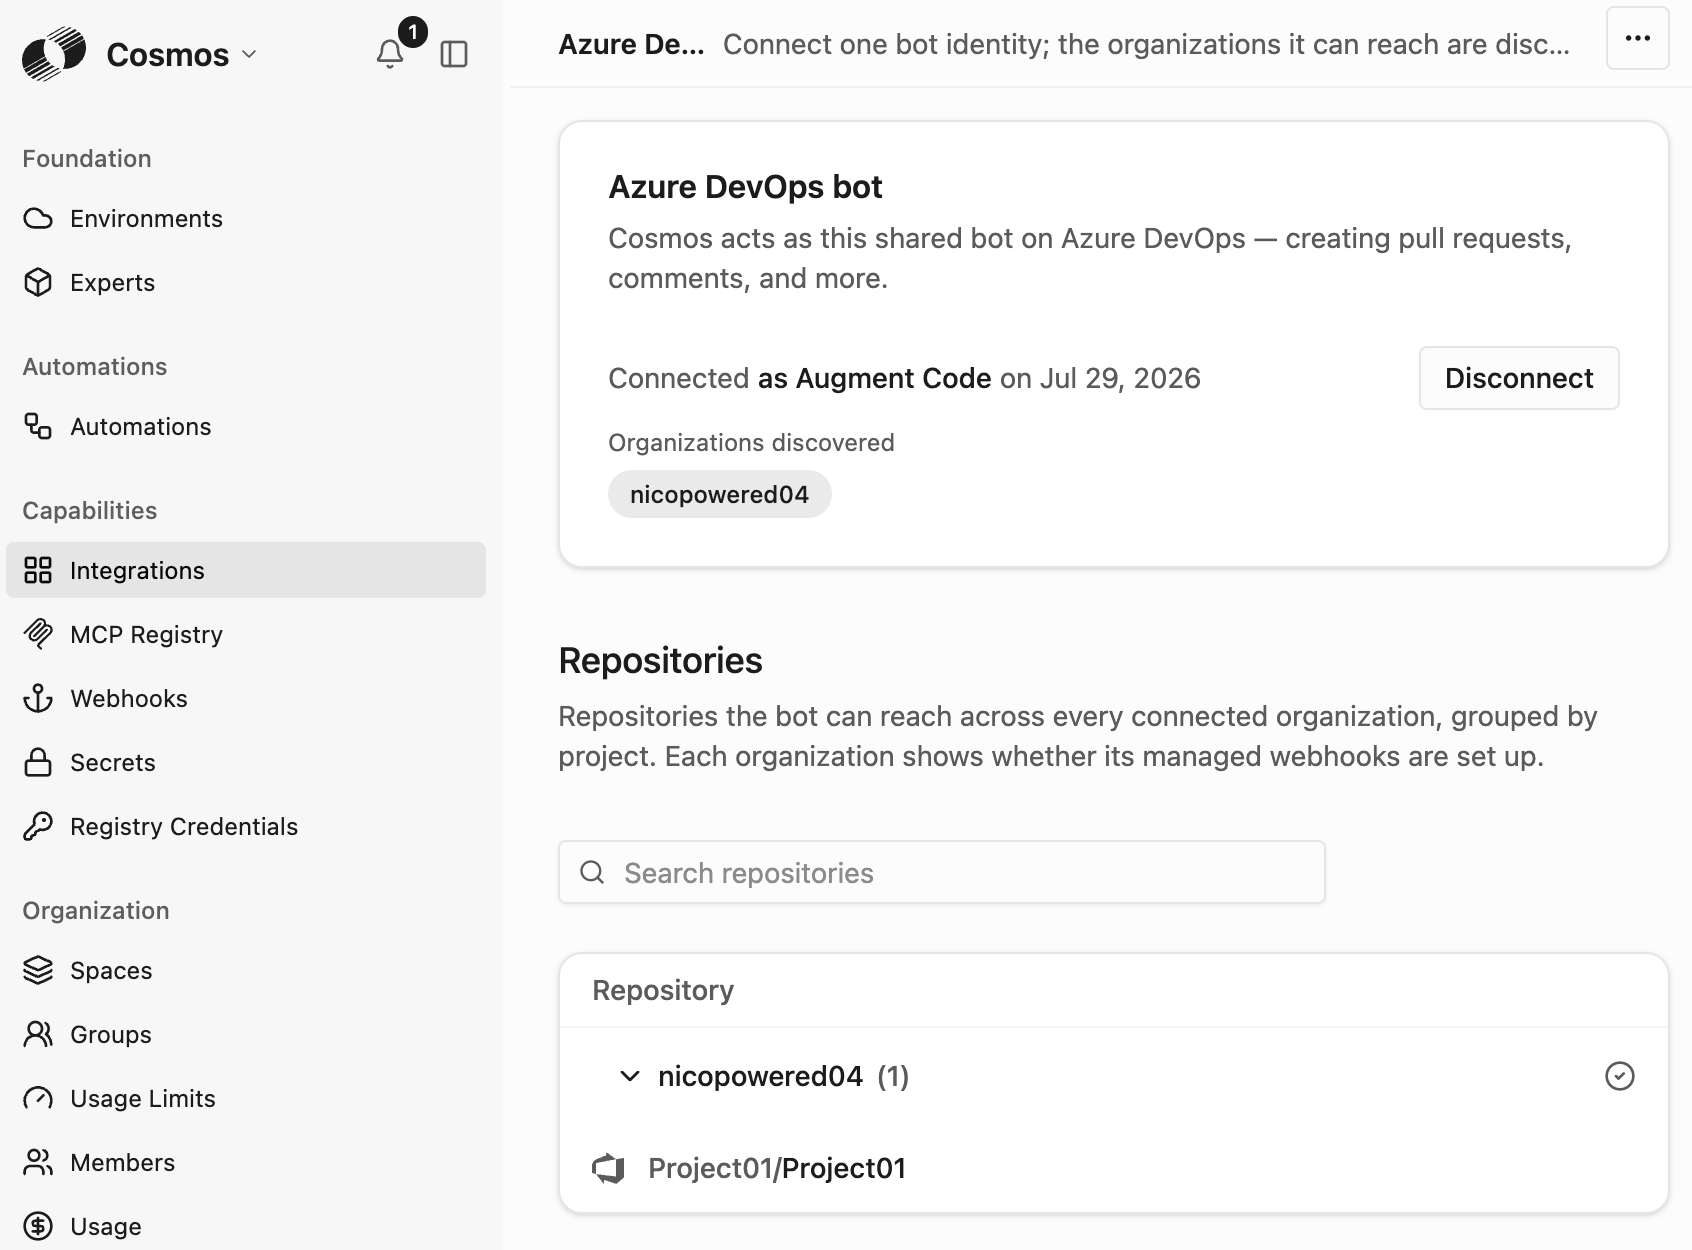
 You should then be redirected to Cosmos with the list of Repositories your service account has access to:
 ### Option2: Connecting to ADO via Personal access token
For this option, you will complete the same steps as in Option1 to create a new dedicated EntraID service account user and grant it access to the corresponding ADO organization and projects, but instead of connecting ADO to Cosmos via OAuth, you’ll leverage a ADO PAT token.
Make sure your service account user can access your ADO organization, you should see this when navigating to `https://dev.azure.com/
### Option2: Connecting to ADO via Personal access token
For this option, you will complete the same steps as in Option1 to create a new dedicated EntraID service account user and grant it access to the corresponding ADO organization and projects, but instead of connecting ADO to Cosmos via OAuth, you’ll leverage a ADO PAT token.
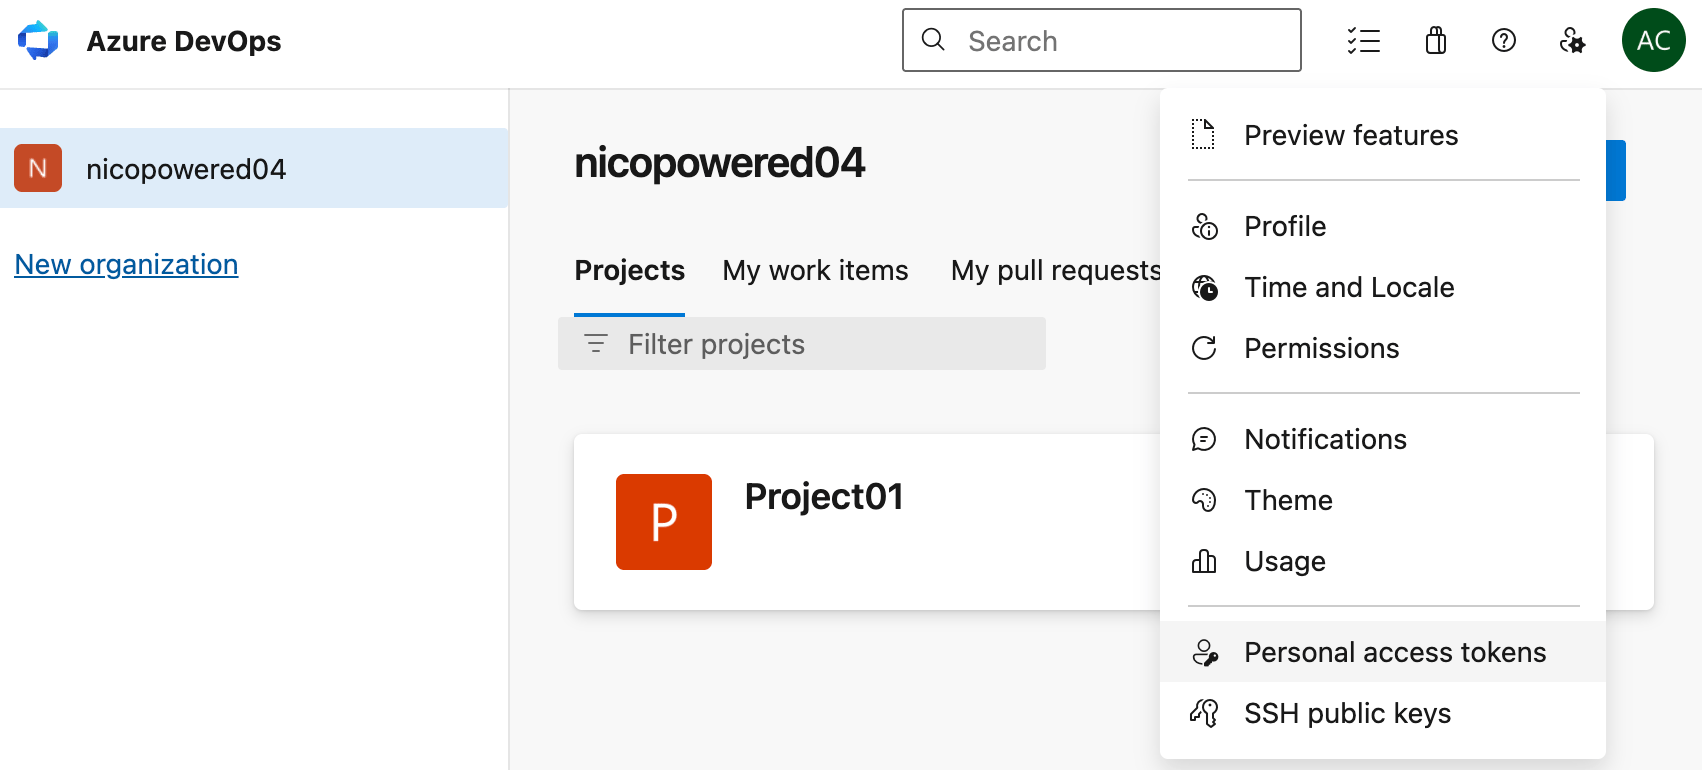
Make sure your service account user can access your ADO organization, you should see this when navigating to `https://dev.azure.com/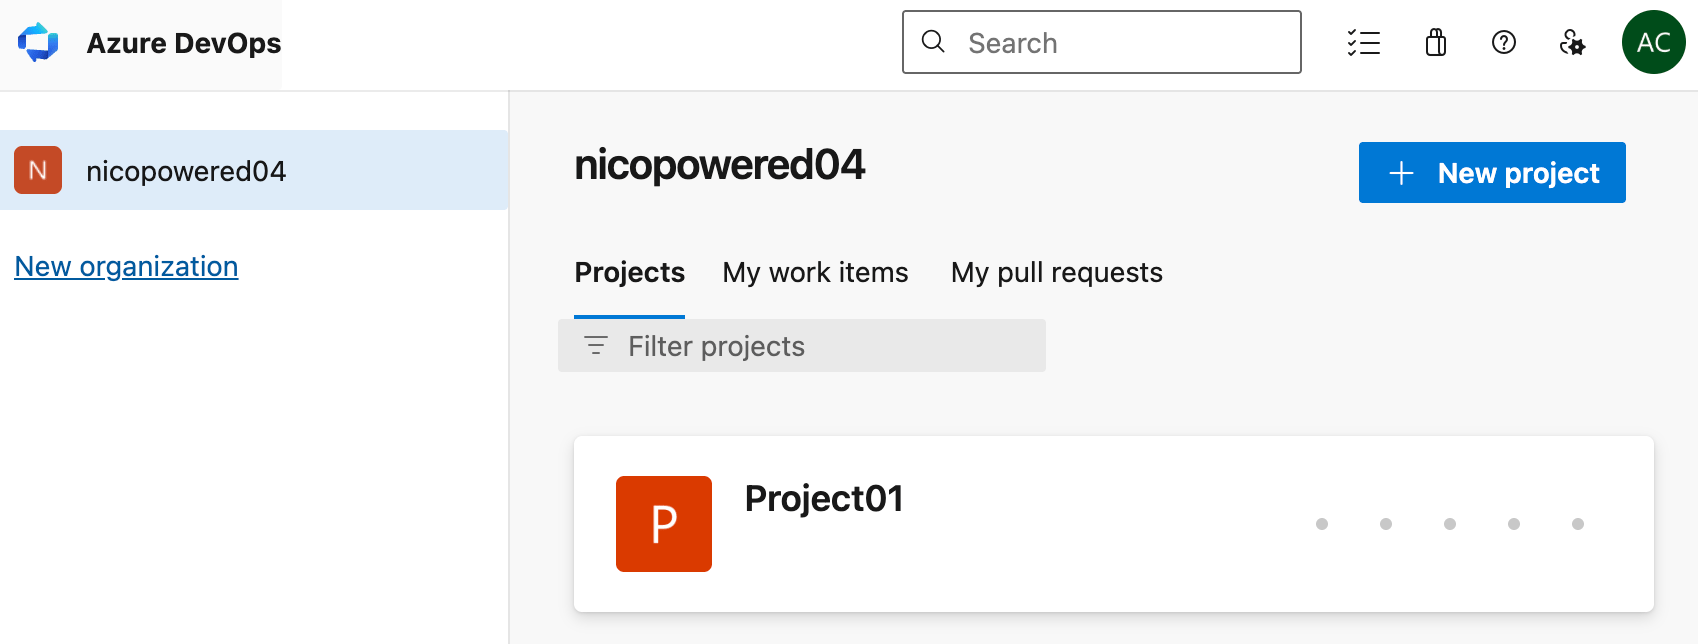 Click on the wheel icon top right > Personal access tokens
 You should see this:
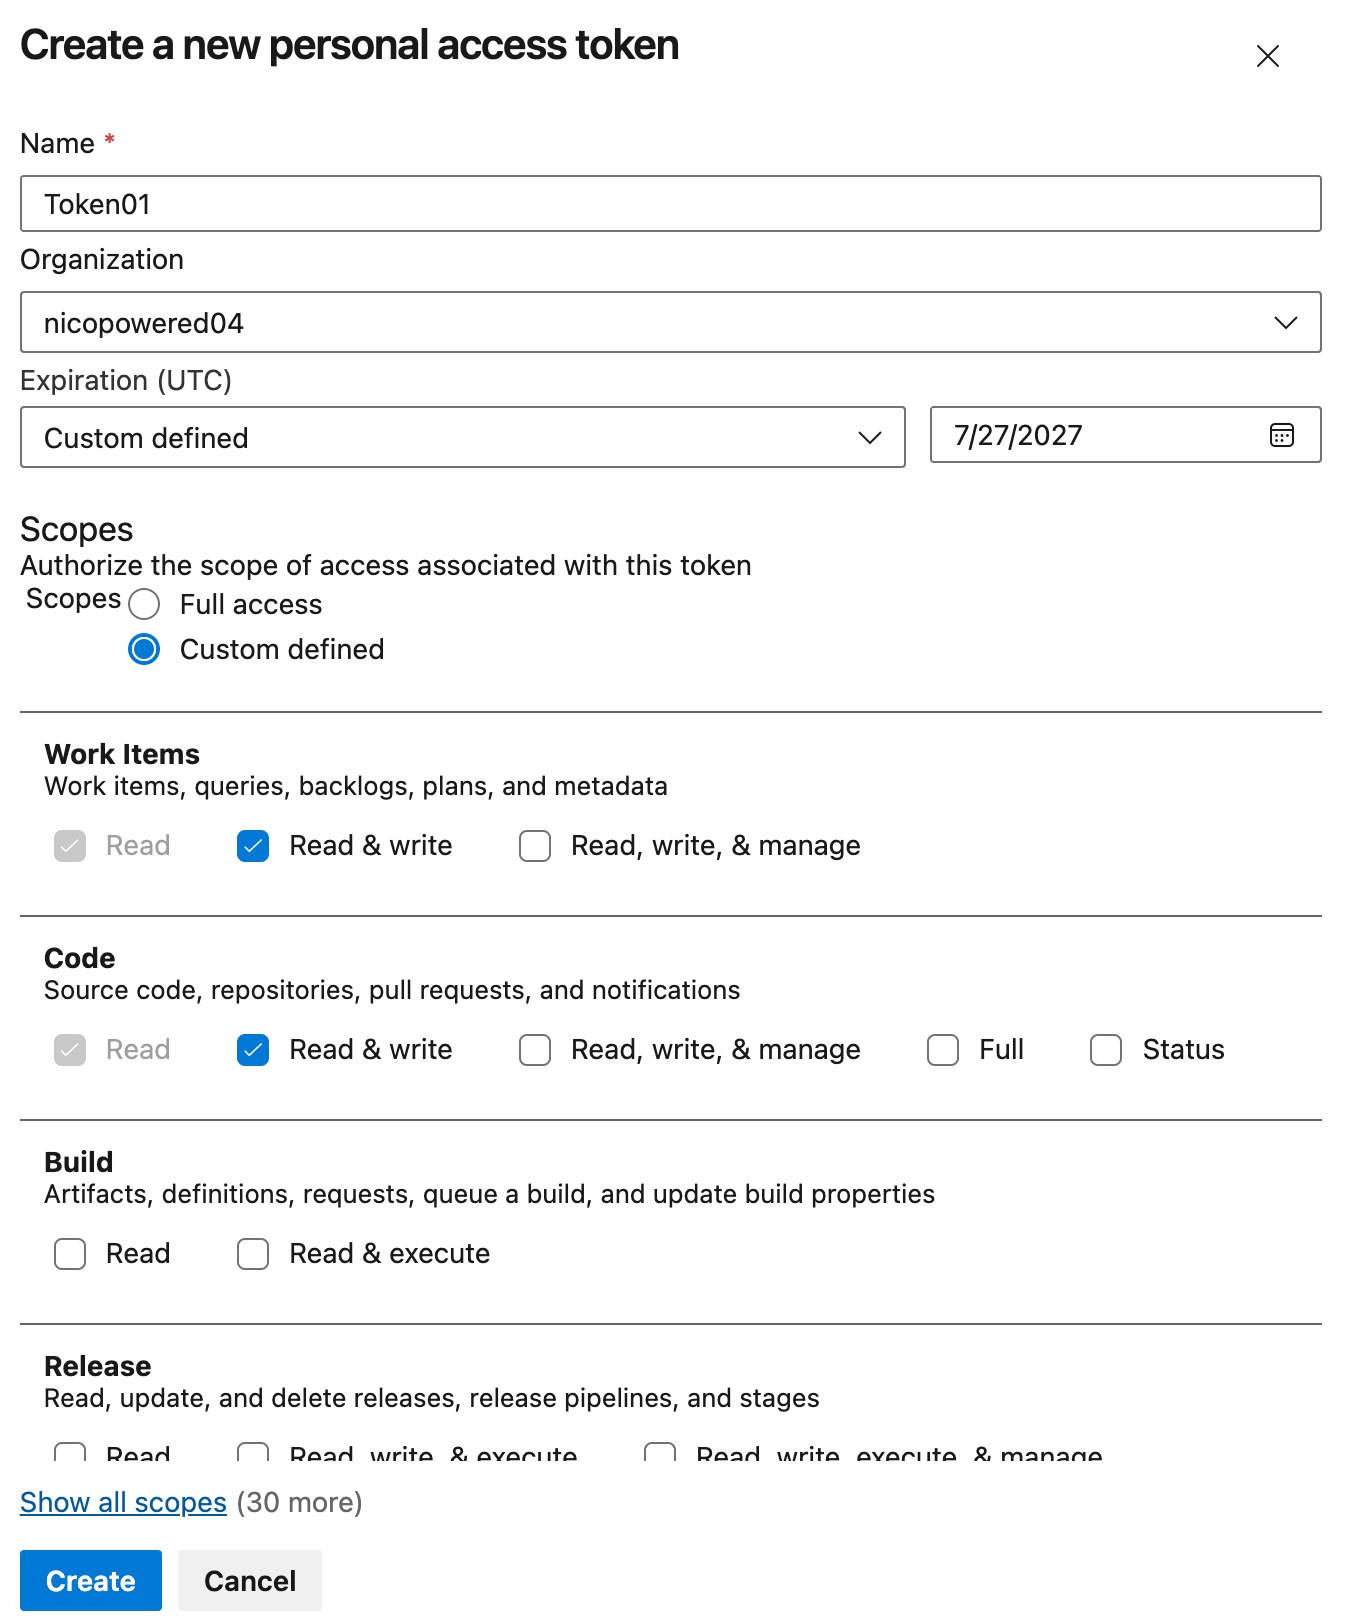
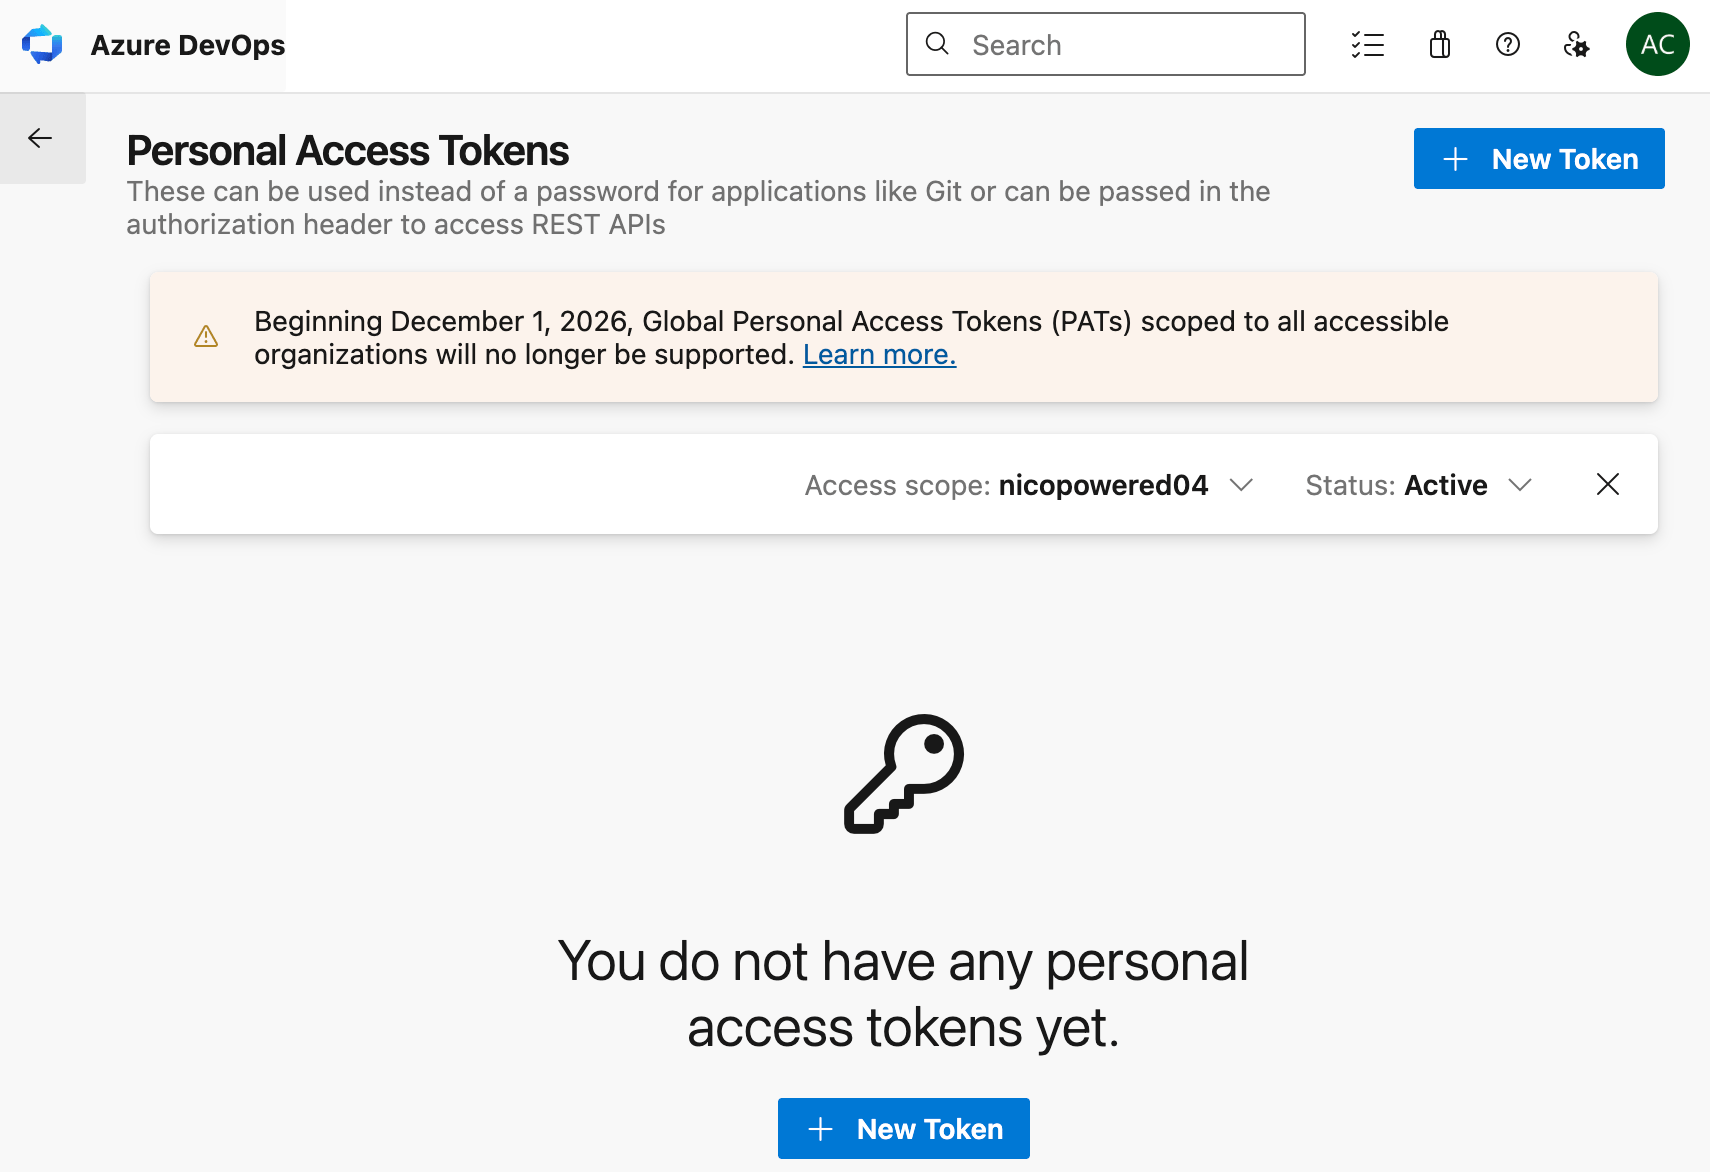 Click on New Token:
* Name: Token01
* Organization: a specific organization or `All accessible organizations` (recommended if using multiple organizations)
* Expiration: pick the date most far out
* Scopes: `Custom defined`, then select
* `Work Items (Read & Write)`
* `Code (Read & Write)`
You should see this:
Click on New Token:
* Name: Token01
* Organization: a specific organization or `All accessible organizations` (recommended if using multiple organizations)
* Expiration: pick the date most far out
* Scopes: `Custom defined`, then select
* `Work Items (Read & Write)`
* `Code (Read & Write)`
You should see this:
 Click on Create, you’ll then be presented with a PAT token:
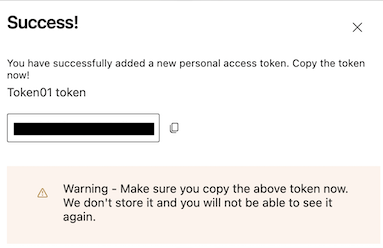 Copy this PAT token then go back to Cosmos as an admin and go to Settings > Integrations > Azure DevOps > expand the section Use a personal access token instead
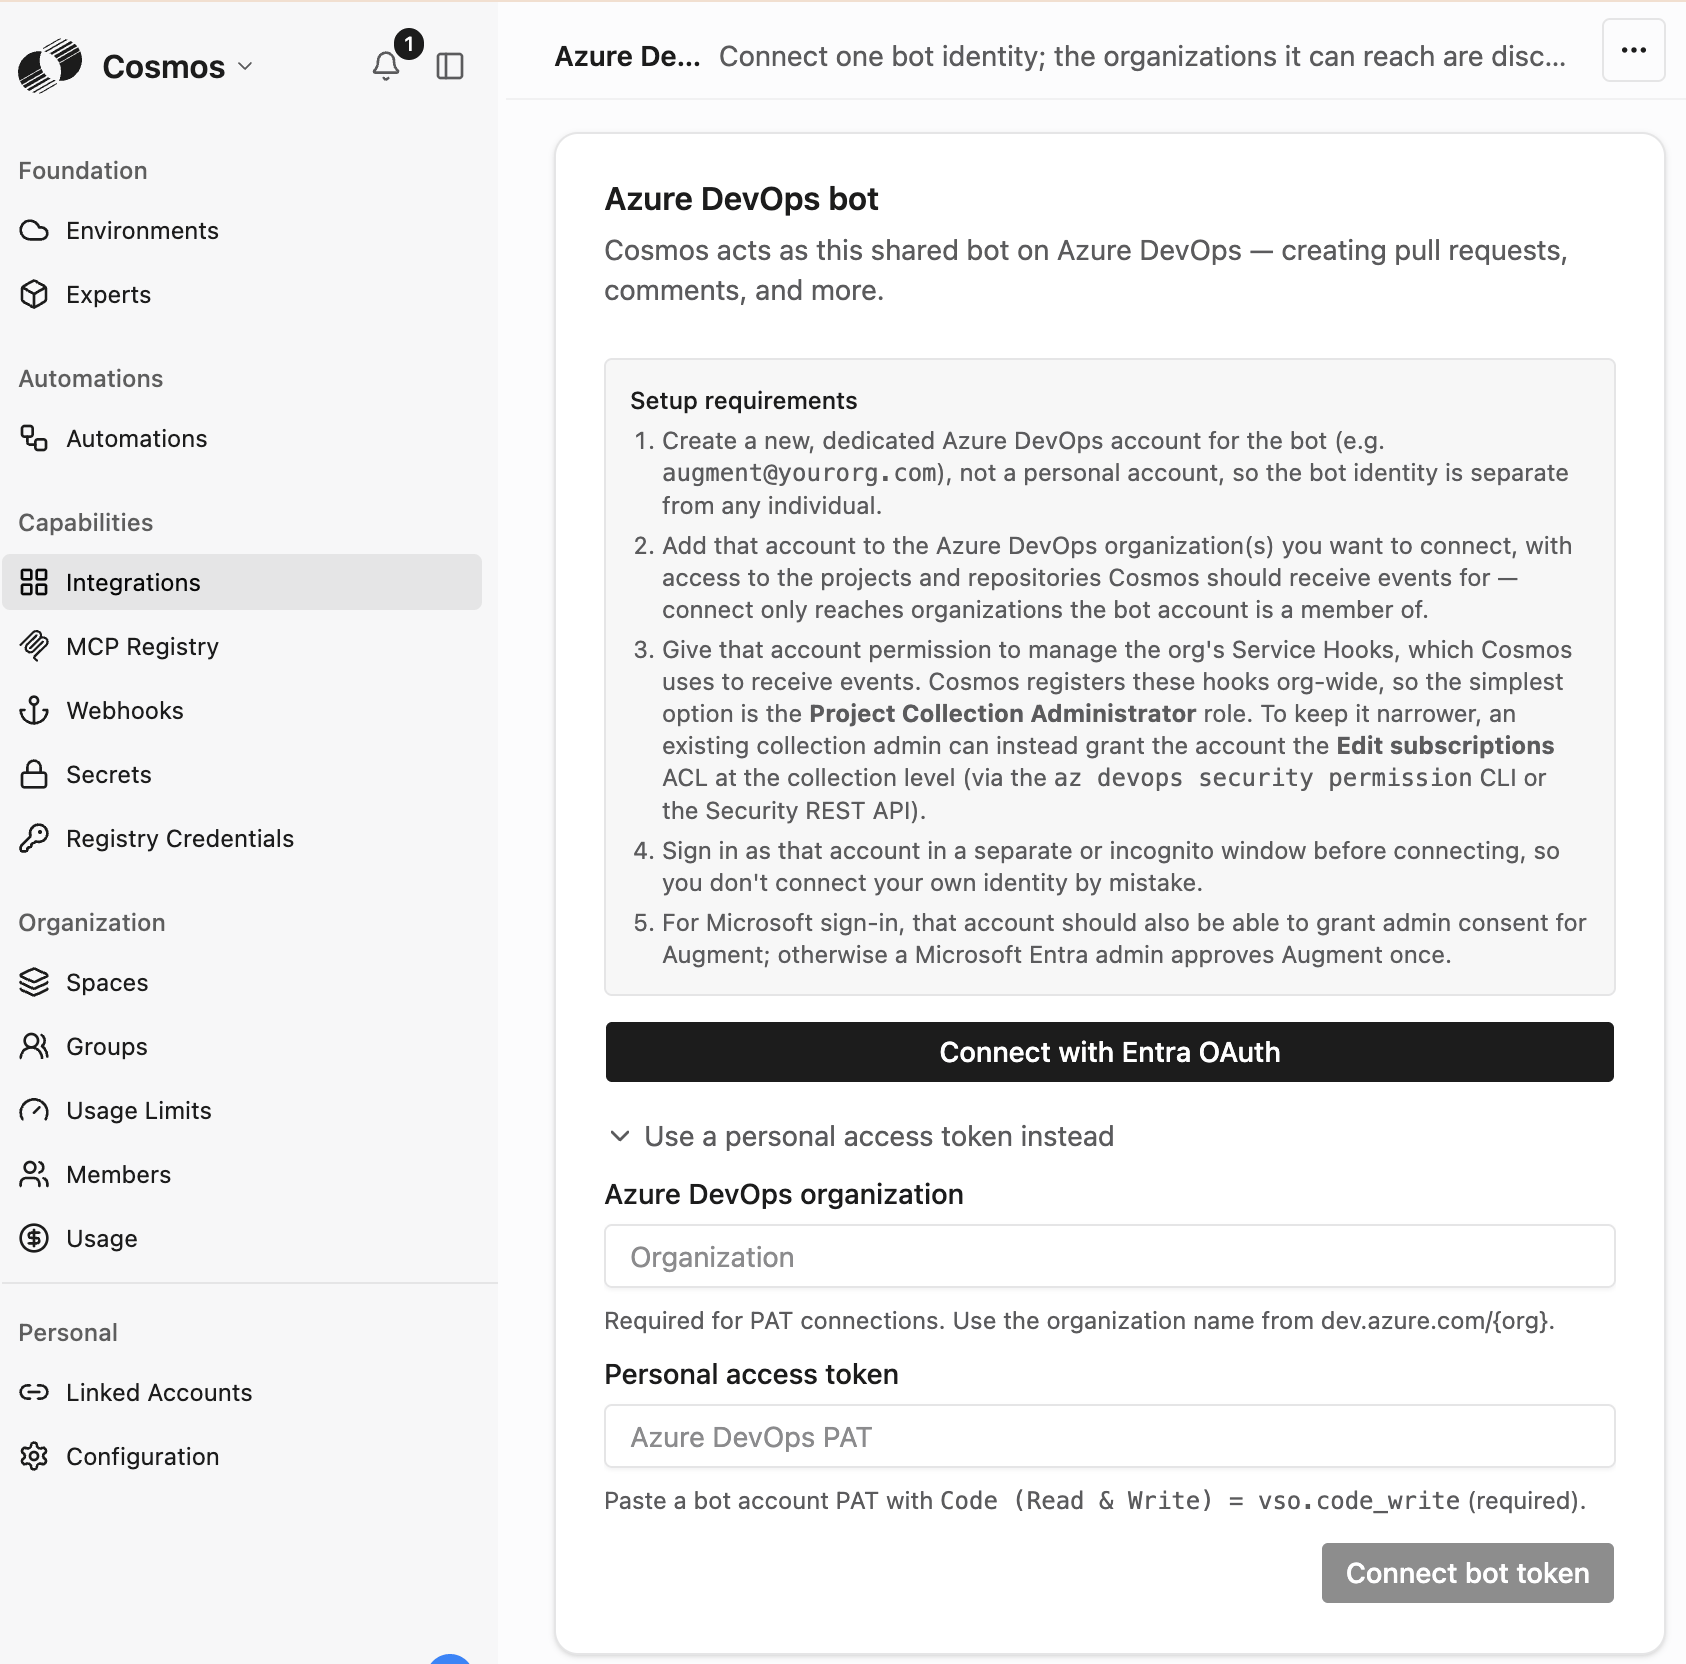 Enter your ADO organization name, PAT token, and click on Connect bot token:
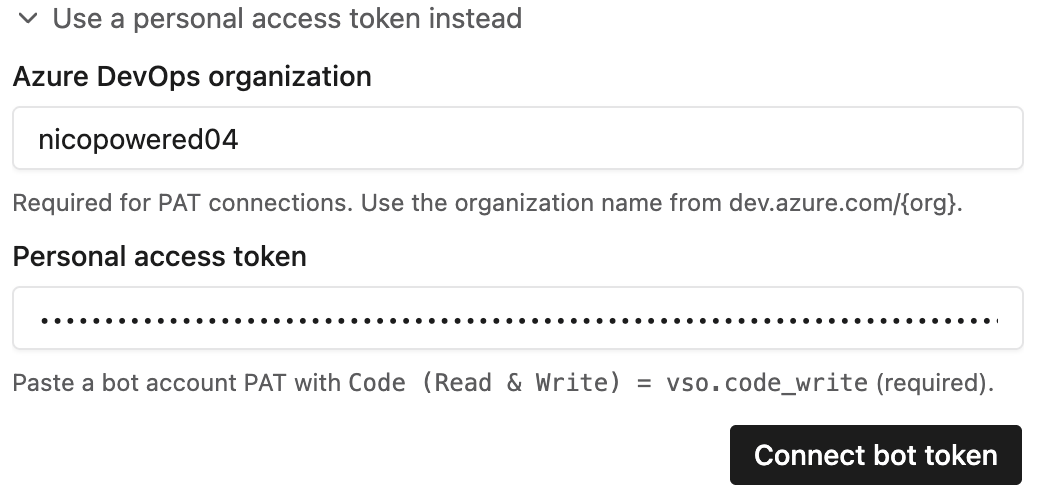 You should then see the list of Repositories your service account has access to:
 ## Step 2 - Create a cloud environment
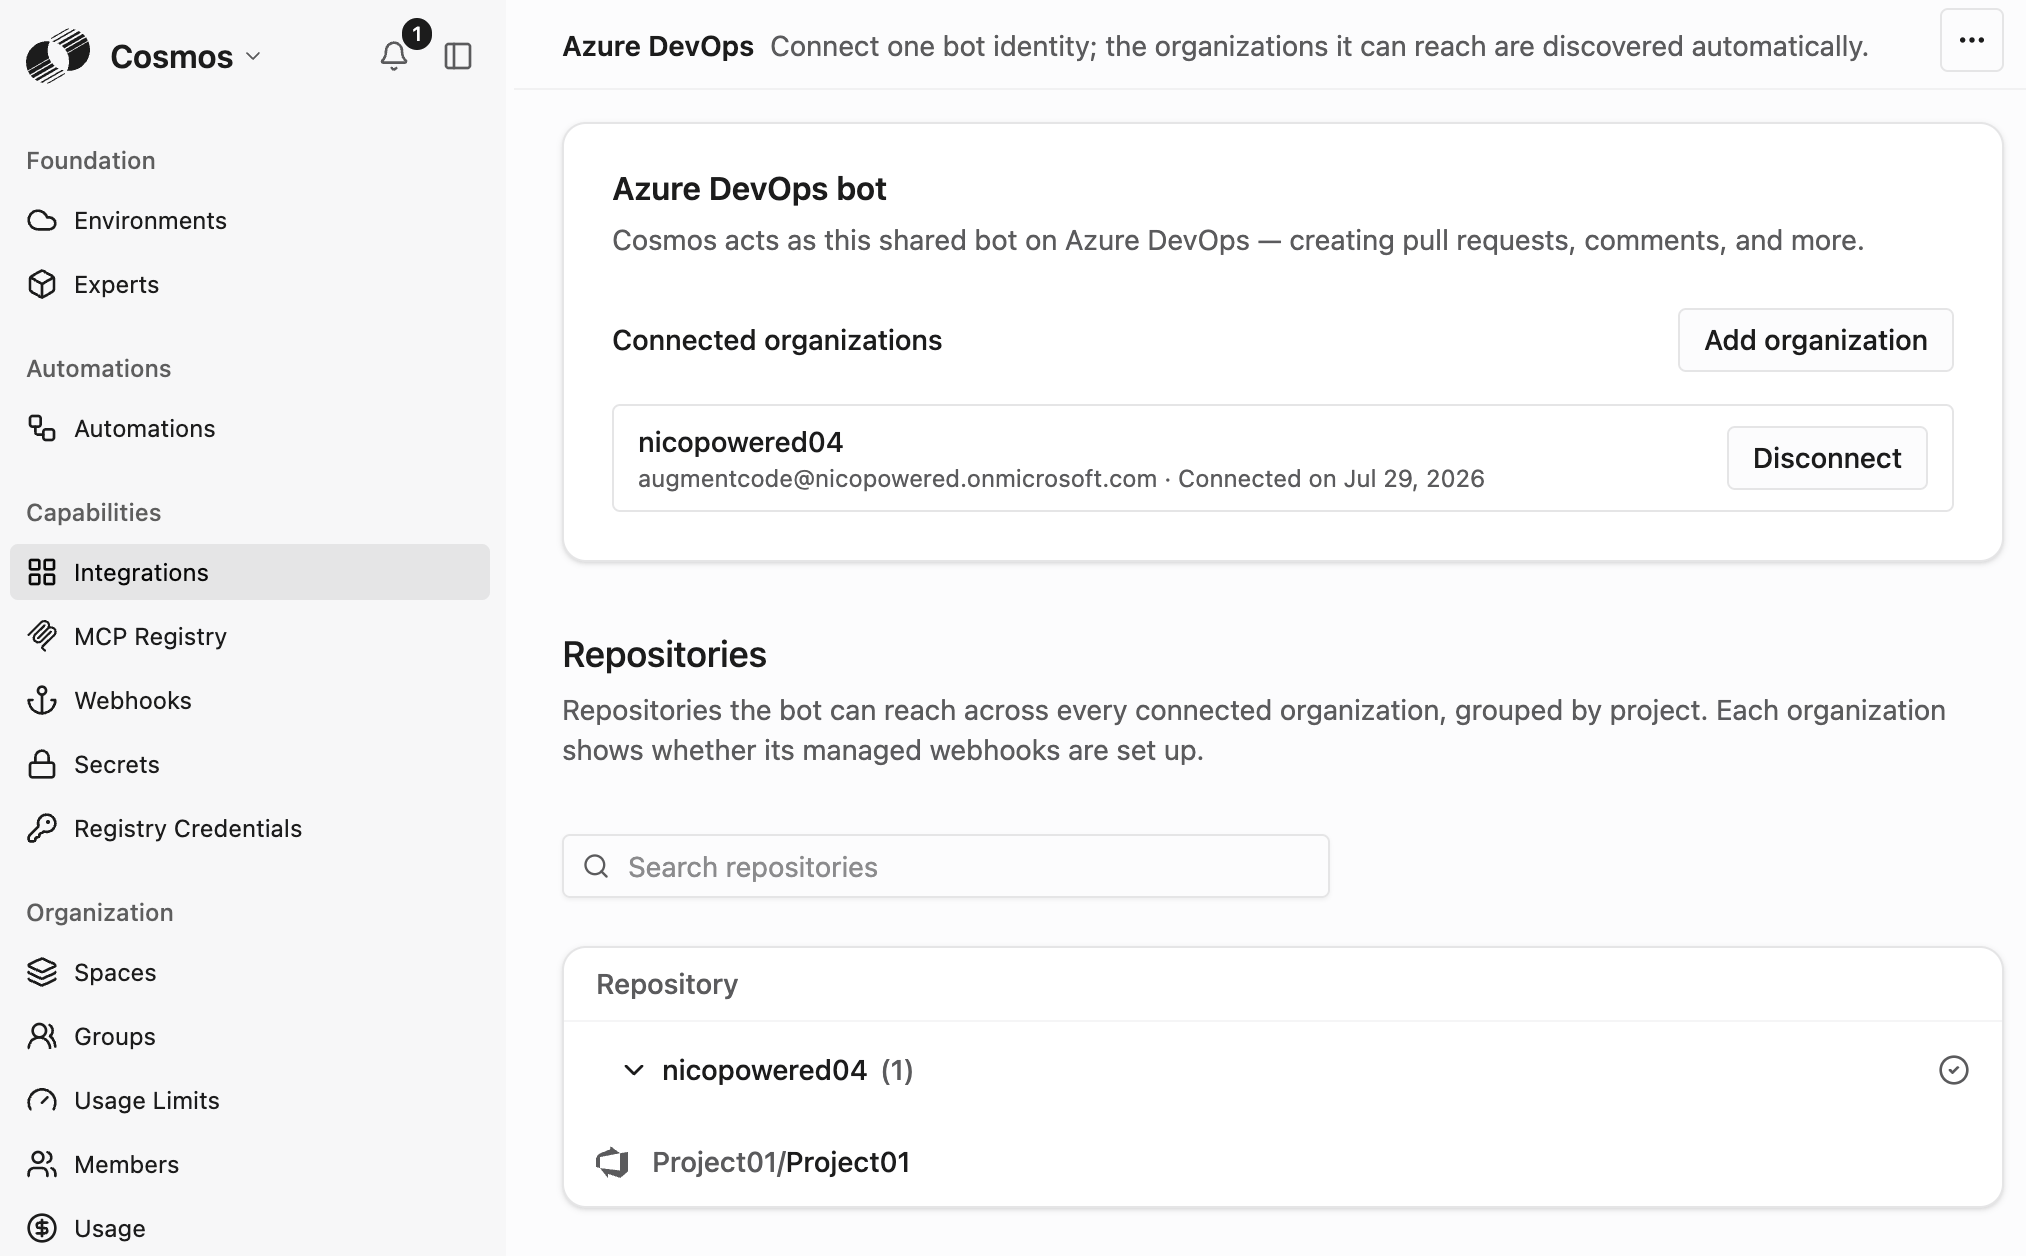
Let’s create a cloud environment with those ADO repos:
Go to Cosmos Settings > Environments ([https://cosmos.augmentcode.com/environments](https://cosmos.augmentcode.com/environments)) > top right Create an environment > Cloud machine
## Step 2 - Create a cloud environment
Let’s create a cloud environment with those ADO repos:
Go to Cosmos Settings > Environments ([https://cosmos.augmentcode.com/environments](https://cosmos.augmentcode.com/environments)) > top right Create an environment > Cloud machine
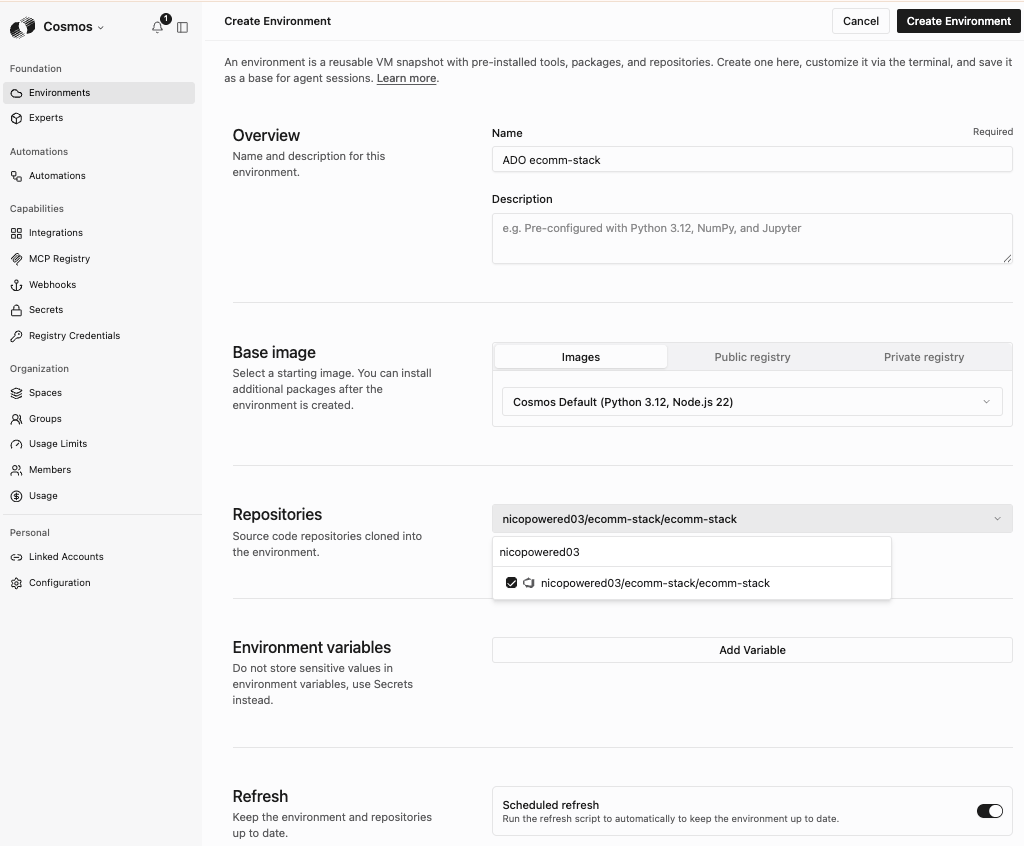
 Configure your environment:
* Name: ex: ADO ecomm-stack
* Image: ex: keep the Cosmos default base image
* Repositories: select your ADO repos
* Refresh: toggle on
* Spaces: keep the default space
* Click on Create Environment
Configure your environment:
* Name: ex: ADO ecomm-stack
* Image: ex: keep the Cosmos default base image
* Repositories: select your ADO repos
* Refresh: toggle on
* Spaces: keep the default space
* Click on Create Environment
 Cosmos will create the cloud environment, git clone your repos and keep them up to date:
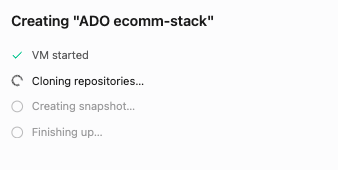
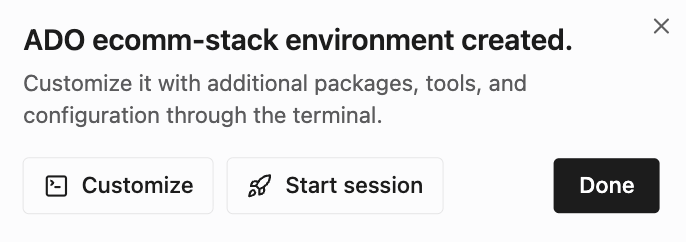 Click on Done
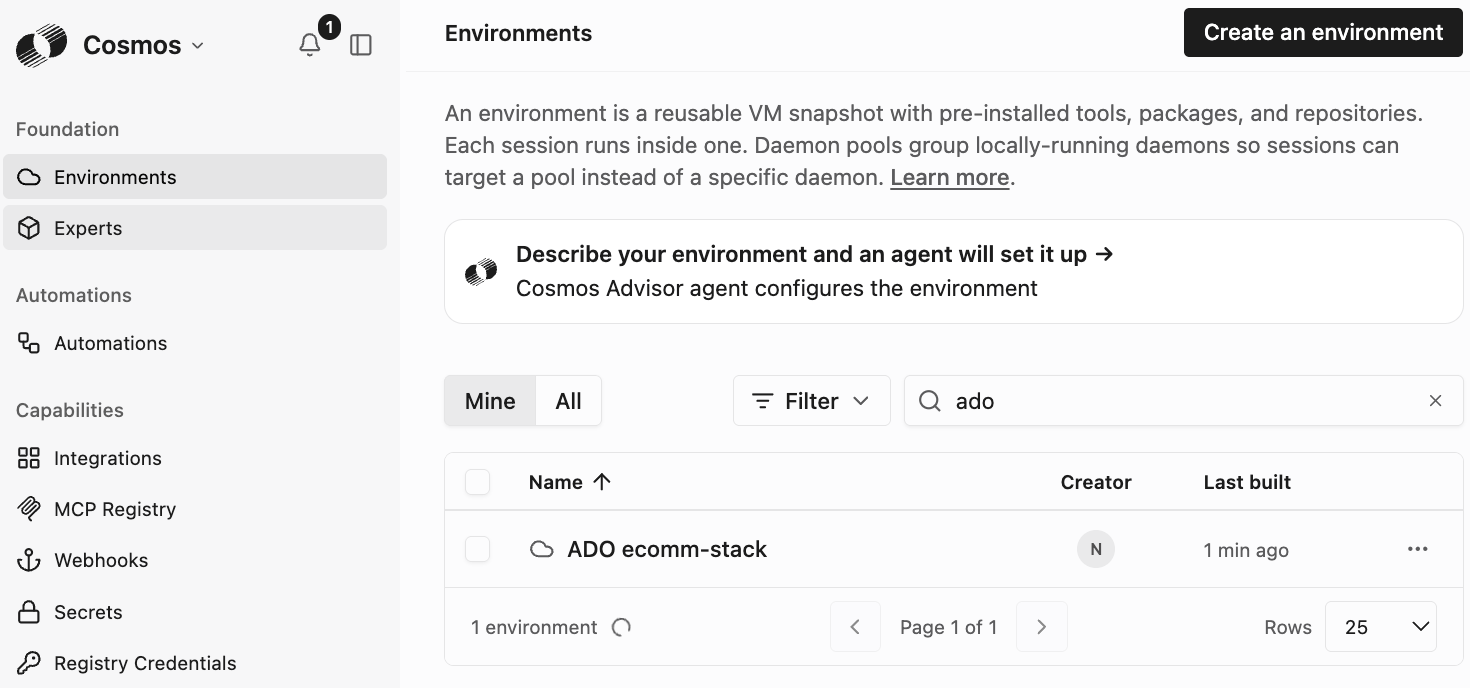
You’ll see your new environment in your “Mine” tab:
Click on Done
You’ll see your new environment in your “Mine” tab:
 Now let’s do a quick test and create a session with that env:
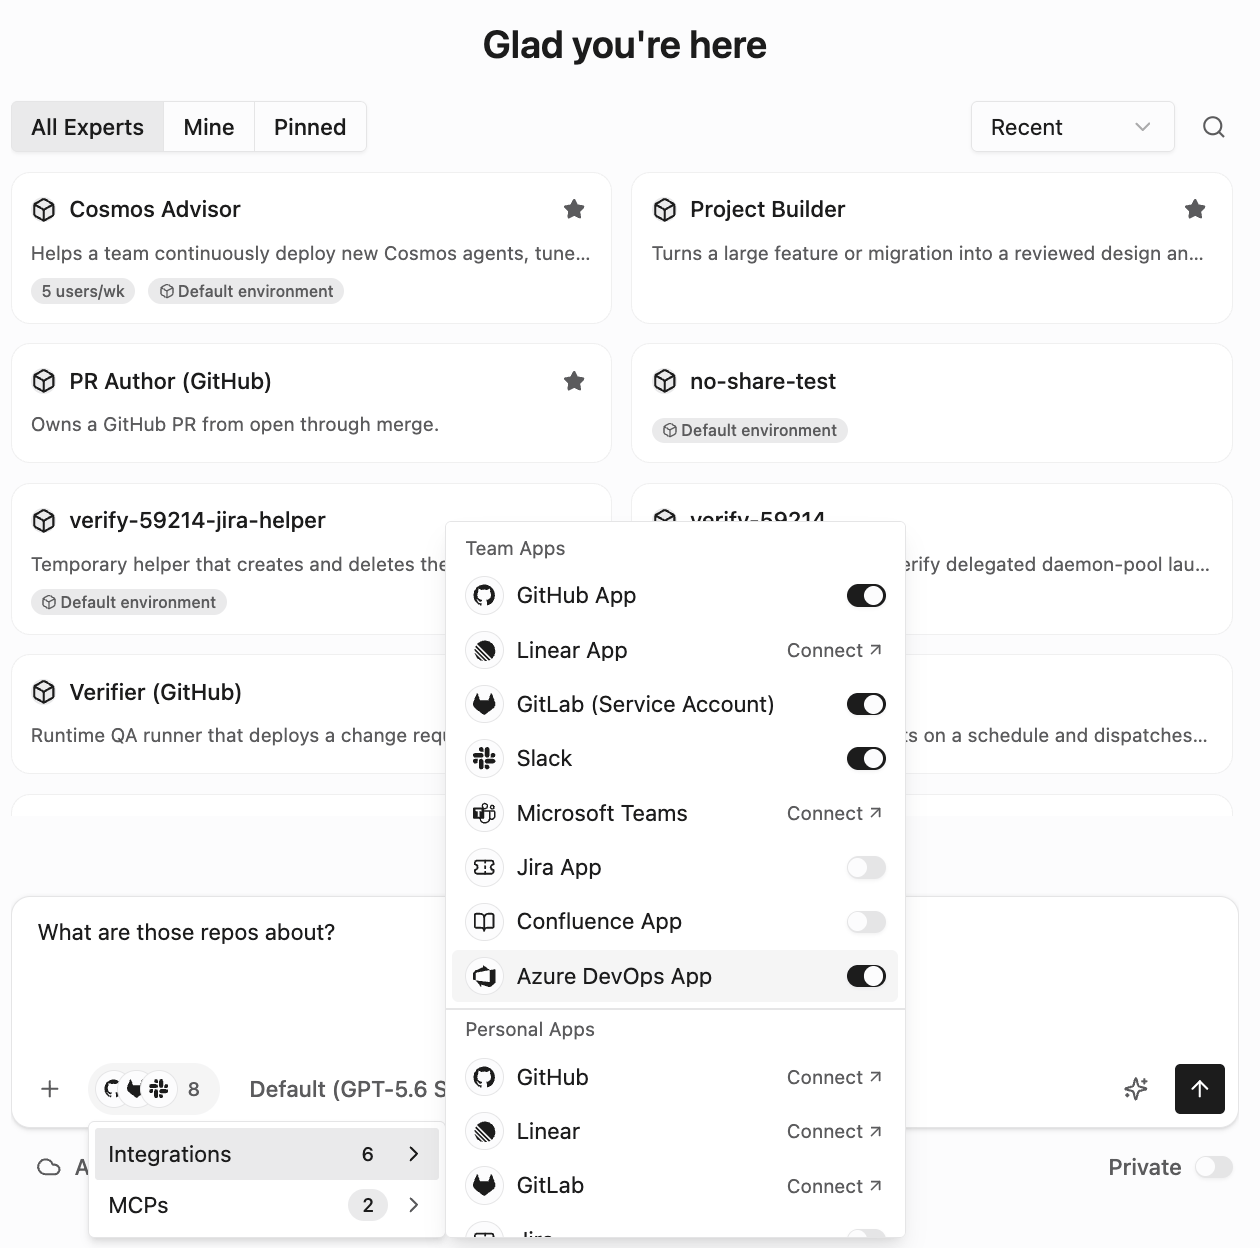
In the left sidebar click on ‘Back to app’ > New session ([https://cosmos.augmentcode.com/home](https://cosmos.augmentcode.com/home)) > bottom left of the prompt select your cloud env, then click on Integrations and verify that ADO is selected, then send this prompt `What are those repos about?`
Now let’s do a quick test and create a session with that env:
In the left sidebar click on ‘Back to app’ > New session ([https://cosmos.augmentcode.com/home](https://cosmos.augmentcode.com/home)) > bottom left of the prompt select your cloud env, then click on Integrations and verify that ADO is selected, then send this prompt `What are those repos about?`
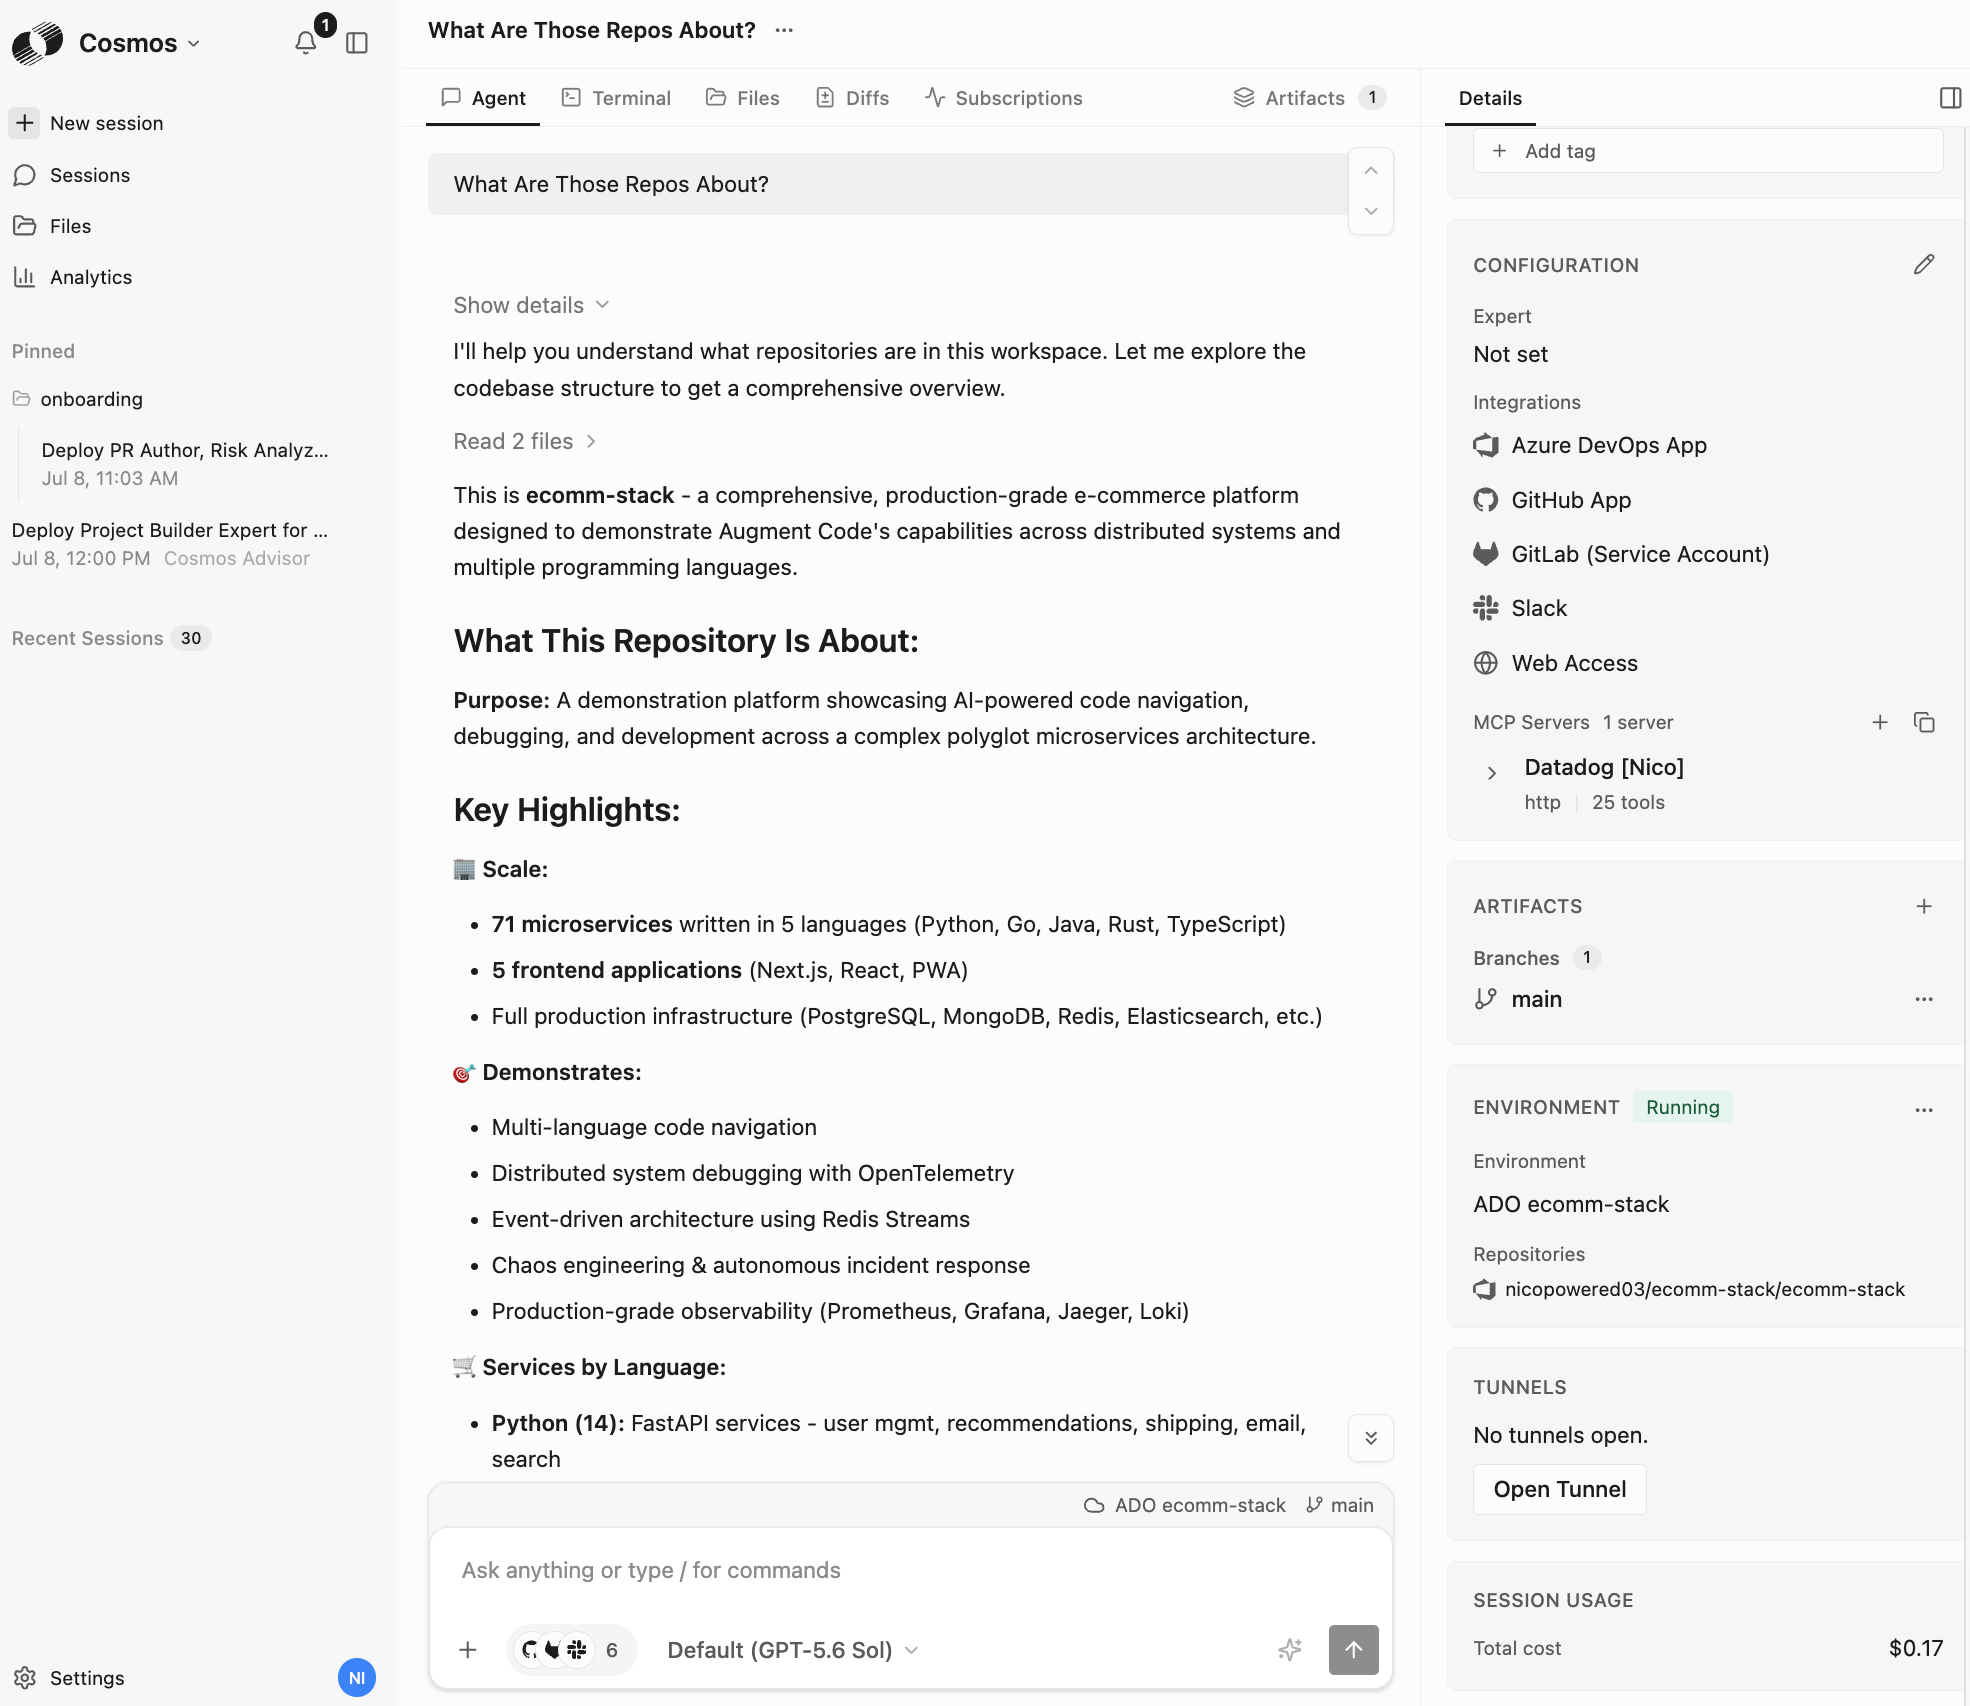
 That’ll start a session. Open the right sidebar by clicking on the icon top right, then note that Expert = Not set, Integrations include Azure DevOps App, your selected env and corresponding repos are visible:
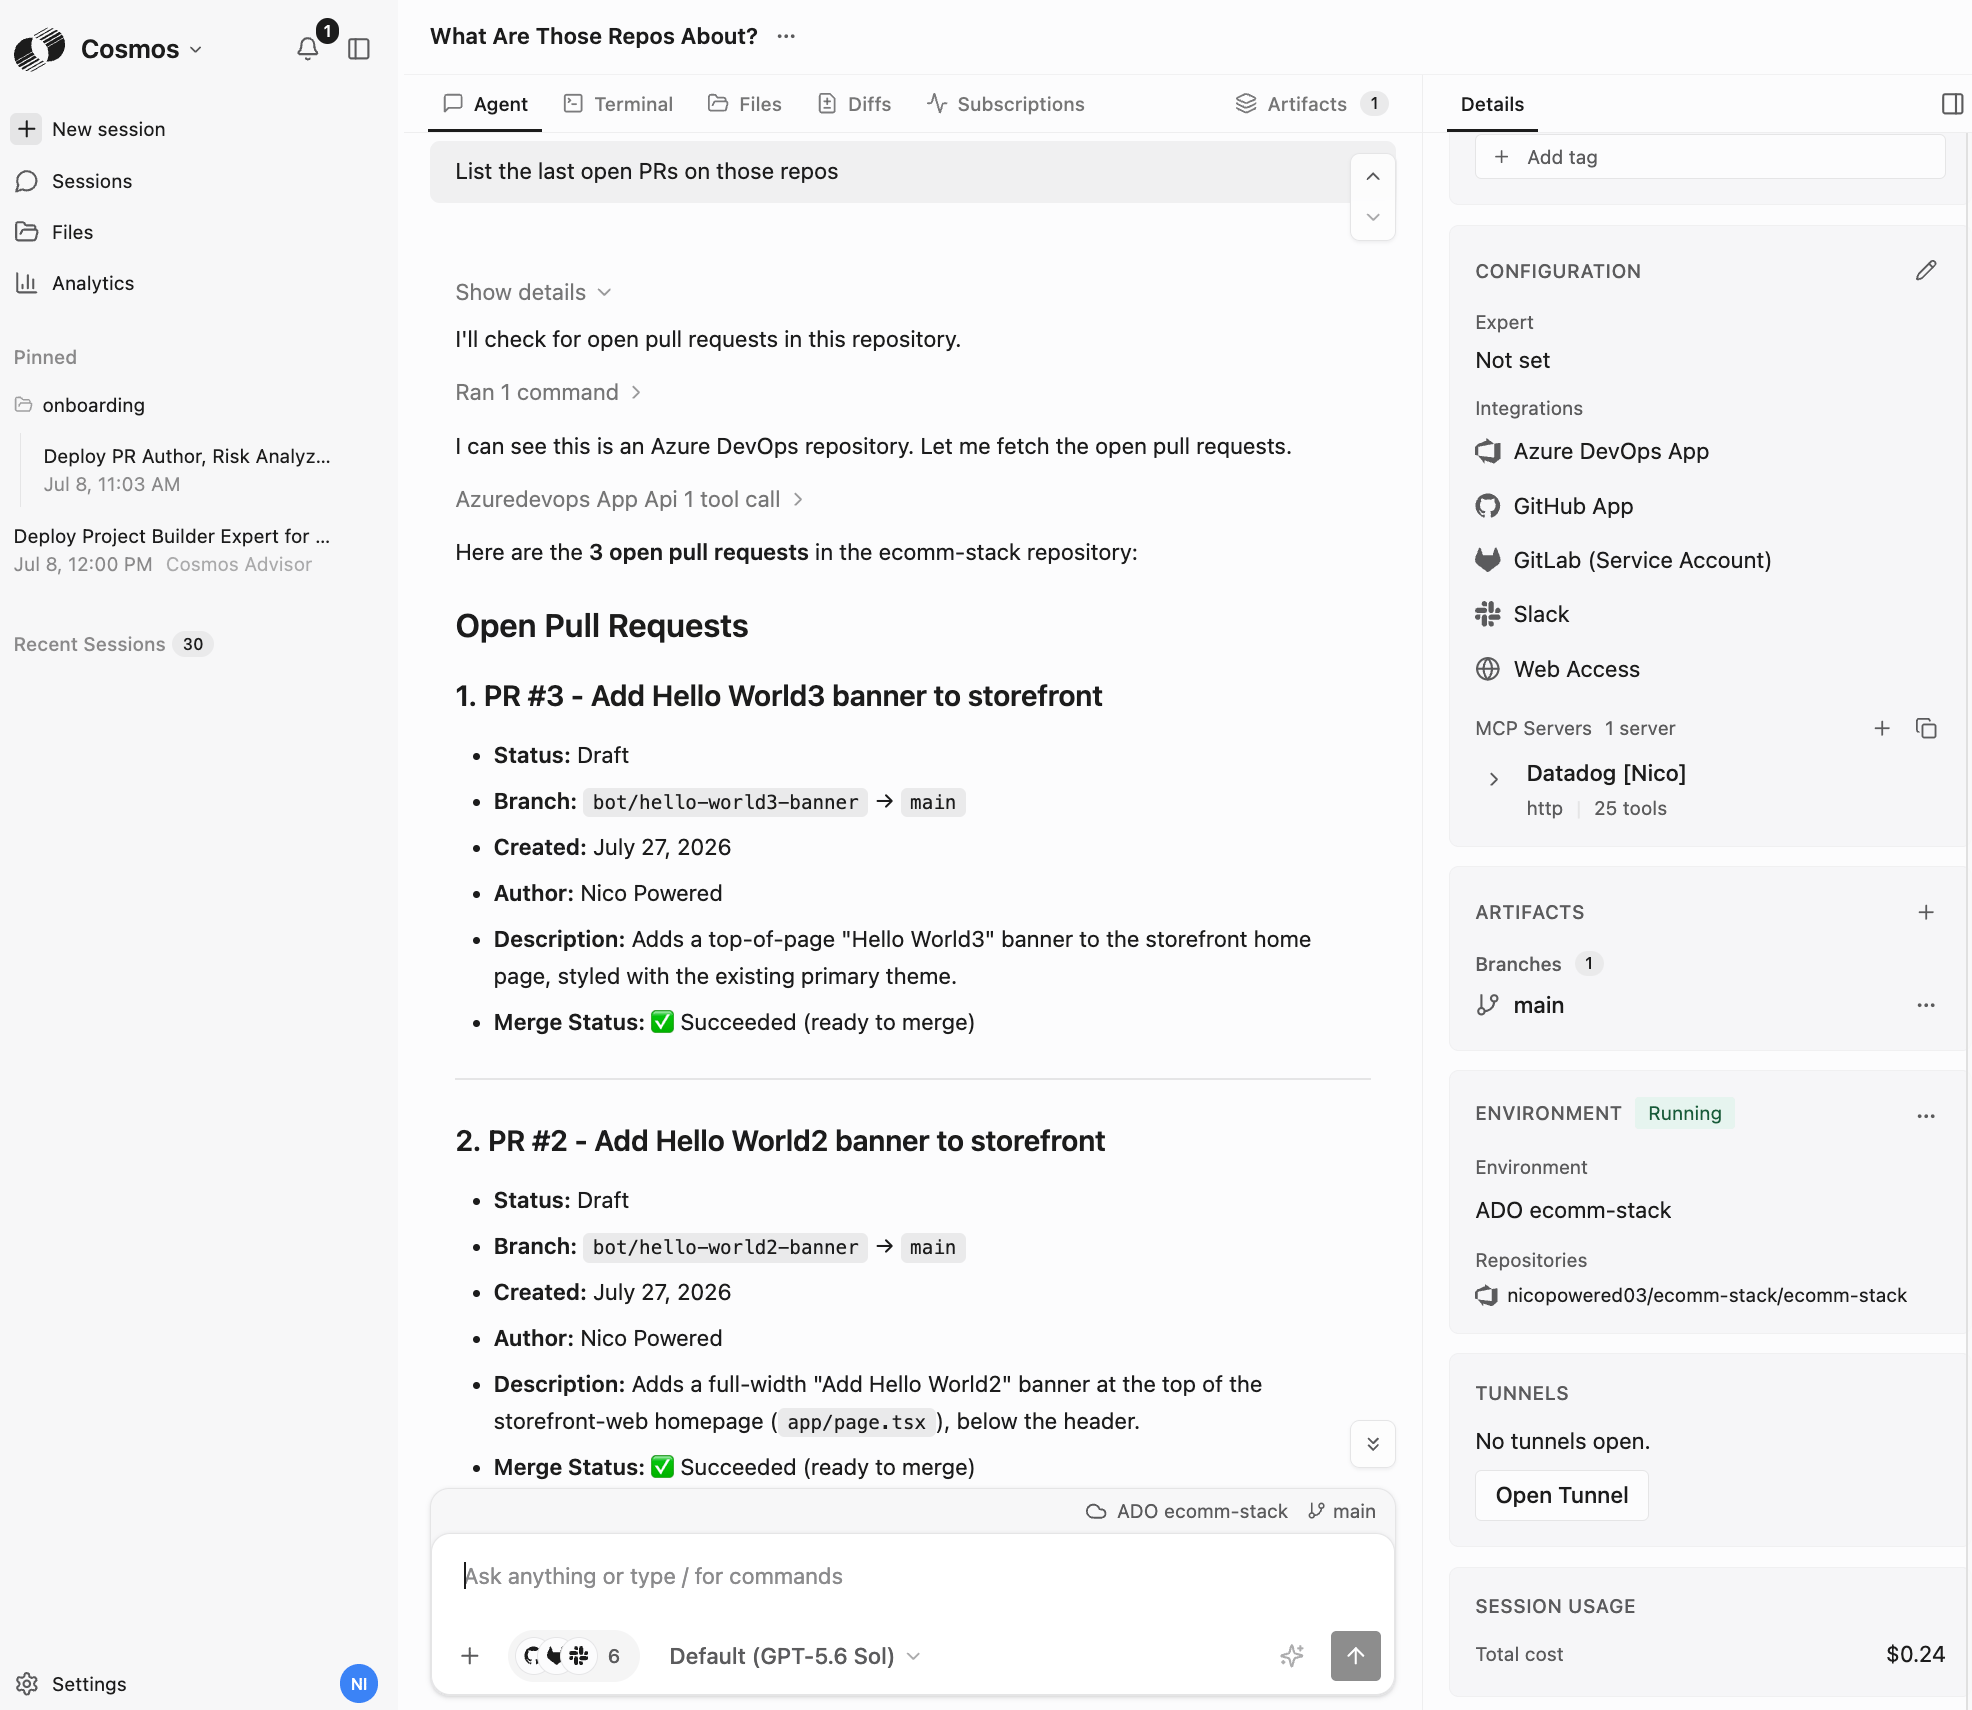
 From that session prompt `List the last open PRs on those repos`, Cosmos should return a list that looks like this:
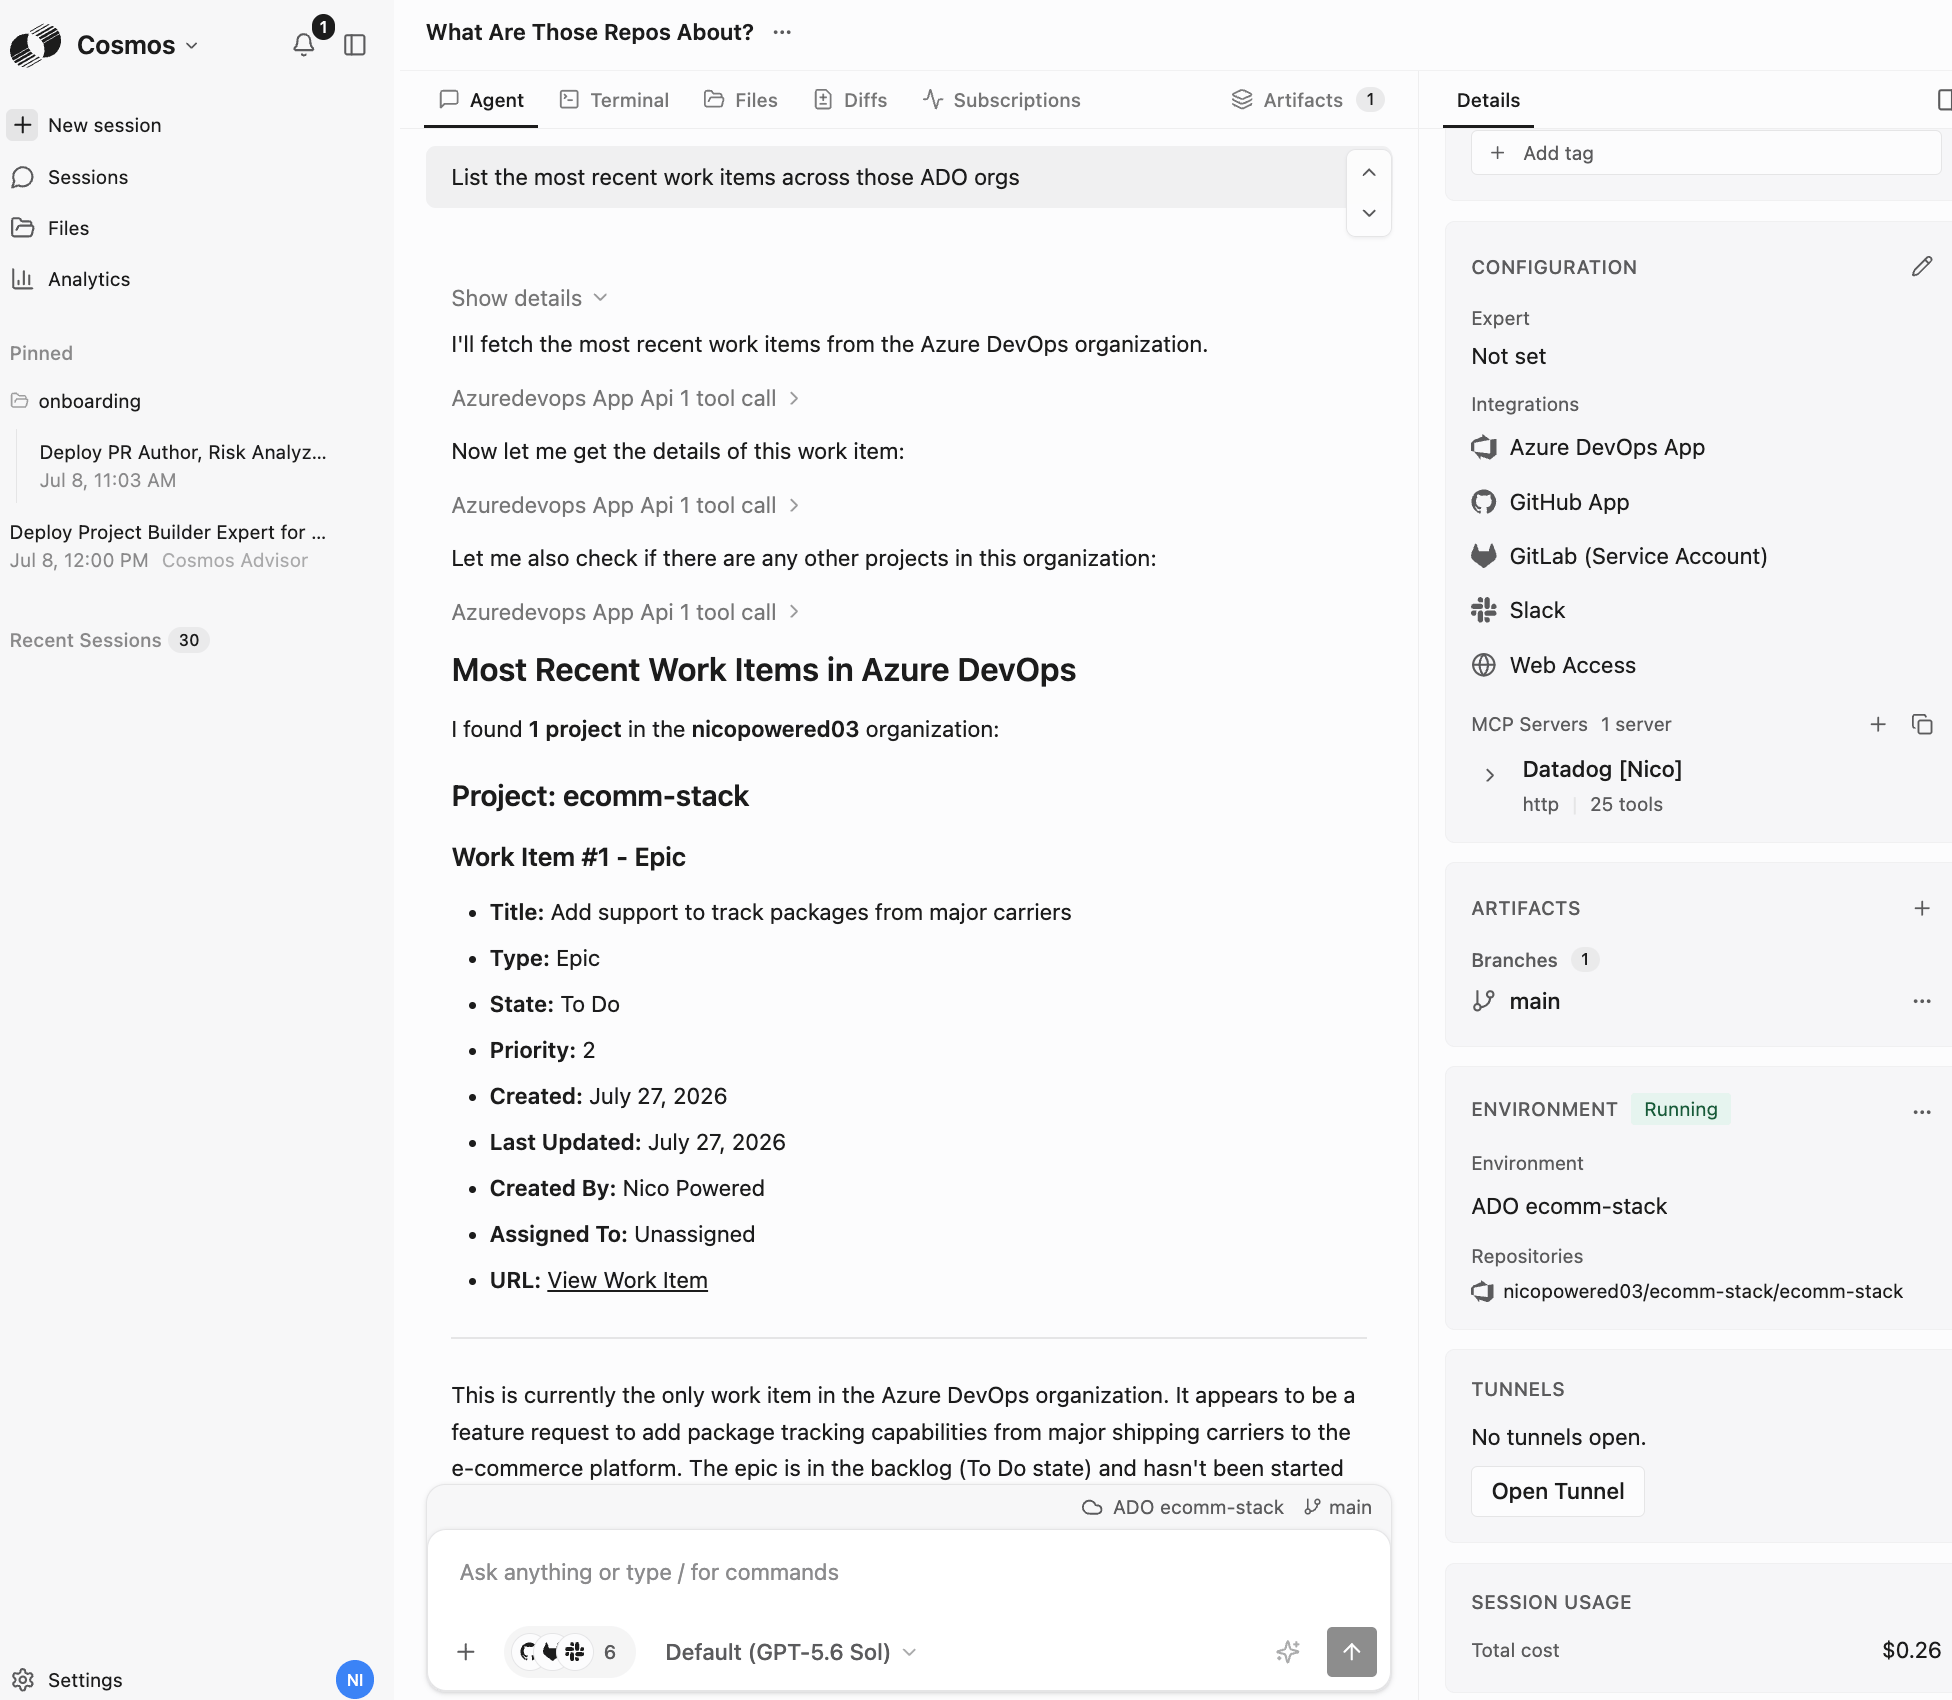
 Lastly, from that session prompt `List the most recent work items across those ADO orgs`, Cosmos should return a list that looks like this:
 Your ADO integration and your cloud env are ready! You can now leverage the Cosmos Advisor expert to create your ADO-specific experts.
## Step 3 - Create a PR Deep Code Reviewer expert
Cosmos has a large knowledge base and greatly assists with creating new experts.
Your ADO integration and your cloud env are ready! You can now leverage the Cosmos Advisor expert to create your ADO-specific experts.
## Step 3 - Create a PR Deep Code Reviewer expert
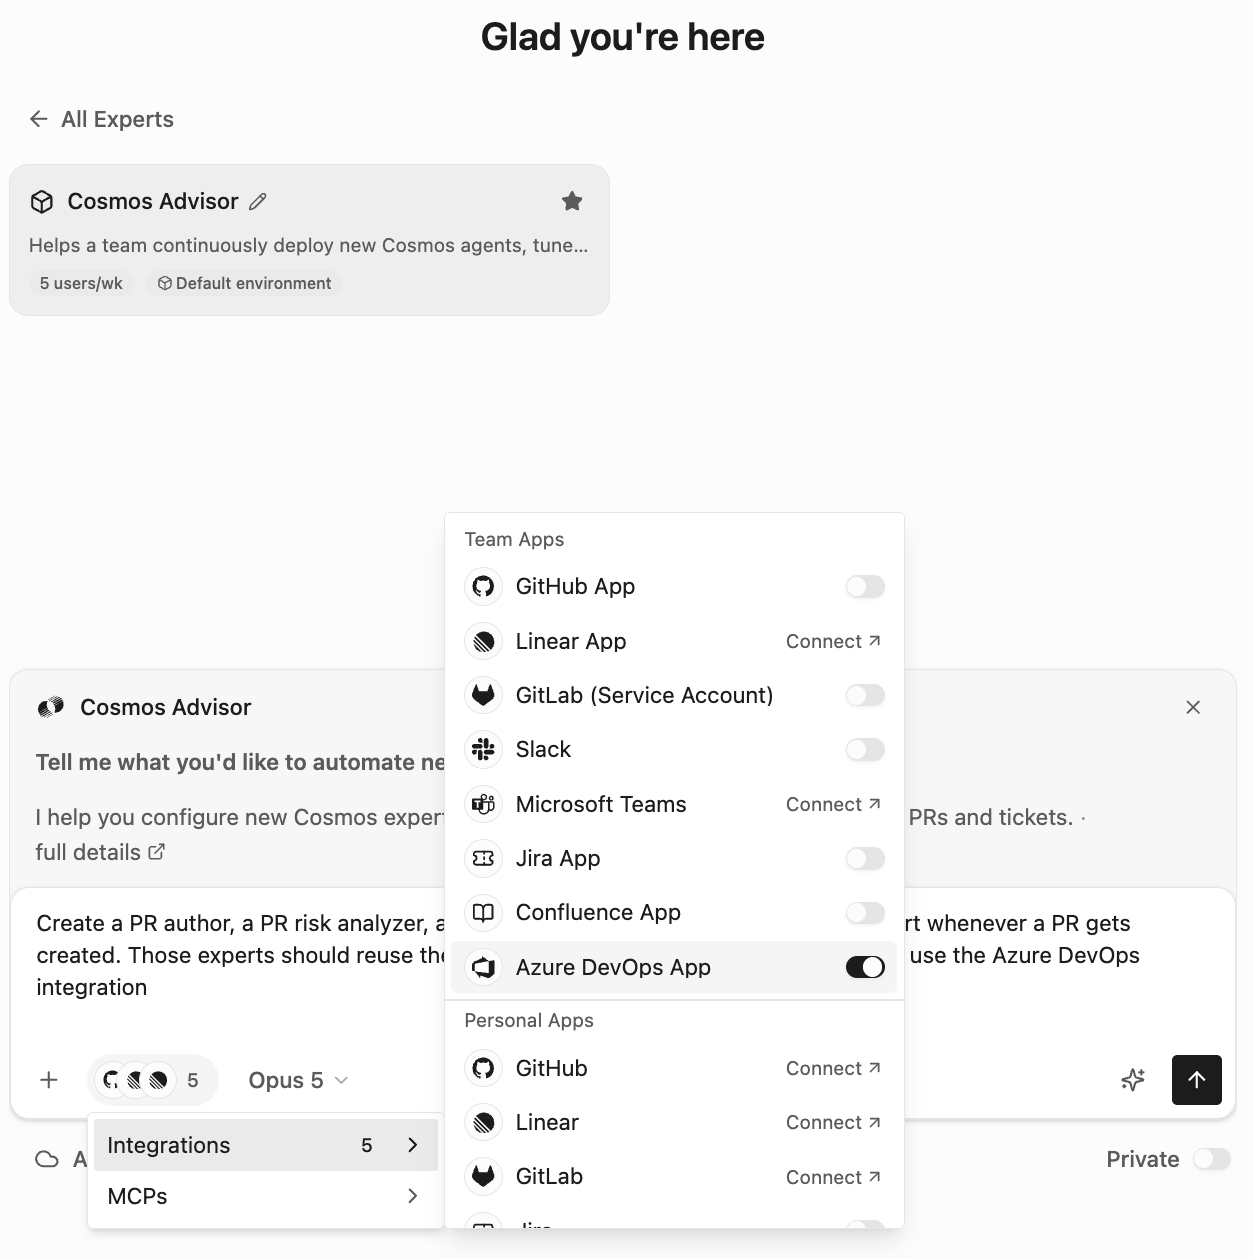
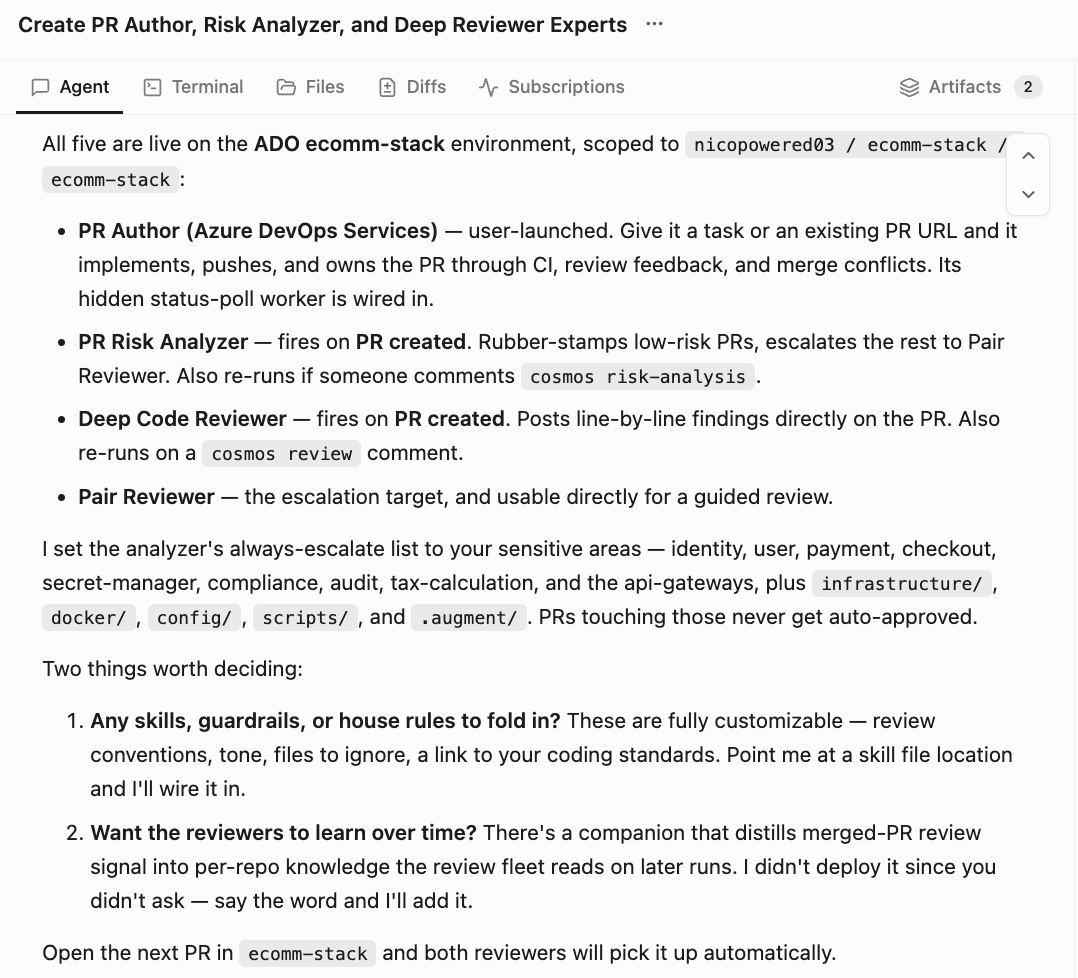
Cosmos has a large knowledge base and greatly assists with creating new experts.A common expert you’d create for your ADO repos is the “PR Deep Code Reviewer”, whose job will be to auto react to PRs being created and auto review them. Whenever you need to create new experts go ask the Cosmos Advisor. Go to New session ([https://cosmos.augmentcode.com/home](https://cosmos.augmentcode.com/home)) > select the ‘Cosmos Advisor’ expert, make sure the ADO integration is selected and prompt with `Create a PR author, a PR risk analyzer, a PR deep reviewer. The PR review should start whenever a PR gets created. Those experts should reuse the ADO ecomm-stack env of this session, and use the Azure DevOps integration`:
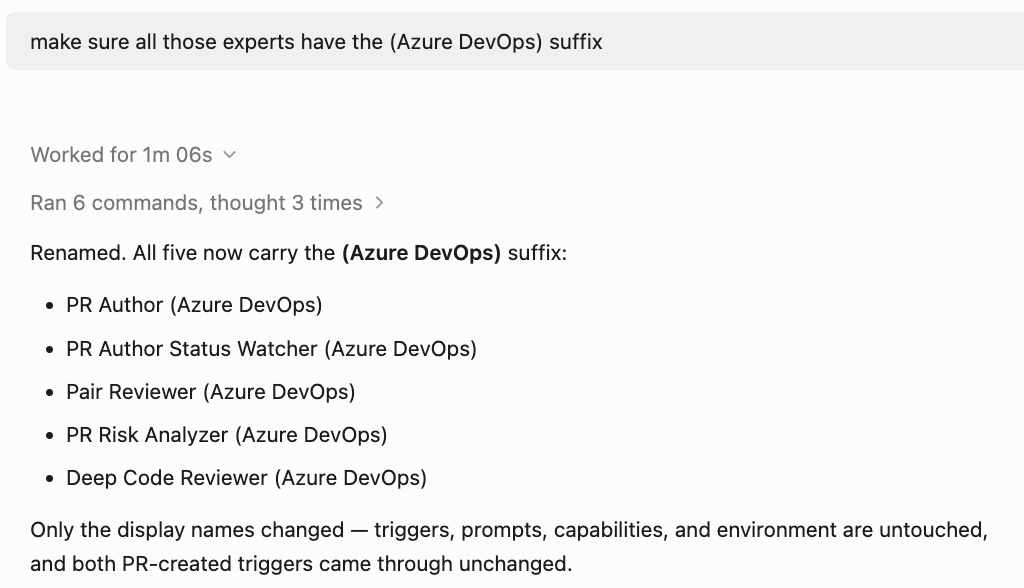
 The Cosmos Advisor may ask you to clarify what experts to deploy, it may recommend to deploy additional experts (ex: helper experts), and if an integration is missing it’ll guide you to add it. If you are deploying experts across different types of repos (ex: Github, Gitlab, ADO), don’t hesitate to prompt Advisor with `make sure all those experts have the (Azure DevOps) suffix` so you can quickly spot the ADO-specific experts vs the Github ones etc. Ultimately you should see this at the end of your session:
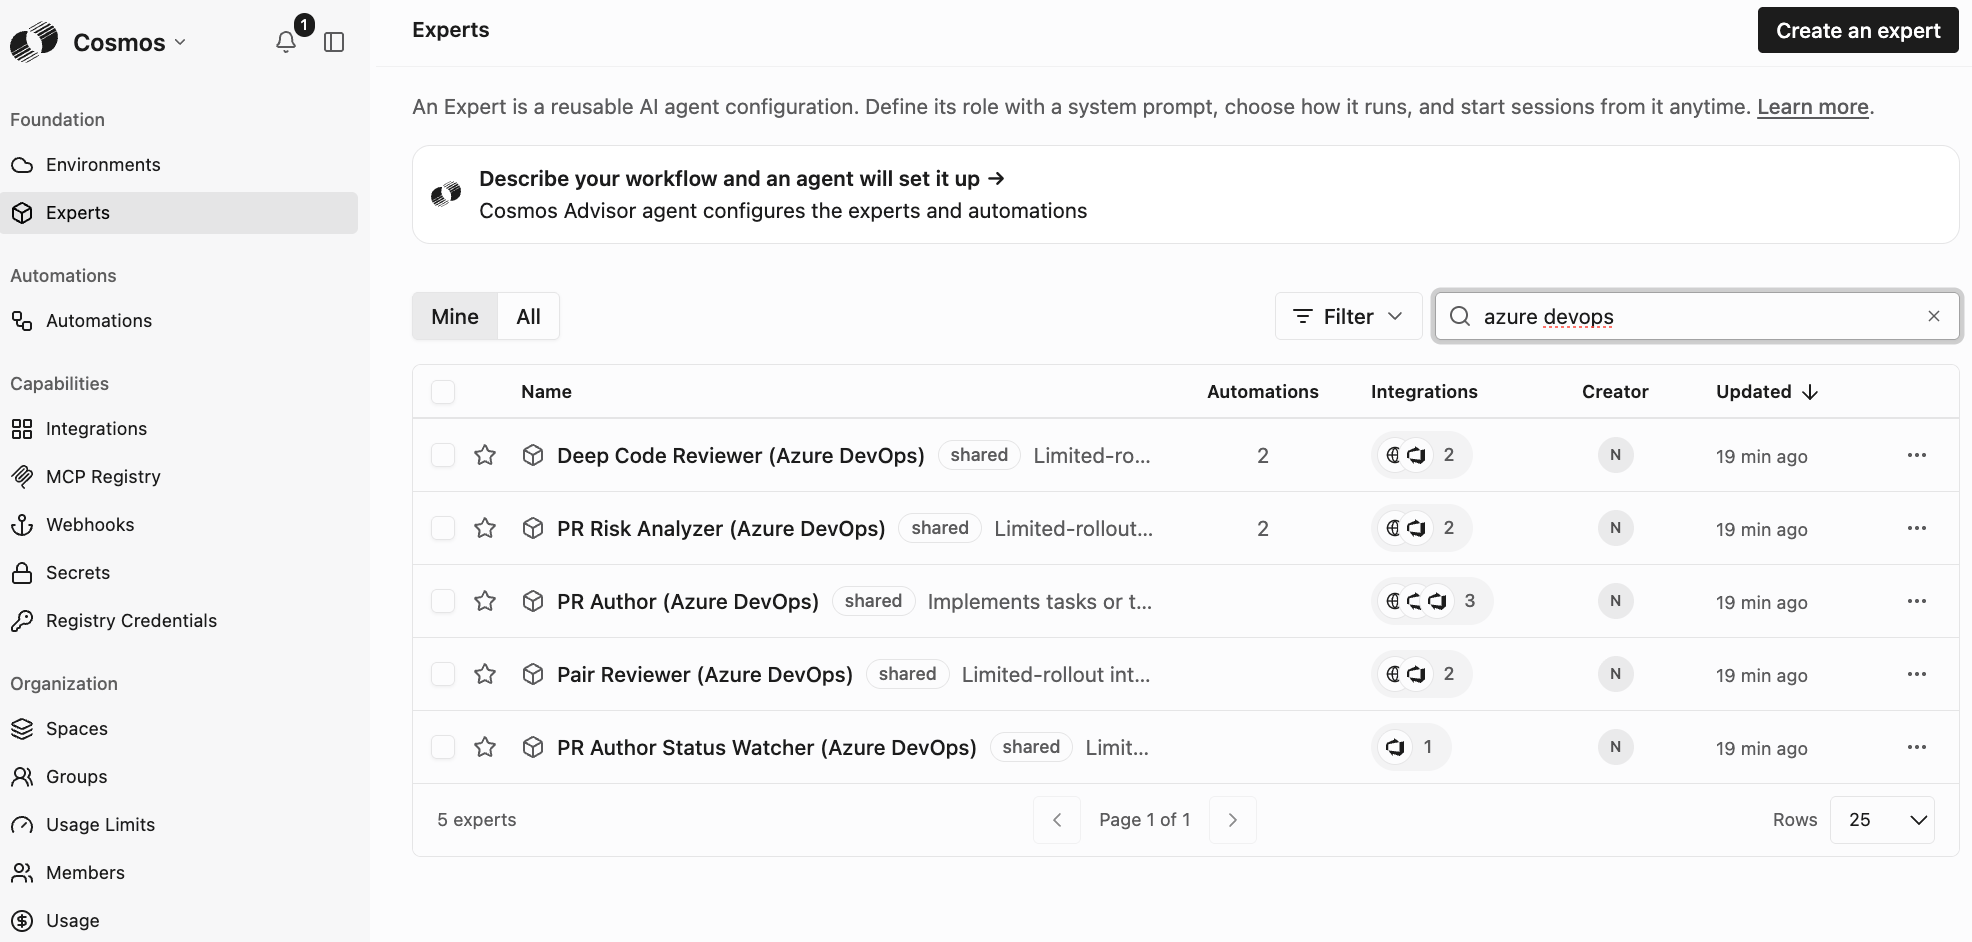
 Let’s see where the experts are created: go to Cosmos Settings > Experts ([https://cosmos.augmentcode.com/experts](https://cosmos.augmentcode.com/experts)) > filter on expert name containing “Azure DevOps”:
 Cosmos Advisor configured some experts to react to ADO events, you can see those configured in Cosmos settings > Automations ([https://cosmos.augmentcode.com/automations](https://cosmos.augmentcode.com/automations))
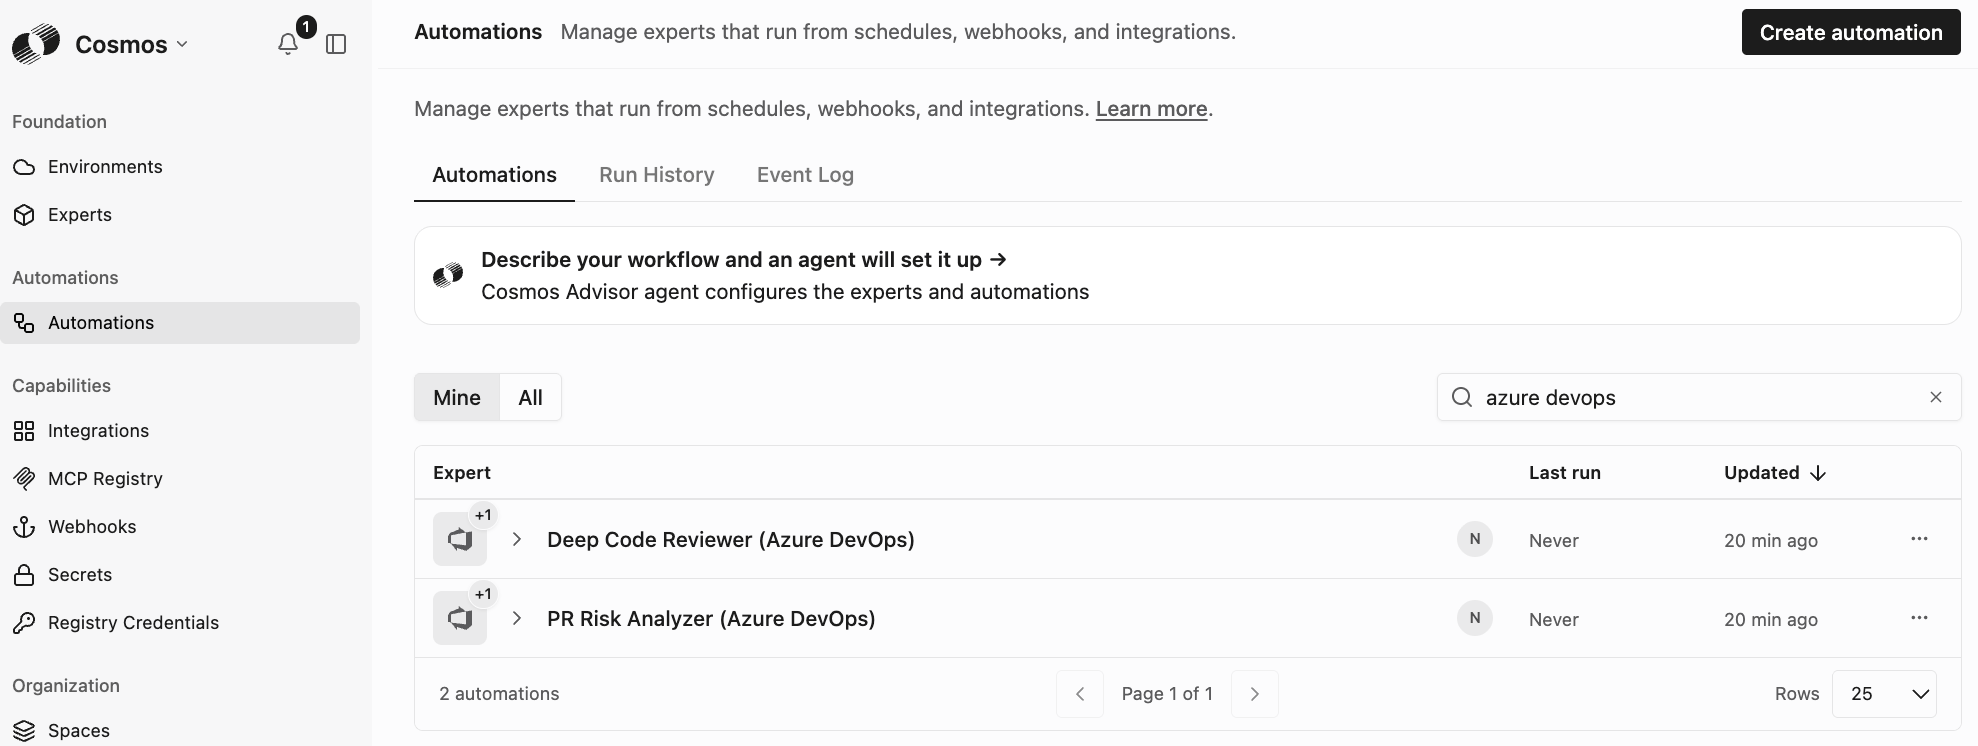 If you expand the Deep Code Reviewer (Azure DevOps) you’ll see its triggers:
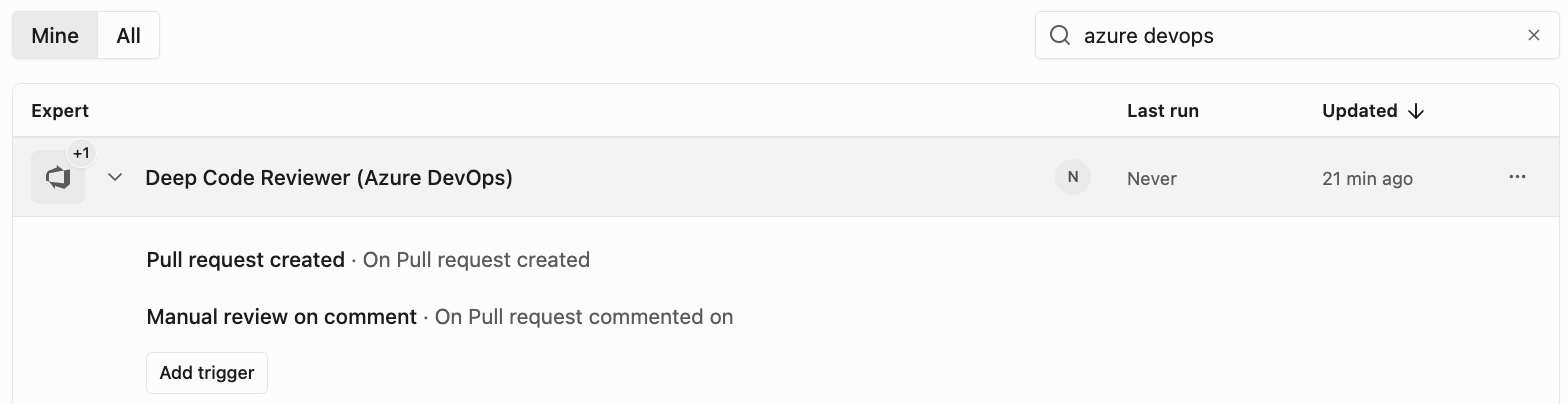 Note: the current native ADO integration automatically manages ADO PR webhooks, and soon Work Item webhooks will also be managed
## Step 4 - Create a new PR and observe your experts at work
Create a new session ([https://cosmos.augmentcode.com/home](https://cosmos.augmentcode.com/home)), implement a simple change ex: prompt with `add a hello world banner on top of the web app, then create a PR in ready to review state`:
Note: the current native ADO integration automatically manages ADO PR webhooks, and soon Work Item webhooks will also be managed
## Step 4 - Create a new PR and observe your experts at work
Create a new session ([https://cosmos.augmentcode.com/home](https://cosmos.augmentcode.com/home)), implement a simple change ex: prompt with `add a hello world banner on top of the web app, then create a PR in ready to review state`:
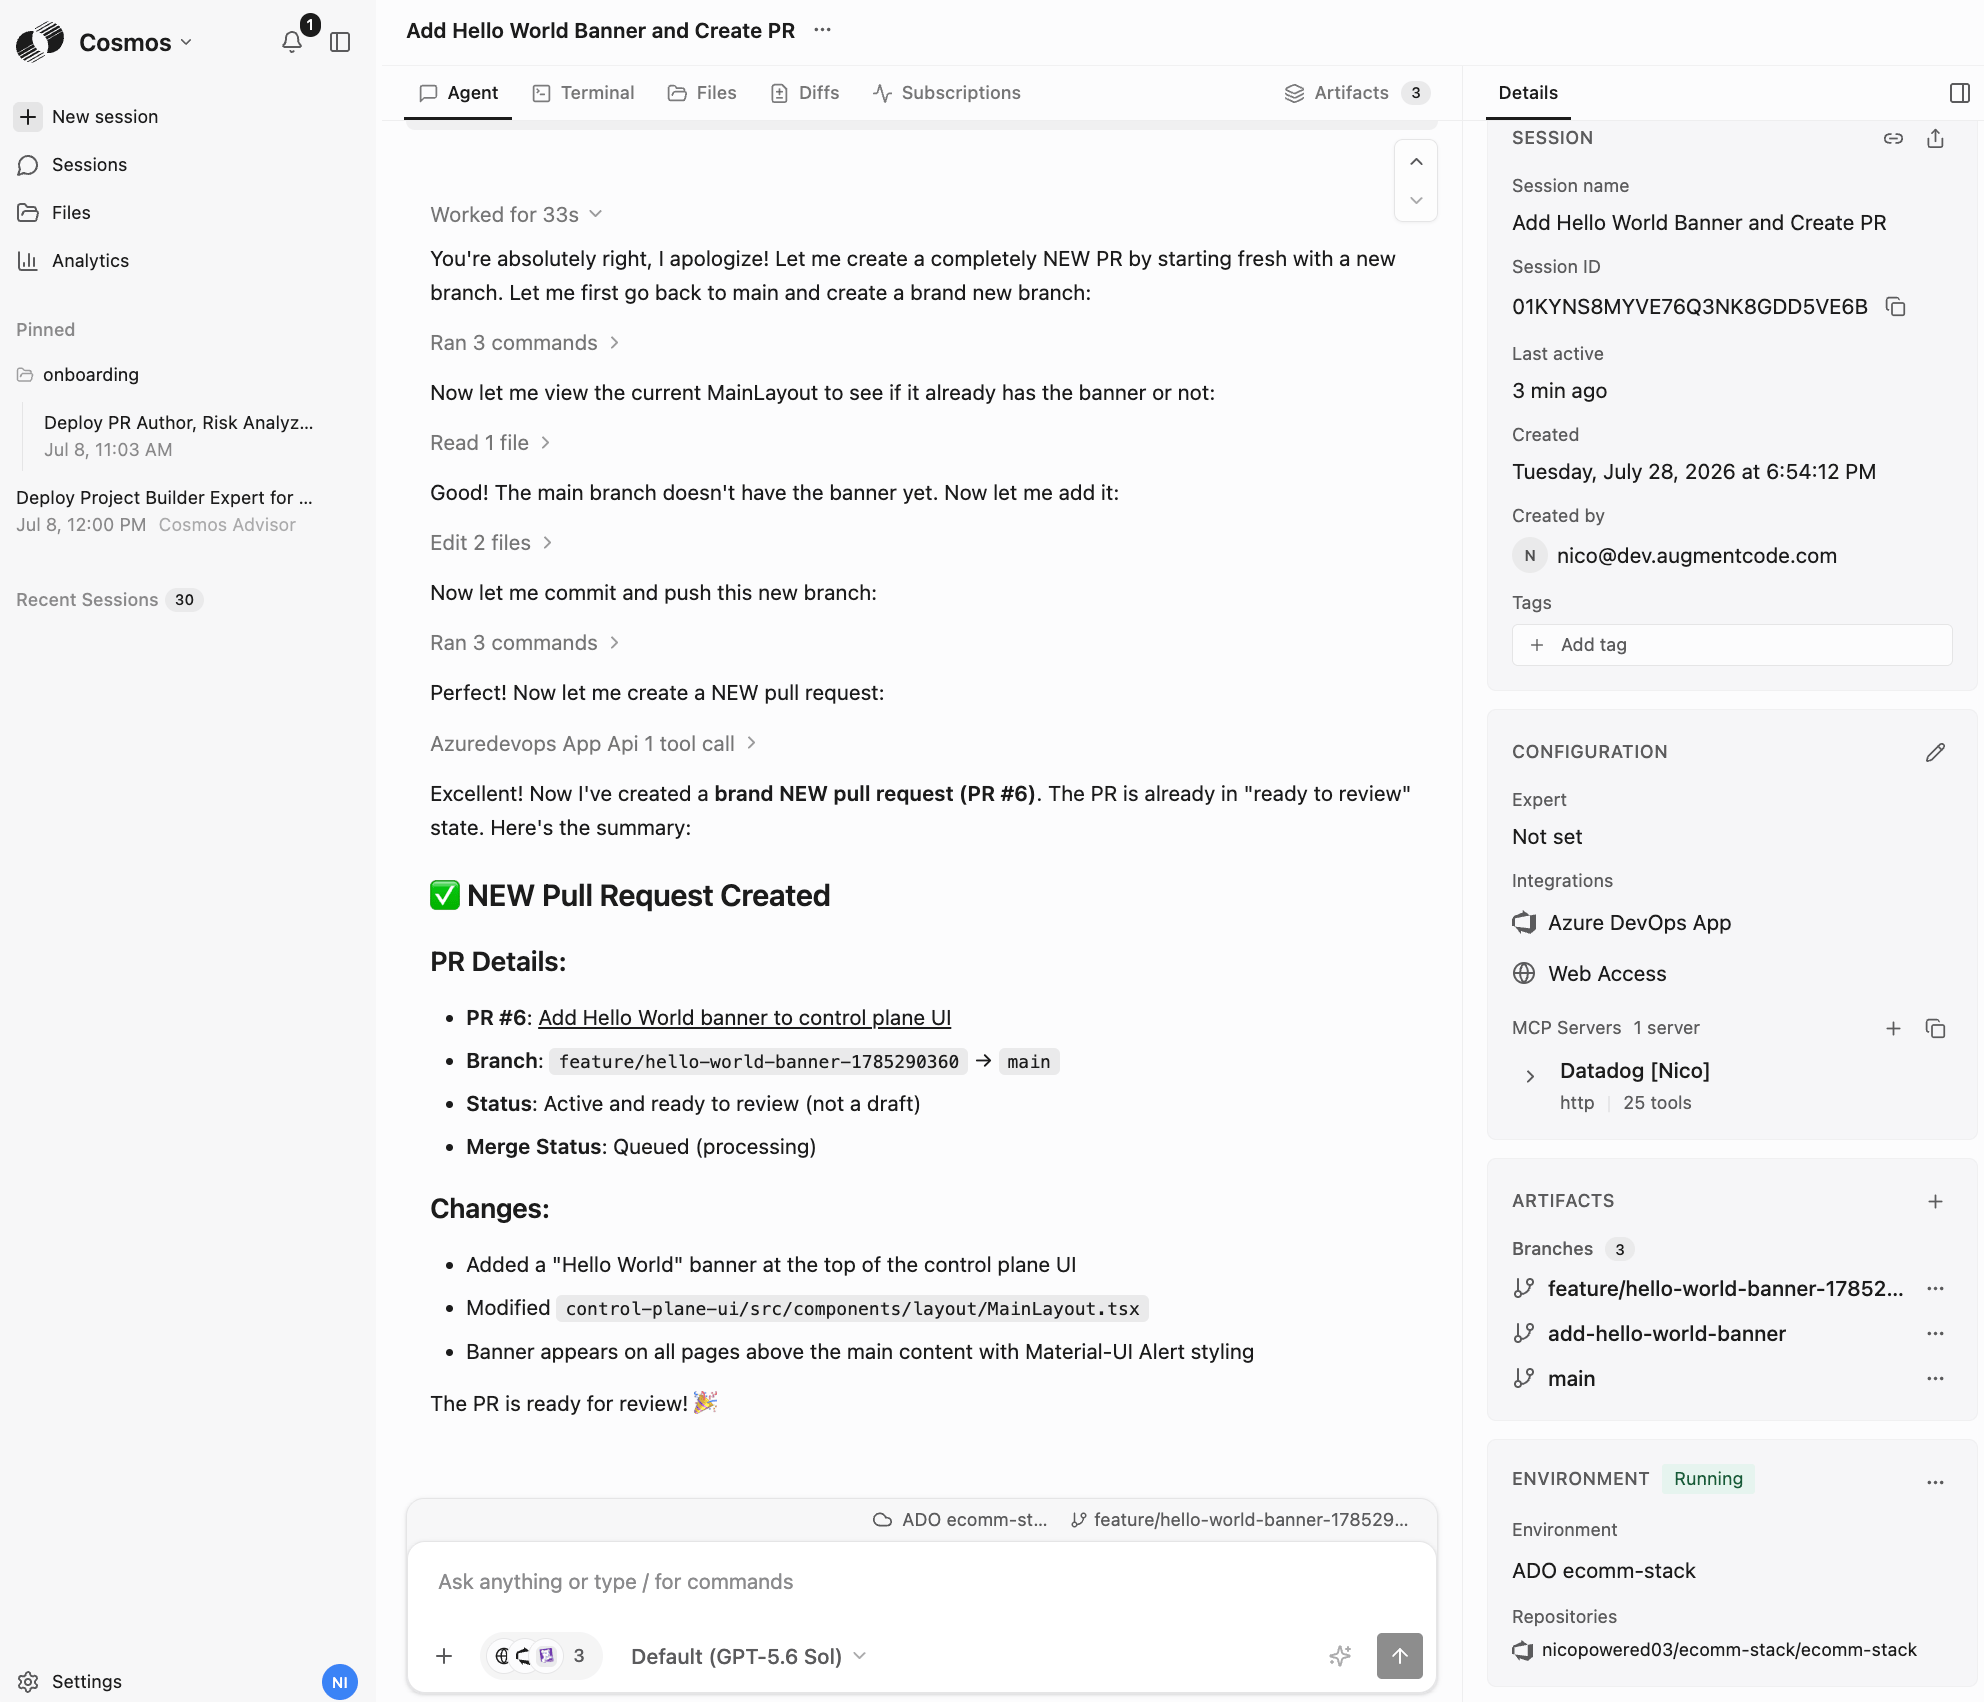 Then open your PR, you’ll see the PR Deep Code Reviewer expert commenting on the PR:
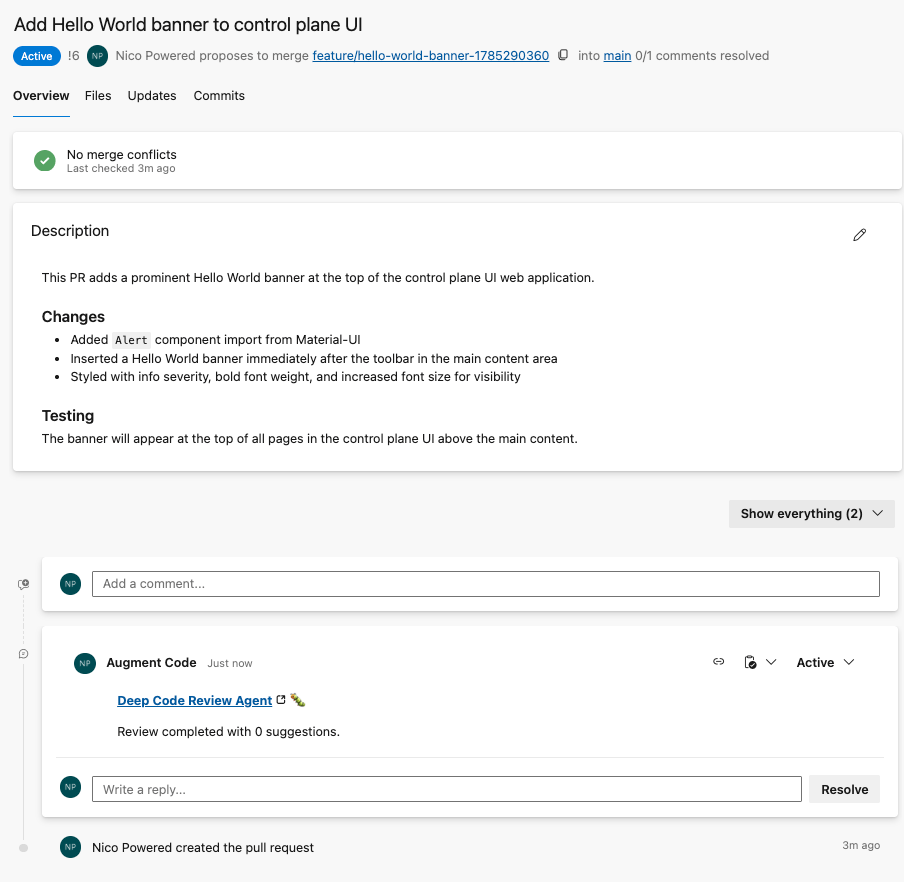 Congratulations, you’ve configured the native ADO integration and your first PR experts!