> ## Documentation Index
> Fetch the complete documentation index at: https://docs.augmentcode.com/llms.txt
> Use this file to discover all available pages before exploring further.
# Integrate GitLab Cloud
## Introduction
In this page we’ll configure the native Gitlab integration and learn how to:
1. Get Gitlab to push events to Cosmos via webhooks
2. Configure a Cosmos environment that git clones/fetches from Gitlab repo(s)
3. Get Cosmos to automatically post onto a MR when the MR is created
4. Deploy the MR author and MR reviewer experts via the Cosmos Advisor
For 4, below is the flow that will be followed by the Cosmos MR reviewer expert:
```mermaid theme={null}
sequenceDiagram
autonumber
participant GL as GitLab
participant A as Augment Cosmos
GL->>A: Webhook: Merge Request created (MR payload)
A->>A: Start Expert (spawn/run expert agent)
A->>A: Expert analyzes MR (diff + context)
A->>GL: POST MR comment
GL-->>A: 201 Created (comment posted)
```
## Prerequisites
To configure the one-time connectivity between Cosmos and Gitlab:
* you must be a Augment admin
* you must have Gitlab permissions to create a Gitlab group service access token with the `api` scope (required) and either \[the **Owner** role] or \[a custom role with at least the **Developer** role and the `admin_web_hook` permission].
## Step 1 - Configure the native Gitlab integration
As a Augment admin, go to [cosmos.augmentcode.com](http://cosmos.augmentcode.com) > Settings > Integrations ([https://cosmos.augmentcode.com/integrations](https://cosmos.augmentcode.com/integrations)) and next to Gitlab click on Connect:
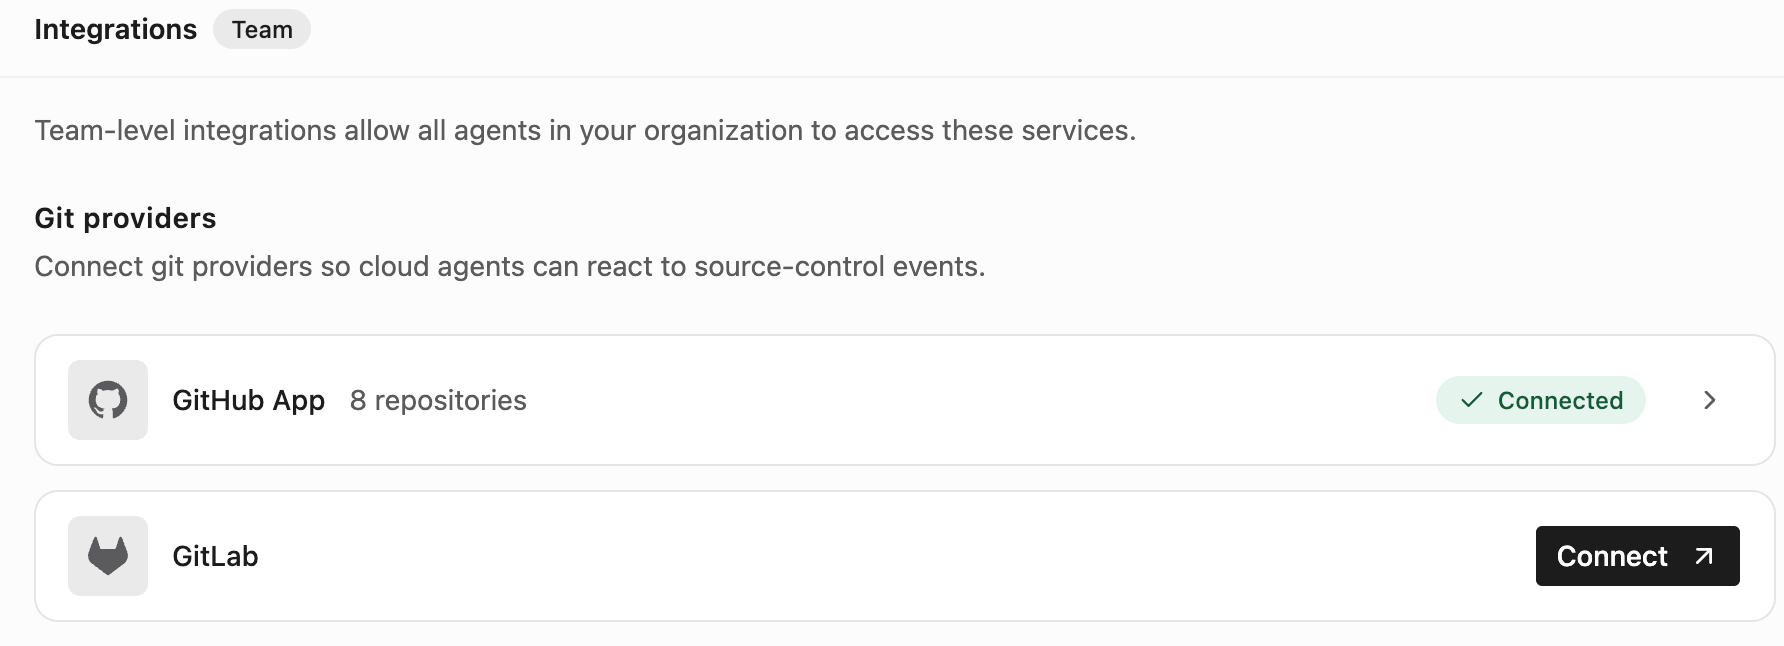 You’ll be redirected to this view:
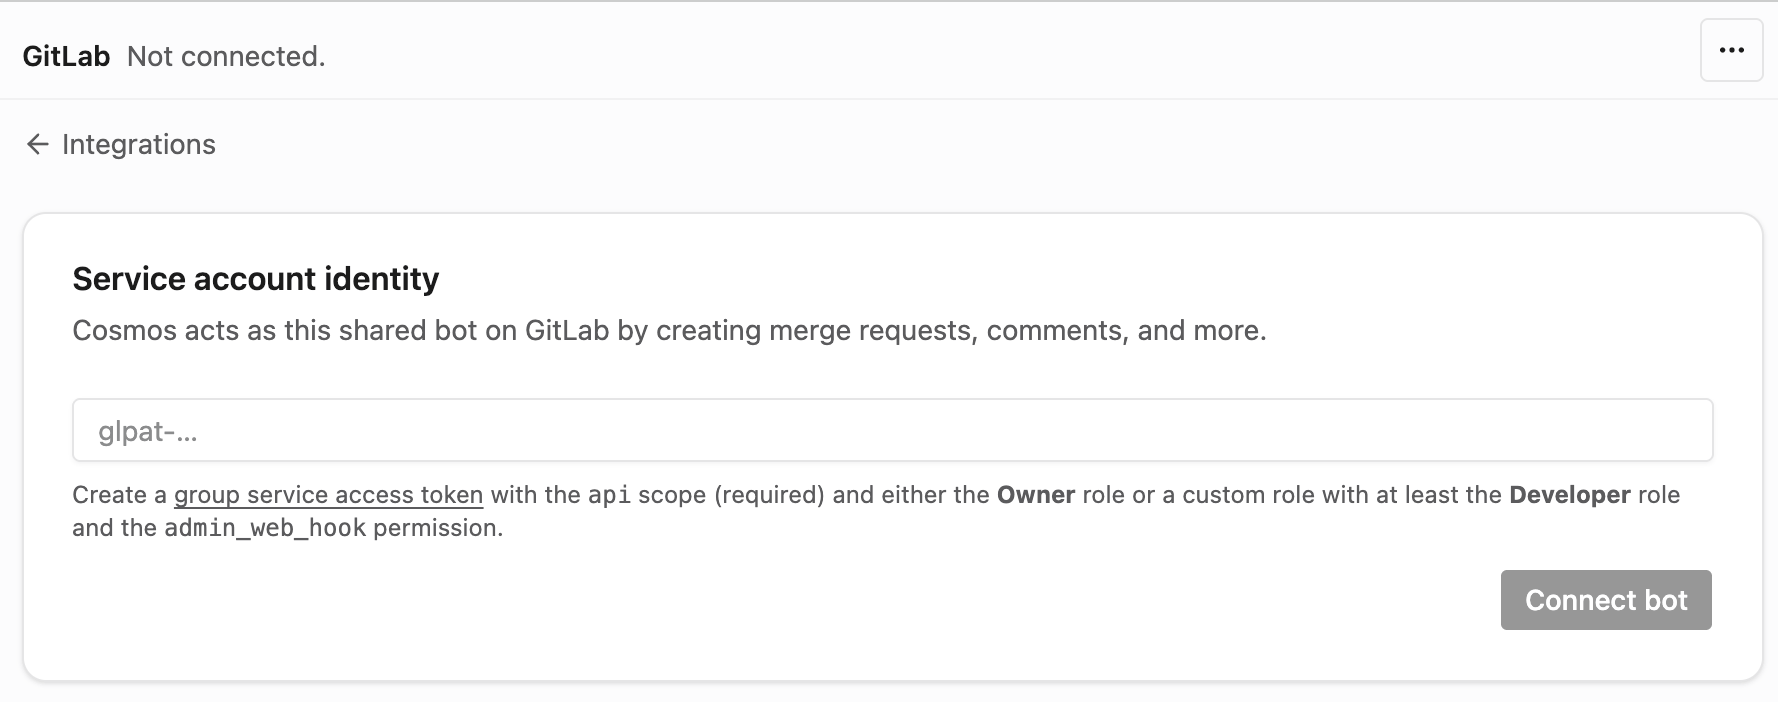 Let’s switch to Gitlab to create that group service account:
* Navigate to your Gitlab group, then Settings > Service Accounts in the left sidebar
Let’s switch to Gitlab to create that group service account:
* Navigate to your Gitlab group, then Settings > Service Accounts in the left sidebar
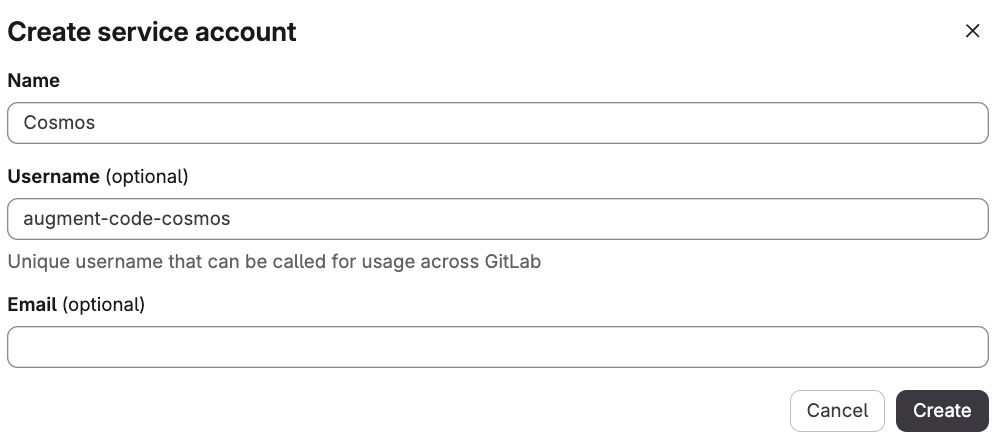
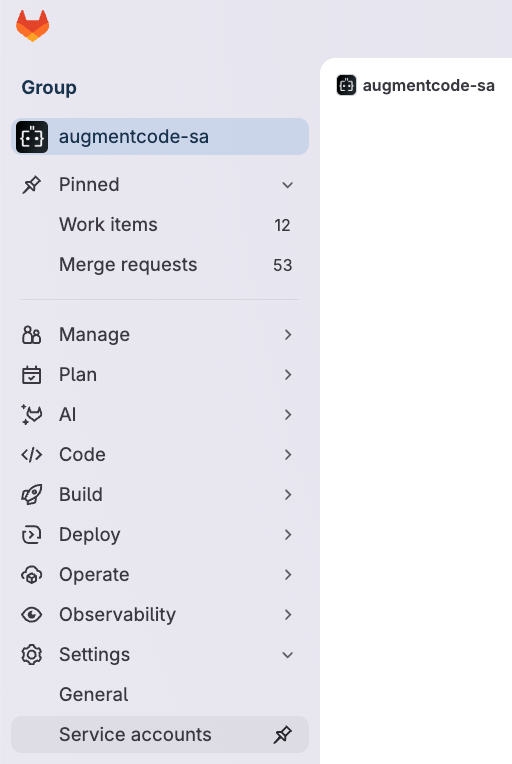 * Click on Add service account
* Name: Cosmos
* Username: ex: augment-code-cosmos
* Click on Add service account
* Name: Cosmos
* Username: ex: augment-code-cosmos
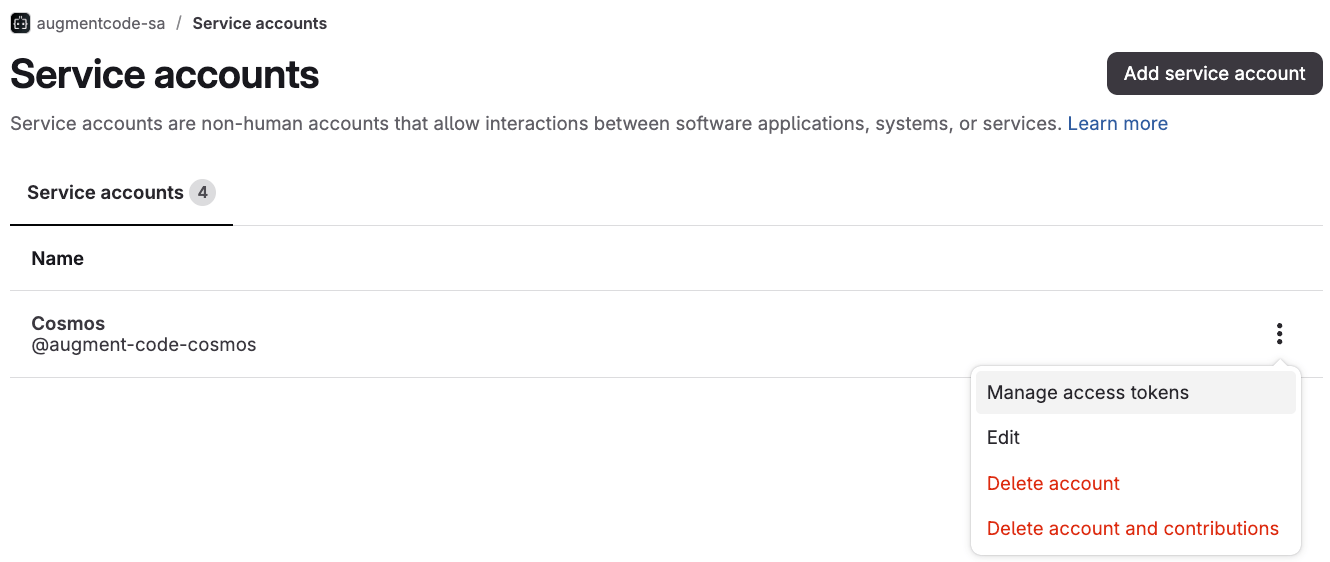
 * Next to your service account > click on the 3 dots > Manage access tokens
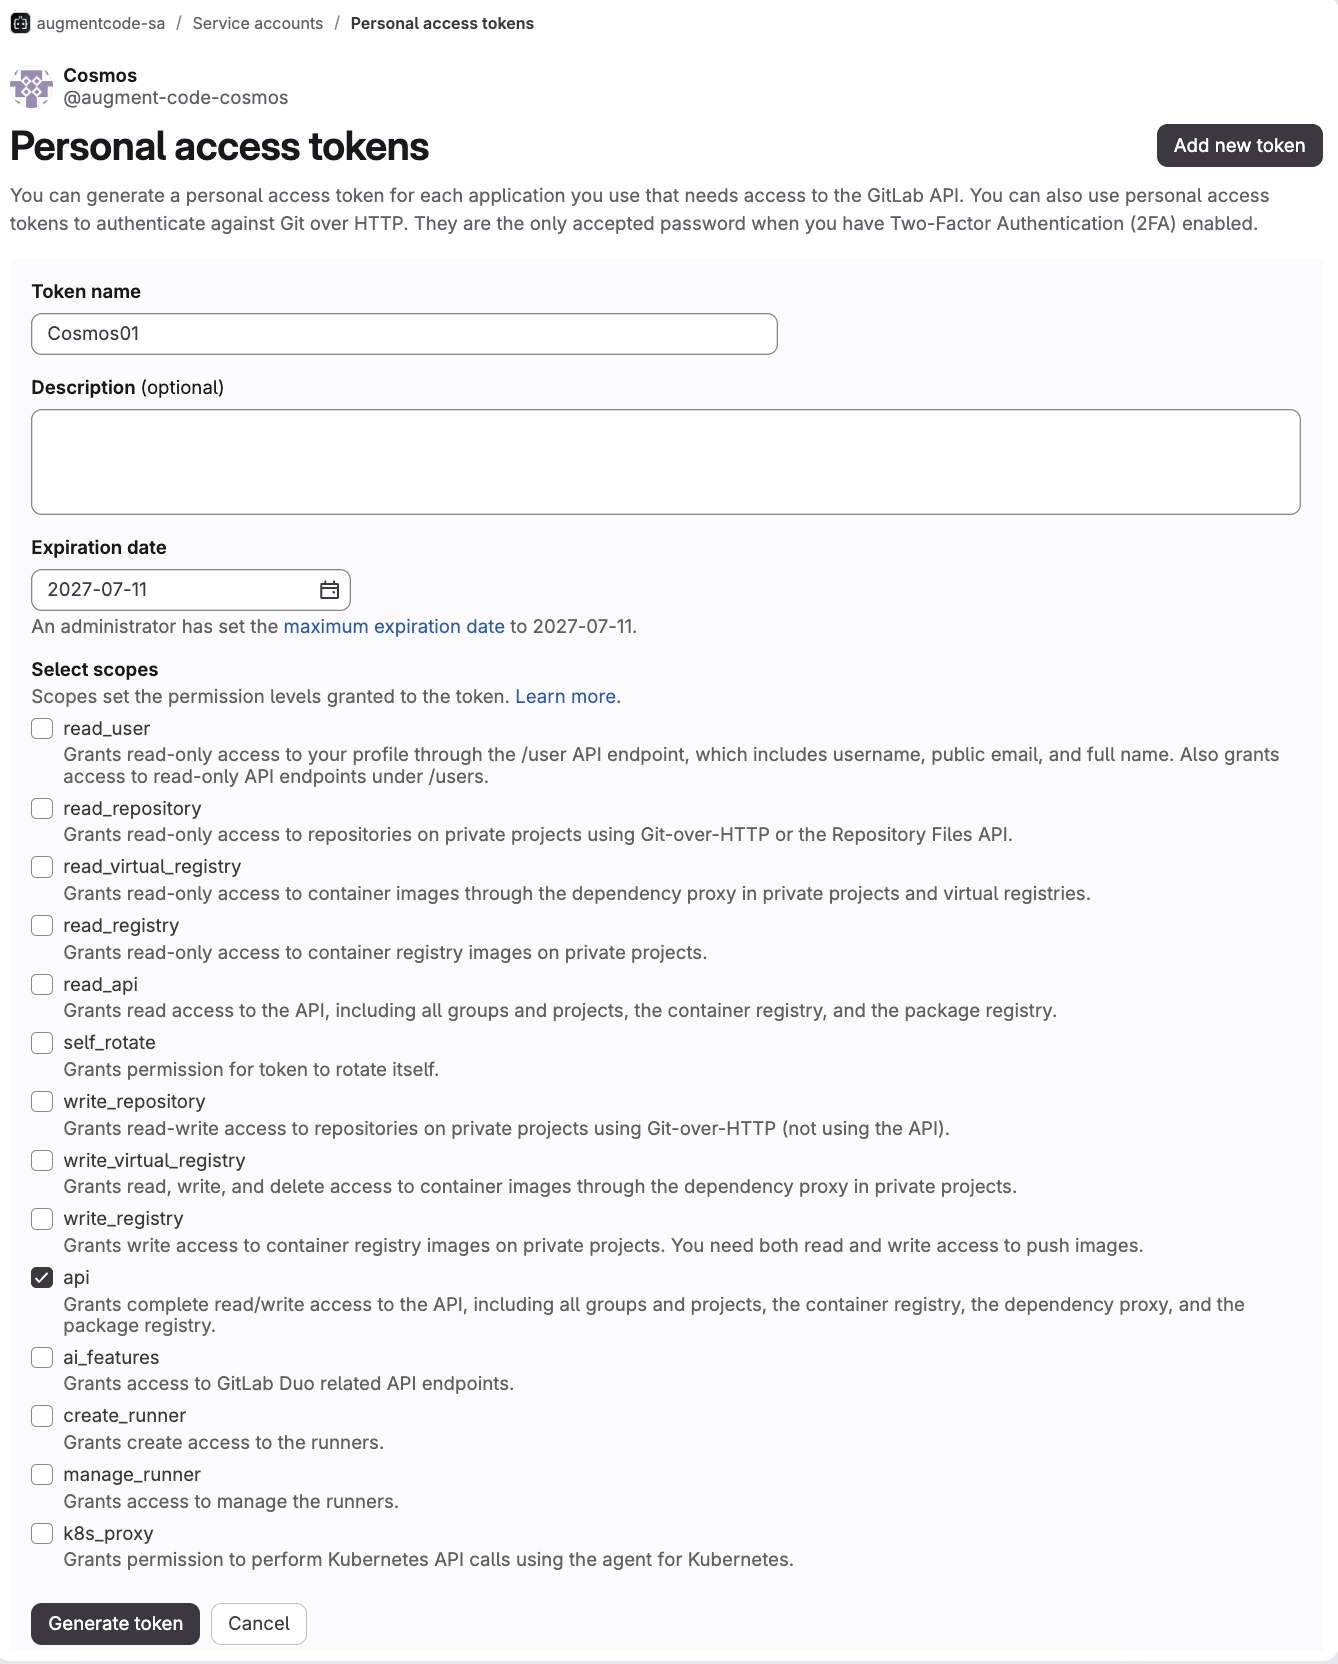
 * Add new token
* Name: Cosmos01
* Expiration date - set the maximum
* Select `api` scope
* Click on Generate token
* Add new token
* Name: Cosmos01
* Expiration date - set the maximum
* Select `api` scope
* Click on Generate token
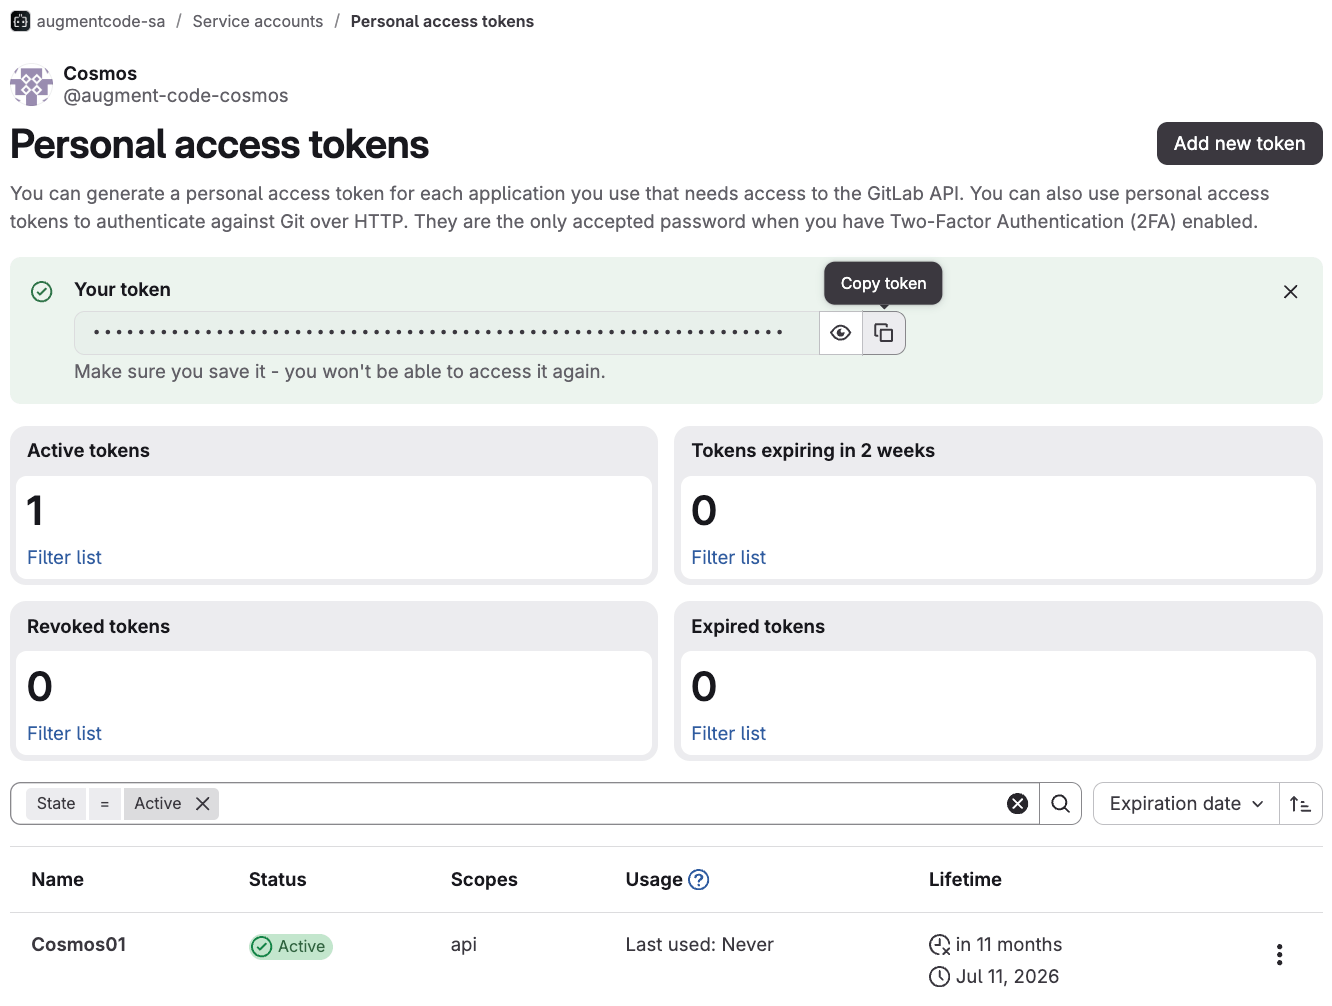
 * Copy the access token, we’ll need it shortly
 Now you’ll make this service account a member of the projects you want to surface in Cosmos.
2 options:
* (1) make it an Owner on those projects
* or (2) create a [custom role](https://docs.gitlab.com/user/custom_roles/) with `admin_web_hook` permission and a base of at least the Developer role
Here we’ll make the service account an Owner on a given project:
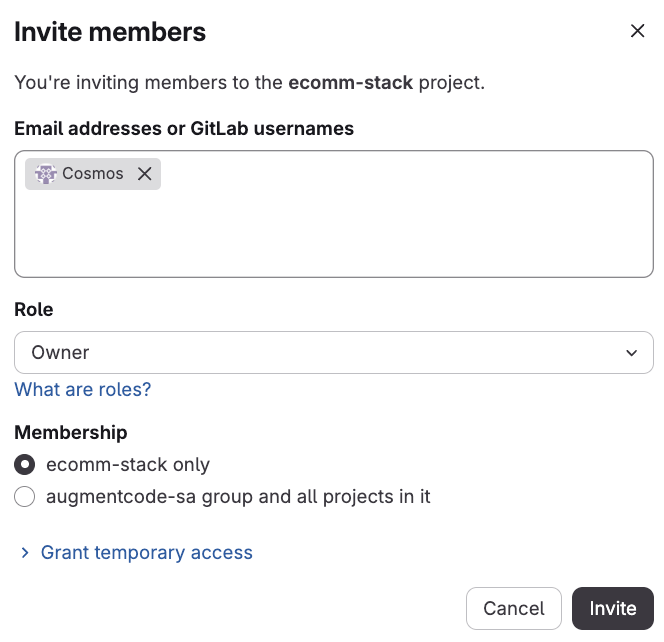
* Go to your project > left sidebar > Manage > Members > Invite members > select your service account > role ‘Owner’ or the Custom role > select your project (or all projects in the group) > Invite
Now you’ll make this service account a member of the projects you want to surface in Cosmos.
2 options:
* (1) make it an Owner on those projects
* or (2) create a [custom role](https://docs.gitlab.com/user/custom_roles/) with `admin_web_hook` permission and a base of at least the Developer role
Here we’ll make the service account an Owner on a given project:
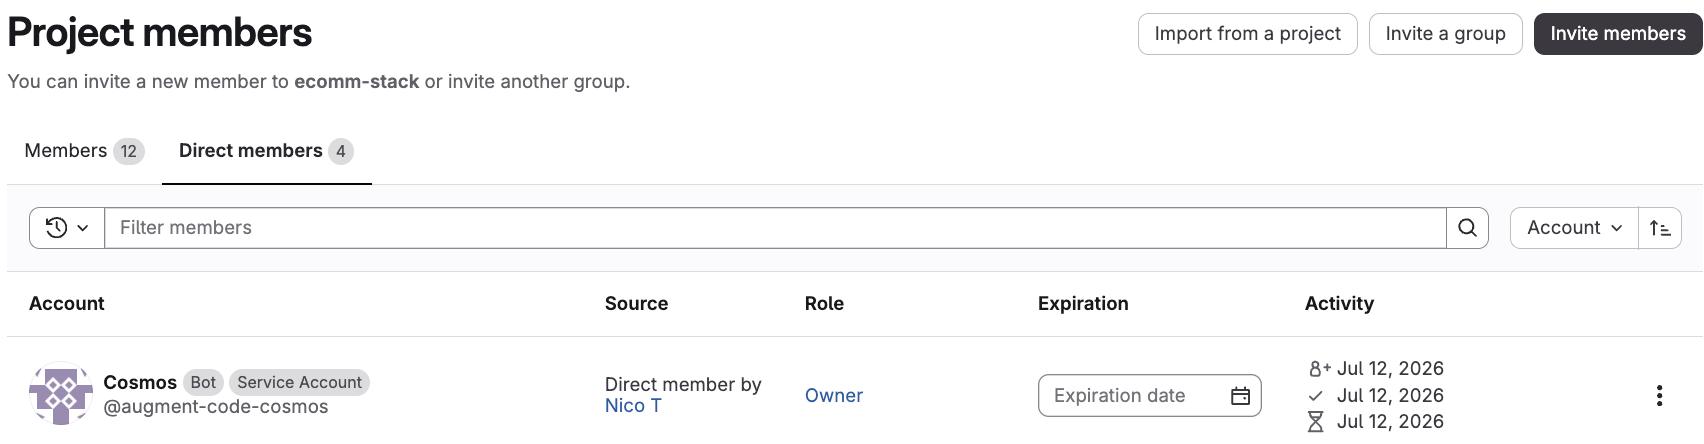
* Go to your project > left sidebar > Manage > Members > Invite members > select your service account > role ‘Owner’ or the Custom role > select your project (or all projects in the group) > Invite
 You should see this:
 Now go back to Cosmos.
* Paste the group service account’s access token into Cosmos and click on ‘Connect bot’:
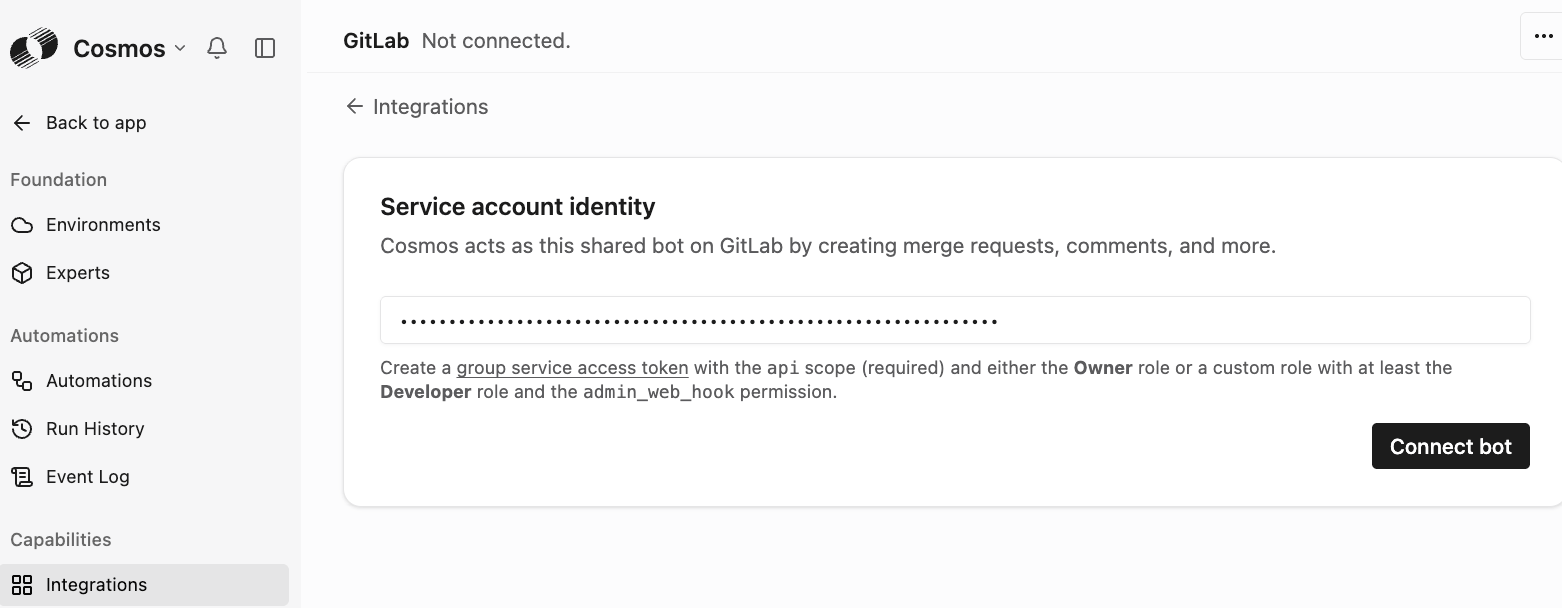
Now go back to Cosmos.
* Paste the group service account’s access token into Cosmos and click on ‘Connect bot’:
 Cosmos will automatically:
* Discover the repos
* Register webhooks to react to events across those repos
You should see this:
Cosmos will automatically:
* Discover the repos
* Register webhooks to react to events across those repos
You should see this:
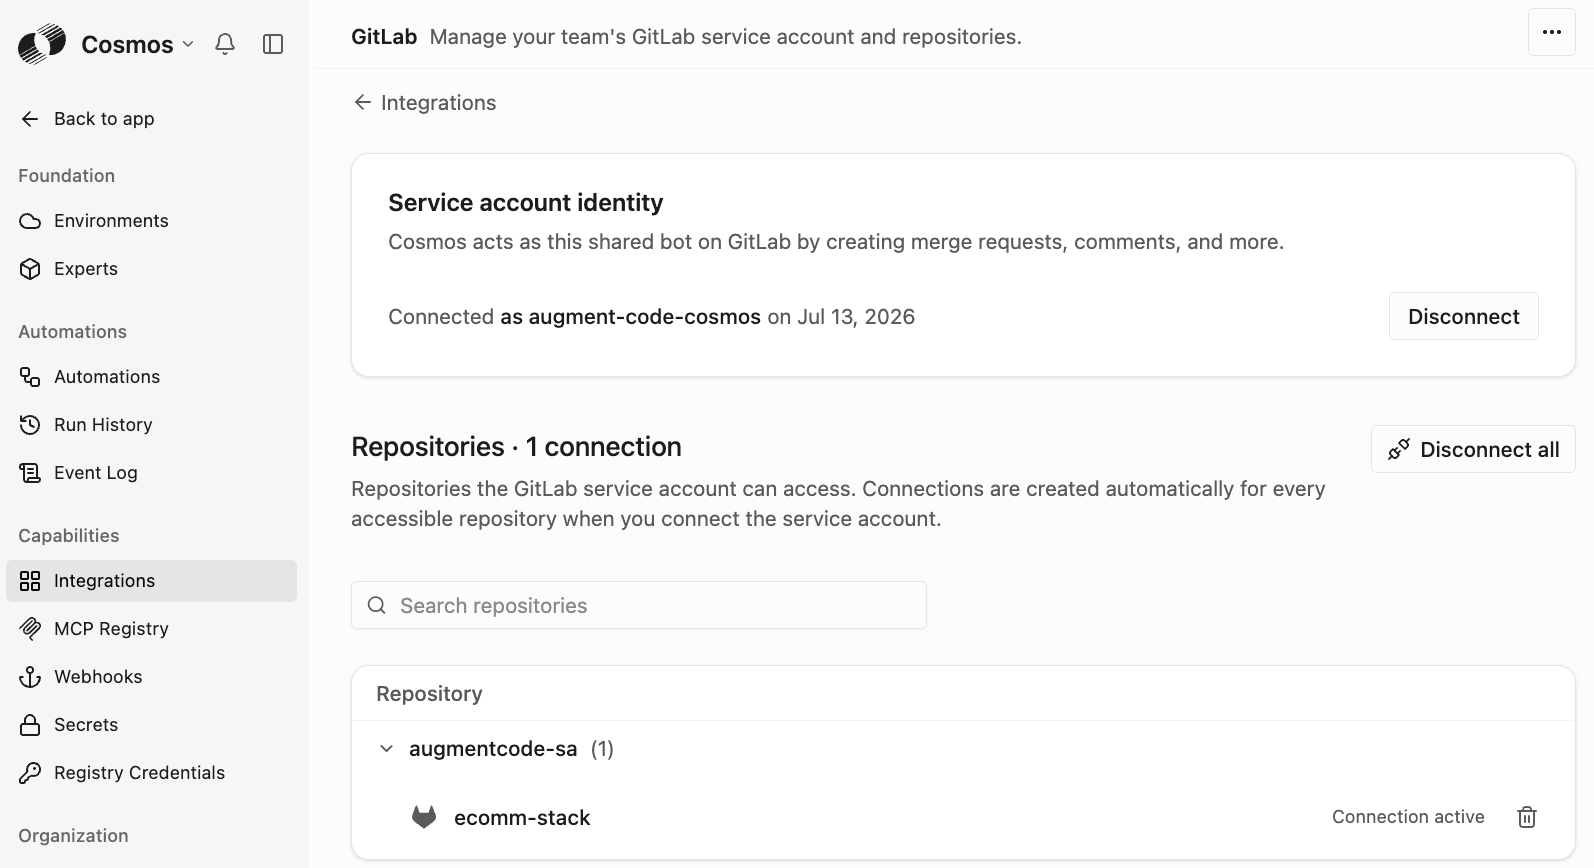 If you don’t see your repos, double check the scopes of your service account and that it’s added as a member of your projects with the proper role.
## Step 2 - Create a cloud environment
Let’s create a cloud environment with those Gitlab repos:
* Go to Cosmos settings > Environments ([https://cosmos.augmentcode.com/environments](https://cosmos.augmentcode.com/environments)) > top right Create an environment > Cloud machine
If you don’t see your repos, double check the scopes of your service account and that it’s added as a member of your projects with the proper role.
## Step 2 - Create a cloud environment
Let’s create a cloud environment with those Gitlab repos:
* Go to Cosmos settings > Environments ([https://cosmos.augmentcode.com/environments](https://cosmos.augmentcode.com/environments)) > top right Create an environment > Cloud machine
 * Configure your environment
* Name: ex: ecomm-stack
* Image: ex: keep the Cosmos default base image
* Repositories: select your Gitlab repos
* Refresh: toggle on
* Spaces: keep the default space
* Click on Create Environment
* Configure your environment
* Name: ex: ecomm-stack
* Image: ex: keep the Cosmos default base image
* Repositories: select your Gitlab repos
* Refresh: toggle on
* Spaces: keep the default space
* Click on Create Environment
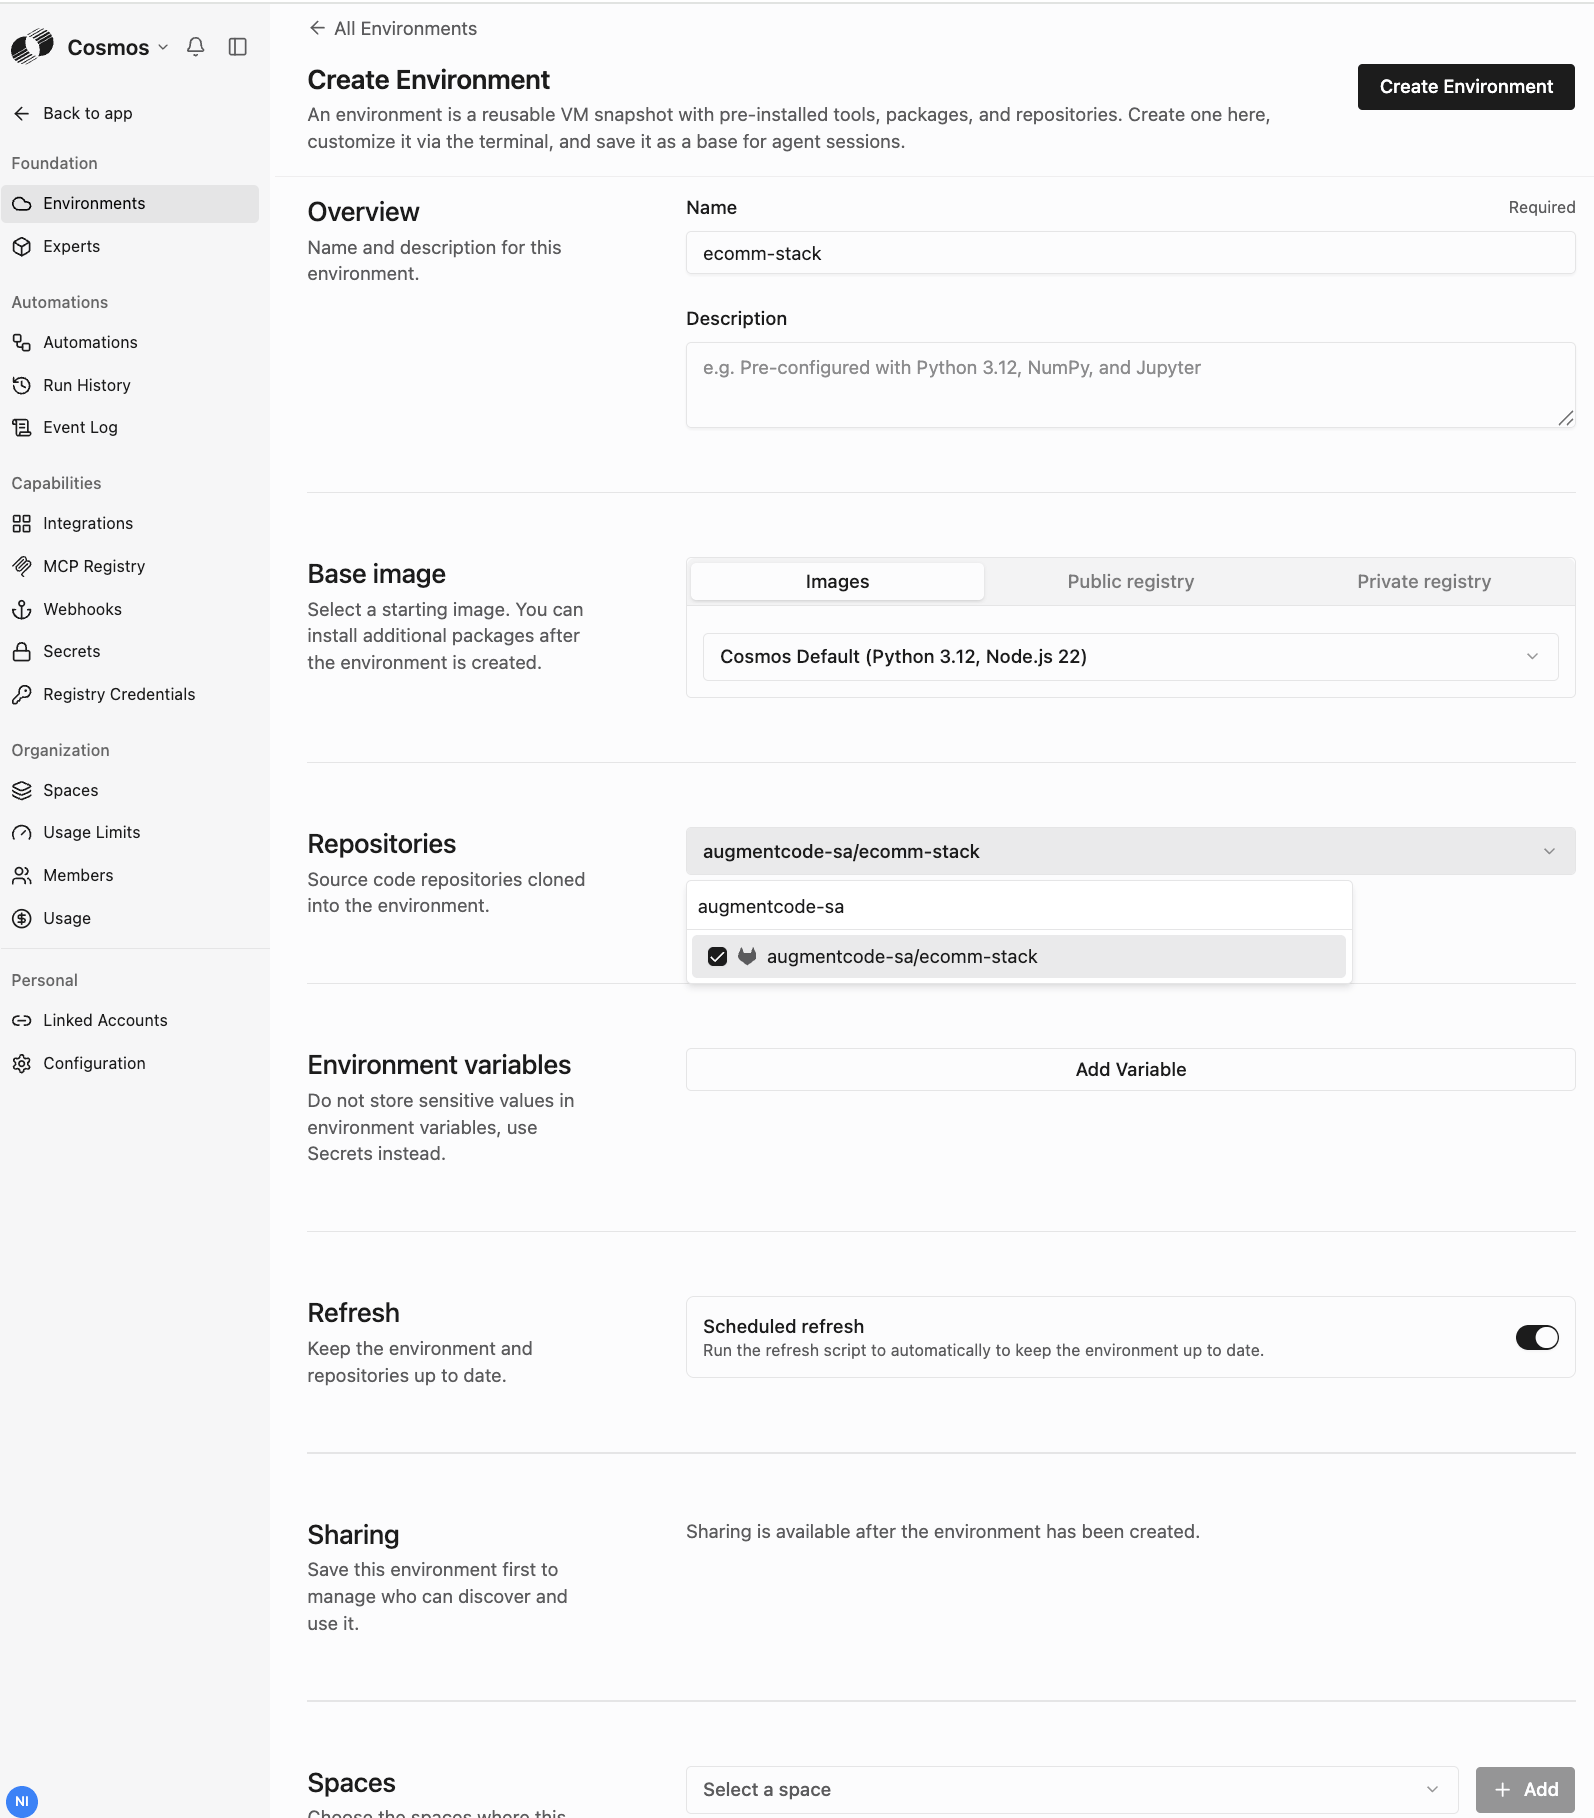 Cosmos will create the cloud environment, git clone your repos and keep them up to date
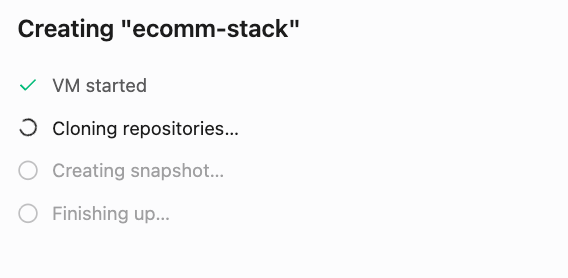
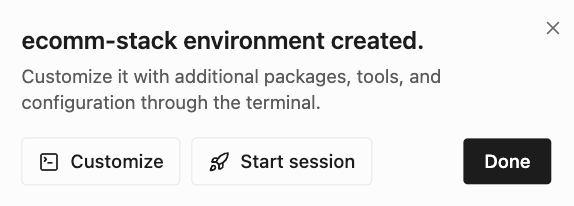 * Click on Done
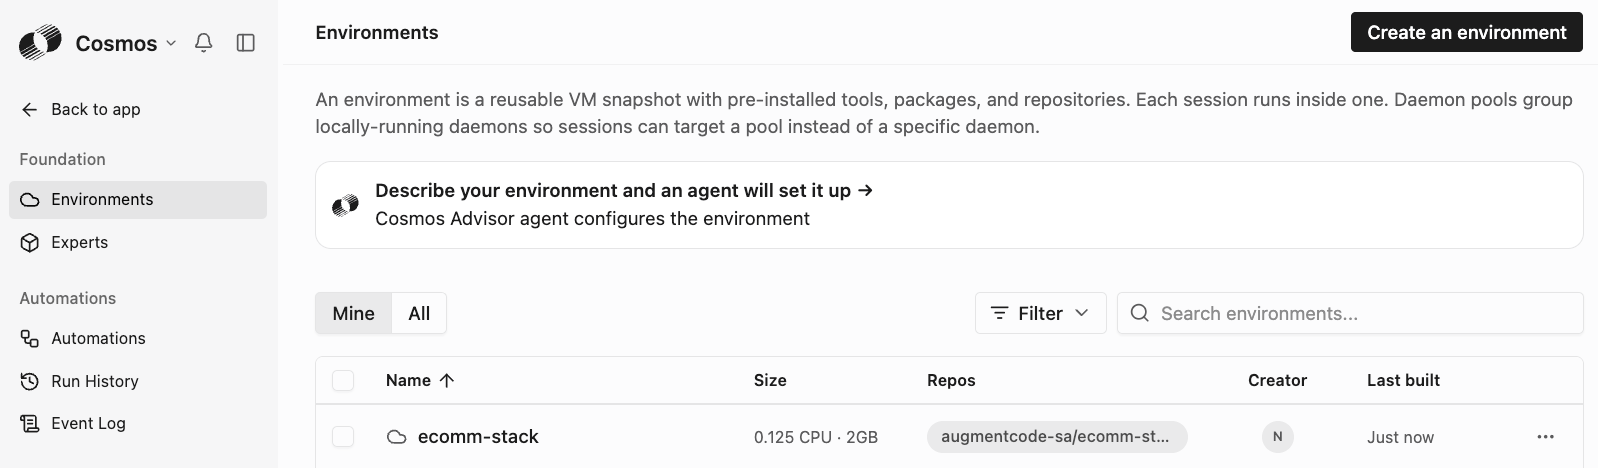
You’ll see your new environment in your “Mine” tab:
* Click on Done
You’ll see your new environment in your “Mine” tab:
 Now let’s do a quick test and create a session with that env:
* Click on ‘Back to app’ top left > New session ([https://cosmos.augmentcode.com/home](https://cosmos.augmentcode.com/home)) > bottom left of the prompt select your env, then click on Integrations and verify that Gitlab is selected, then send this prompt “What’s this repo about?”
Now let’s do a quick test and create a session with that env:
* Click on ‘Back to app’ top left > New session ([https://cosmos.augmentcode.com/home](https://cosmos.augmentcode.com/home)) > bottom left of the prompt select your env, then click on Integrations and verify that Gitlab is selected, then send this prompt “What’s this repo about?”
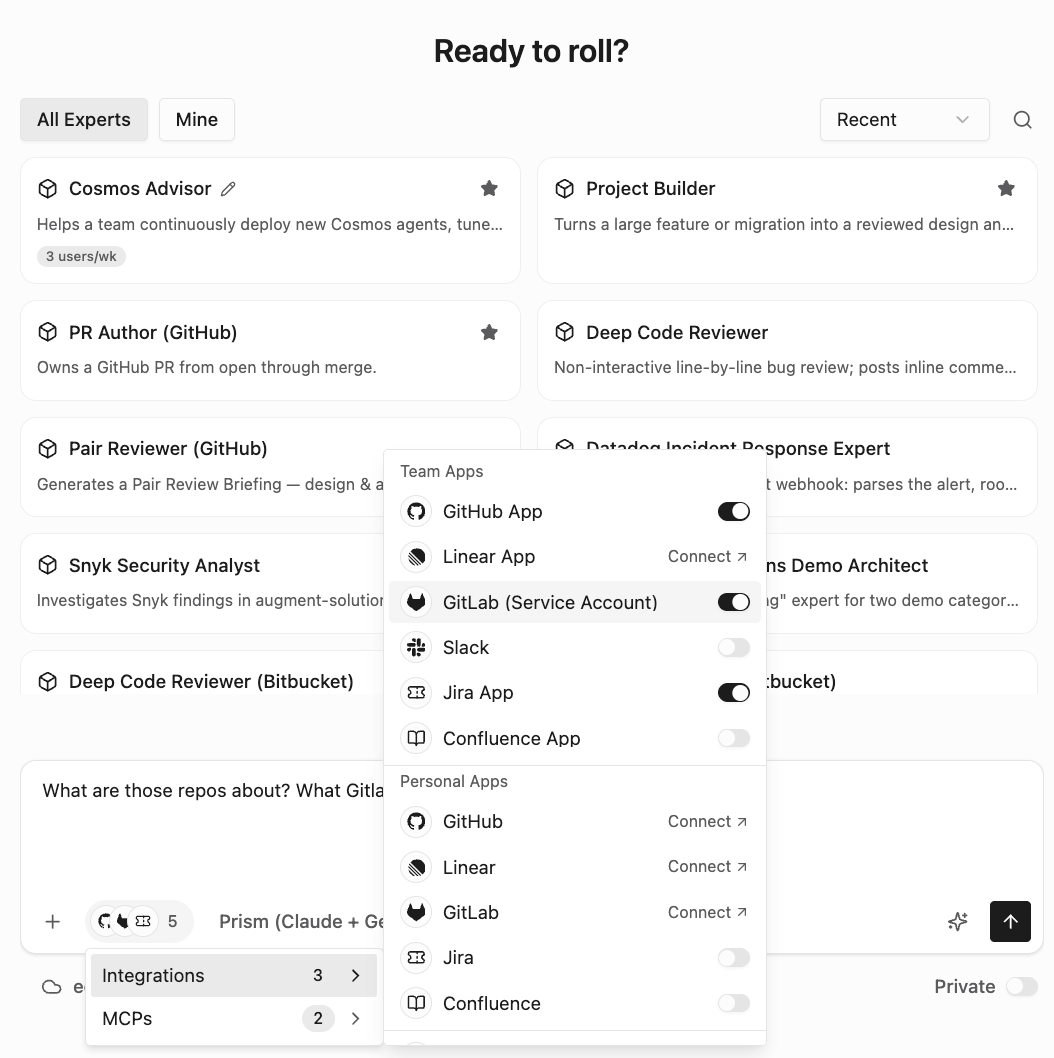 That’ll start a session. Notice on the right sidebar Expert = Not set, Integrations include Gitlab, your selected env:
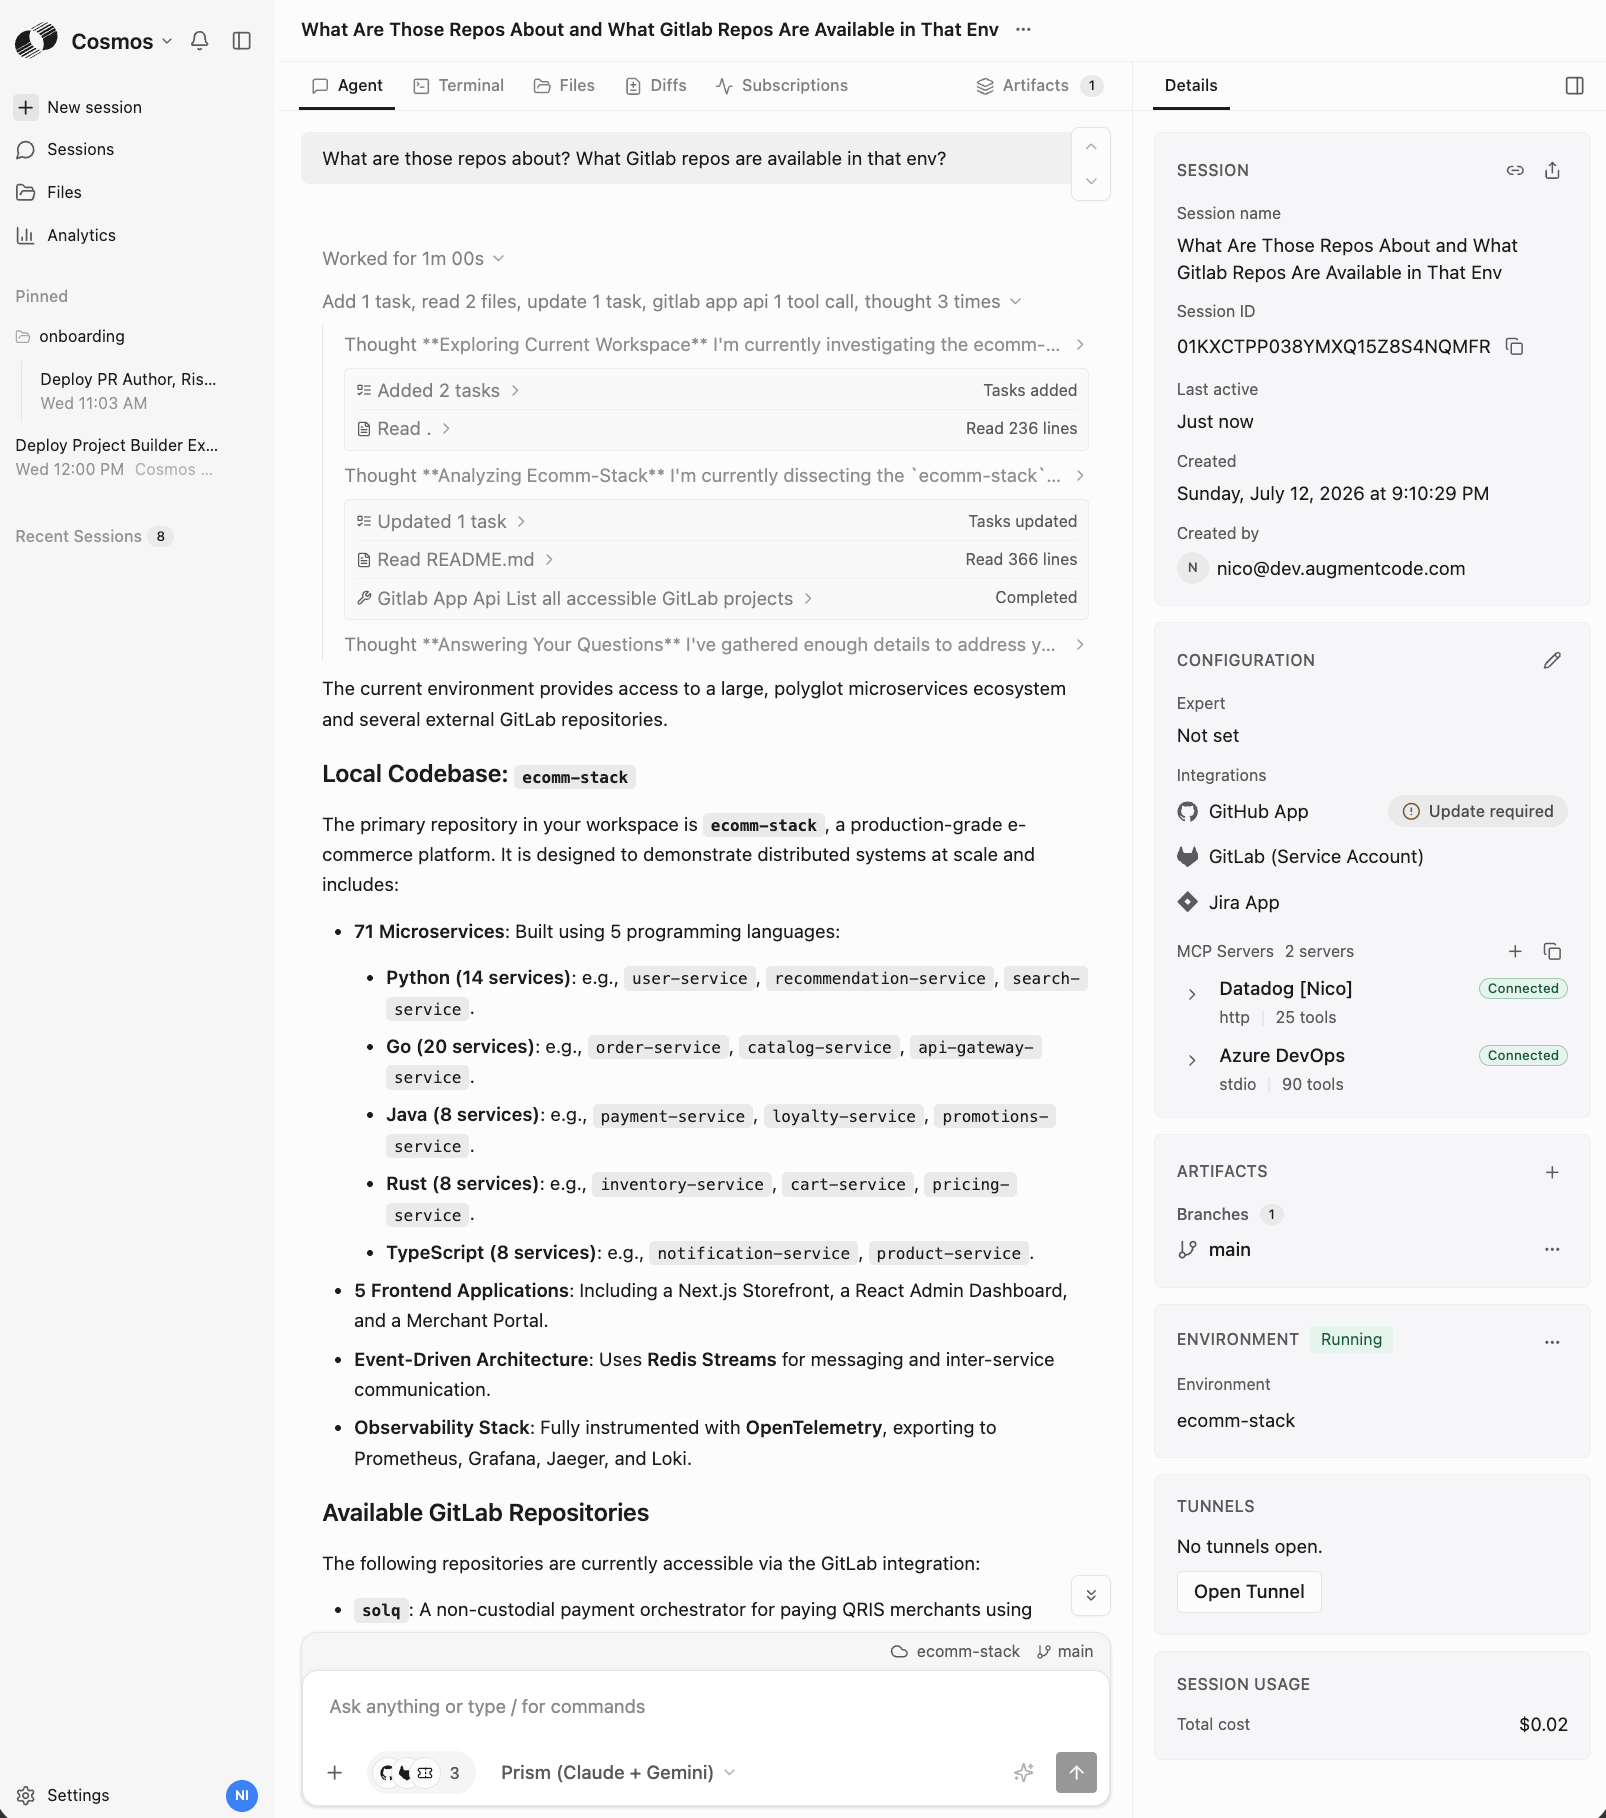 Your Gitlab integration and your cloud env are ready. It’s time to create your first Cosmos expert.
## Step 3 - Create a MR deep reviewer expert
Cosmos has a large knowledge base and greatly assists with creating new experts.
A common expert you’d create for your Gitlab repos is the “MR reviewer”, whose job will be to auto react to MRs being created and auto review them. Whenever you need to create new experts go ask the Cosmos Advisor:
* Go to New session ([https://cosmos.augmentcode.com/home](https://cosmos.augmentcode.com/home)) > select the ‘Cosmos Advisor’ expert, make sure the Gitlab integration is selected and prompt with “Create a MR author, a MR risk analyzer, a MR deep reviewer. The MR review should start whenever a MR gets created. Those experts should reuse the ecomm-stack env of this session”
Your Gitlab integration and your cloud env are ready. It’s time to create your first Cosmos expert.
## Step 3 - Create a MR deep reviewer expert
Cosmos has a large knowledge base and greatly assists with creating new experts.
A common expert you’d create for your Gitlab repos is the “MR reviewer”, whose job will be to auto react to MRs being created and auto review them. Whenever you need to create new experts go ask the Cosmos Advisor:
* Go to New session ([https://cosmos.augmentcode.com/home](https://cosmos.augmentcode.com/home)) > select the ‘Cosmos Advisor’ expert, make sure the Gitlab integration is selected and prompt with “Create a MR author, a MR risk analyzer, a MR deep reviewer. The MR review should start whenever a MR gets created. Those experts should reuse the ecomm-stack env of this session”
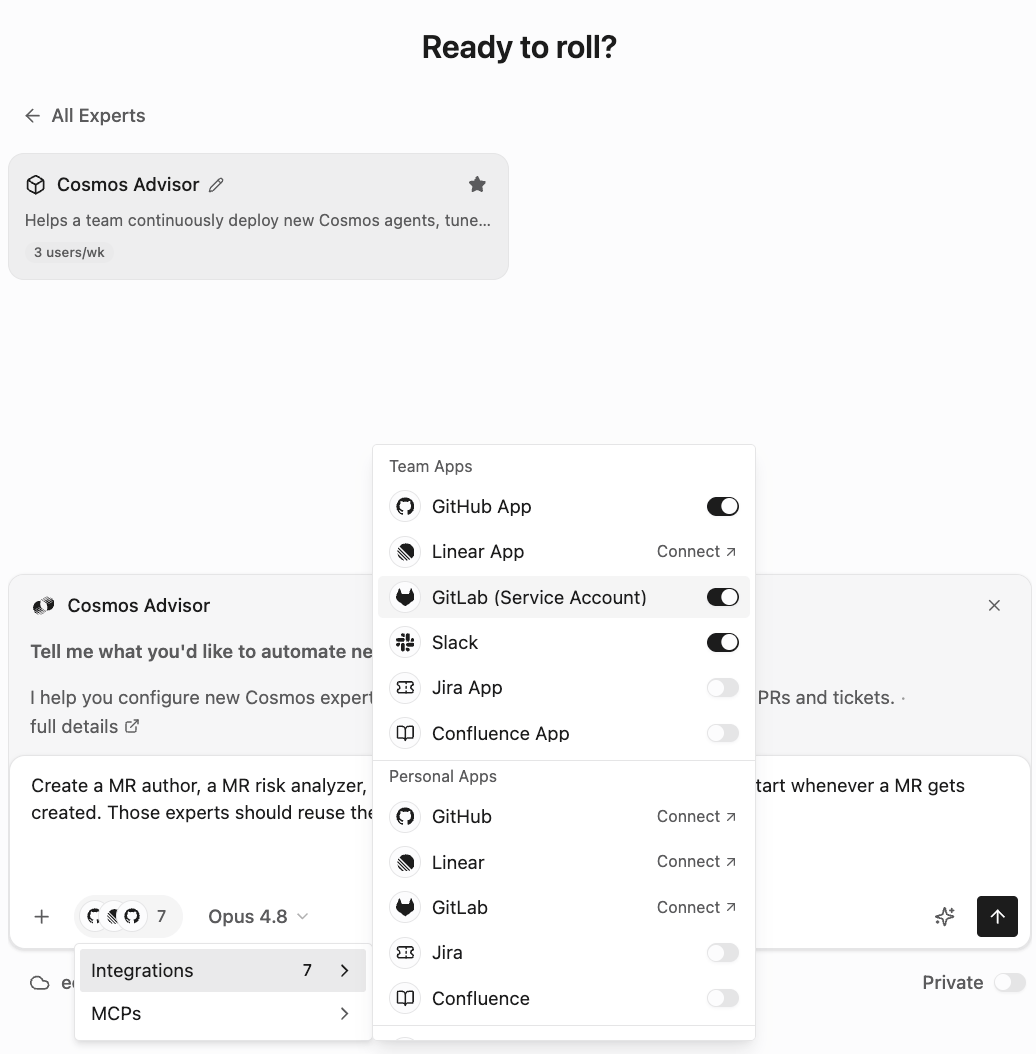 The Cosmos Advisor may ask you to clarify what experts to deploy, it may recommend to include other experts (ex: helper experts), and if an integration is missing it’ll guide you to add it. Ultimately you should see this at the end of your session:
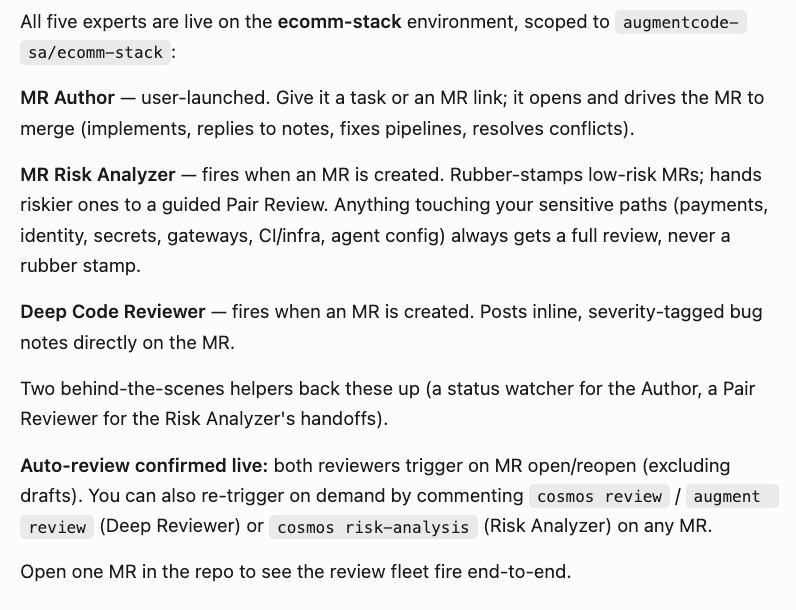 Go check where your experts are created:
* Go to Cosmos settings > Experts ([https://cosmos.augmentcode.com/experts](https://cosmos.augmentcode.com/experts)) > filter on expert name containing ‘gitlab’:
Go check where your experts are created:
* Go to Cosmos settings > Experts ([https://cosmos.augmentcode.com/experts](https://cosmos.augmentcode.com/experts)) > filter on expert name containing ‘gitlab’:
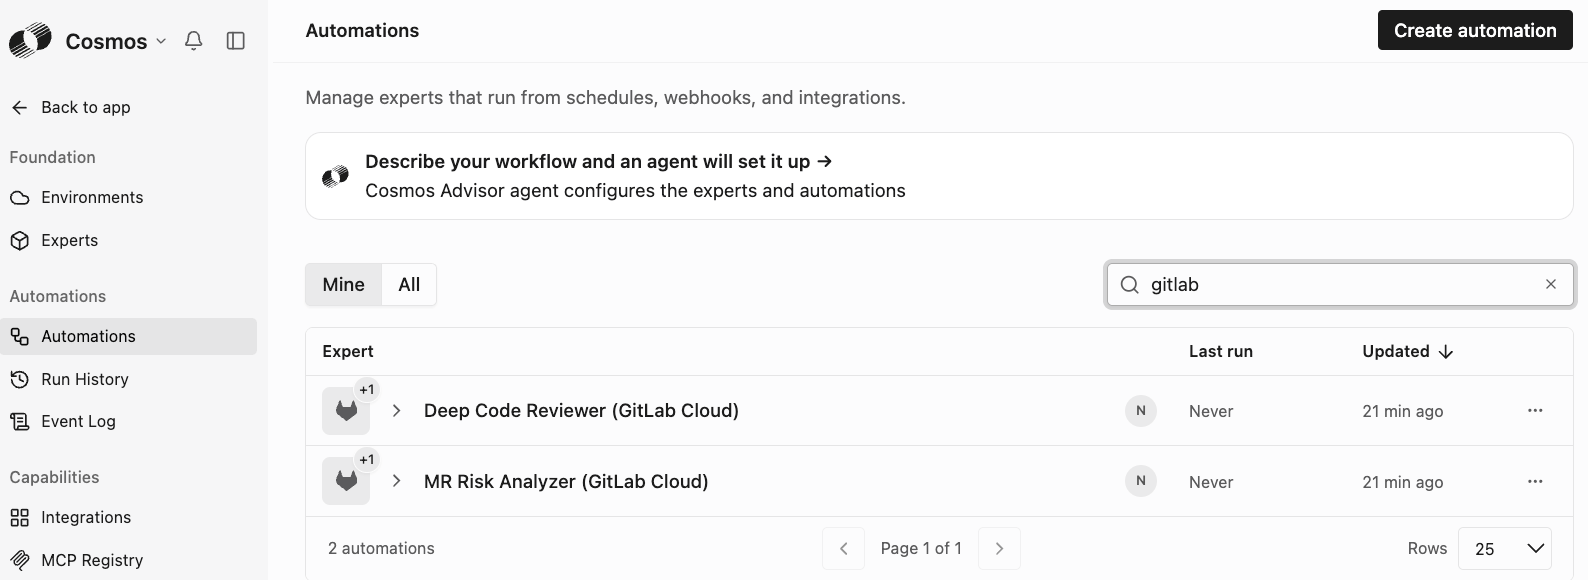
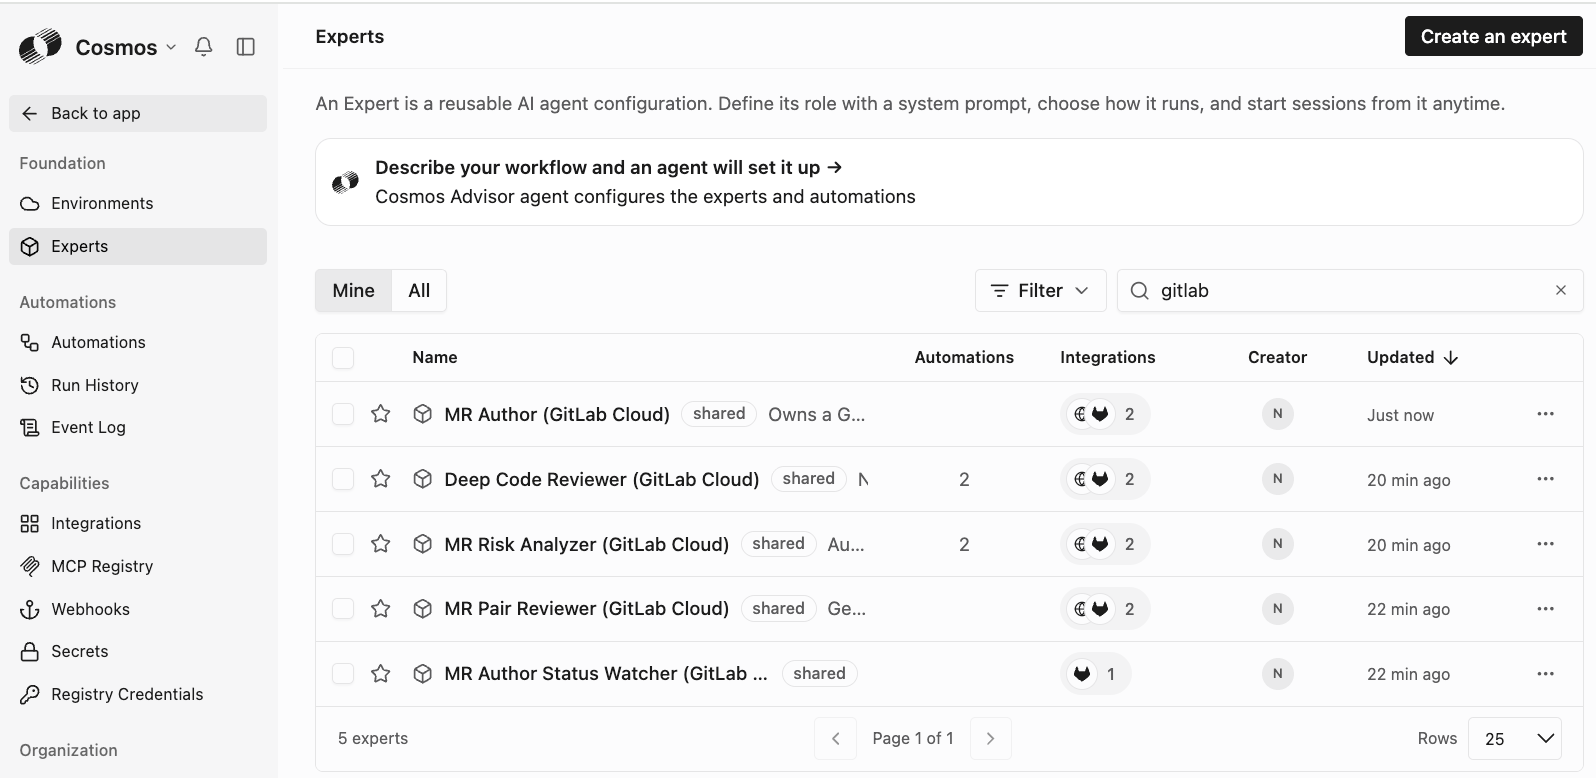 Cosmos Advisor configured some experts to react to Gitlab events, you can see those configured in Cosmos settings > Automations ([https://cosmos.augmentcode.com/automations](https://cosmos.augmentcode.com/automations))
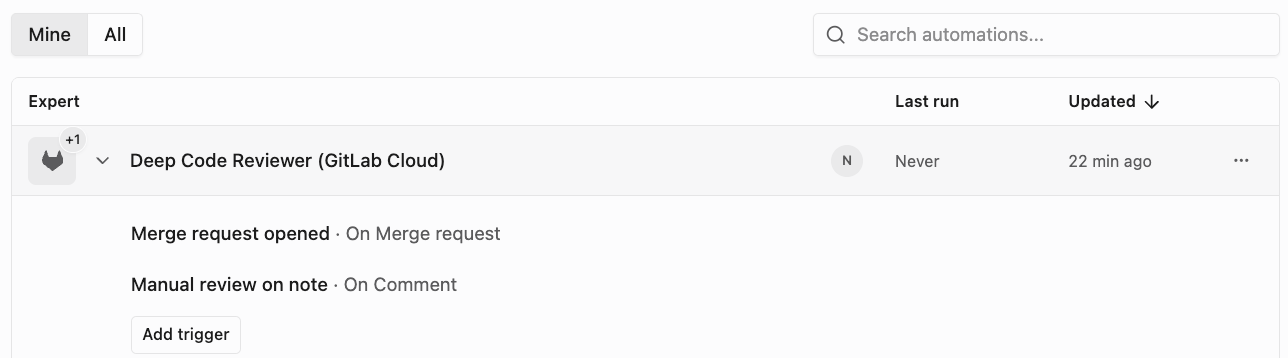
 If you expand the Deep Code Reviewer (Gitlab Cloud) you’ll see its triggers:
 ## Step 4 - Create a new MR and observe your experts at work
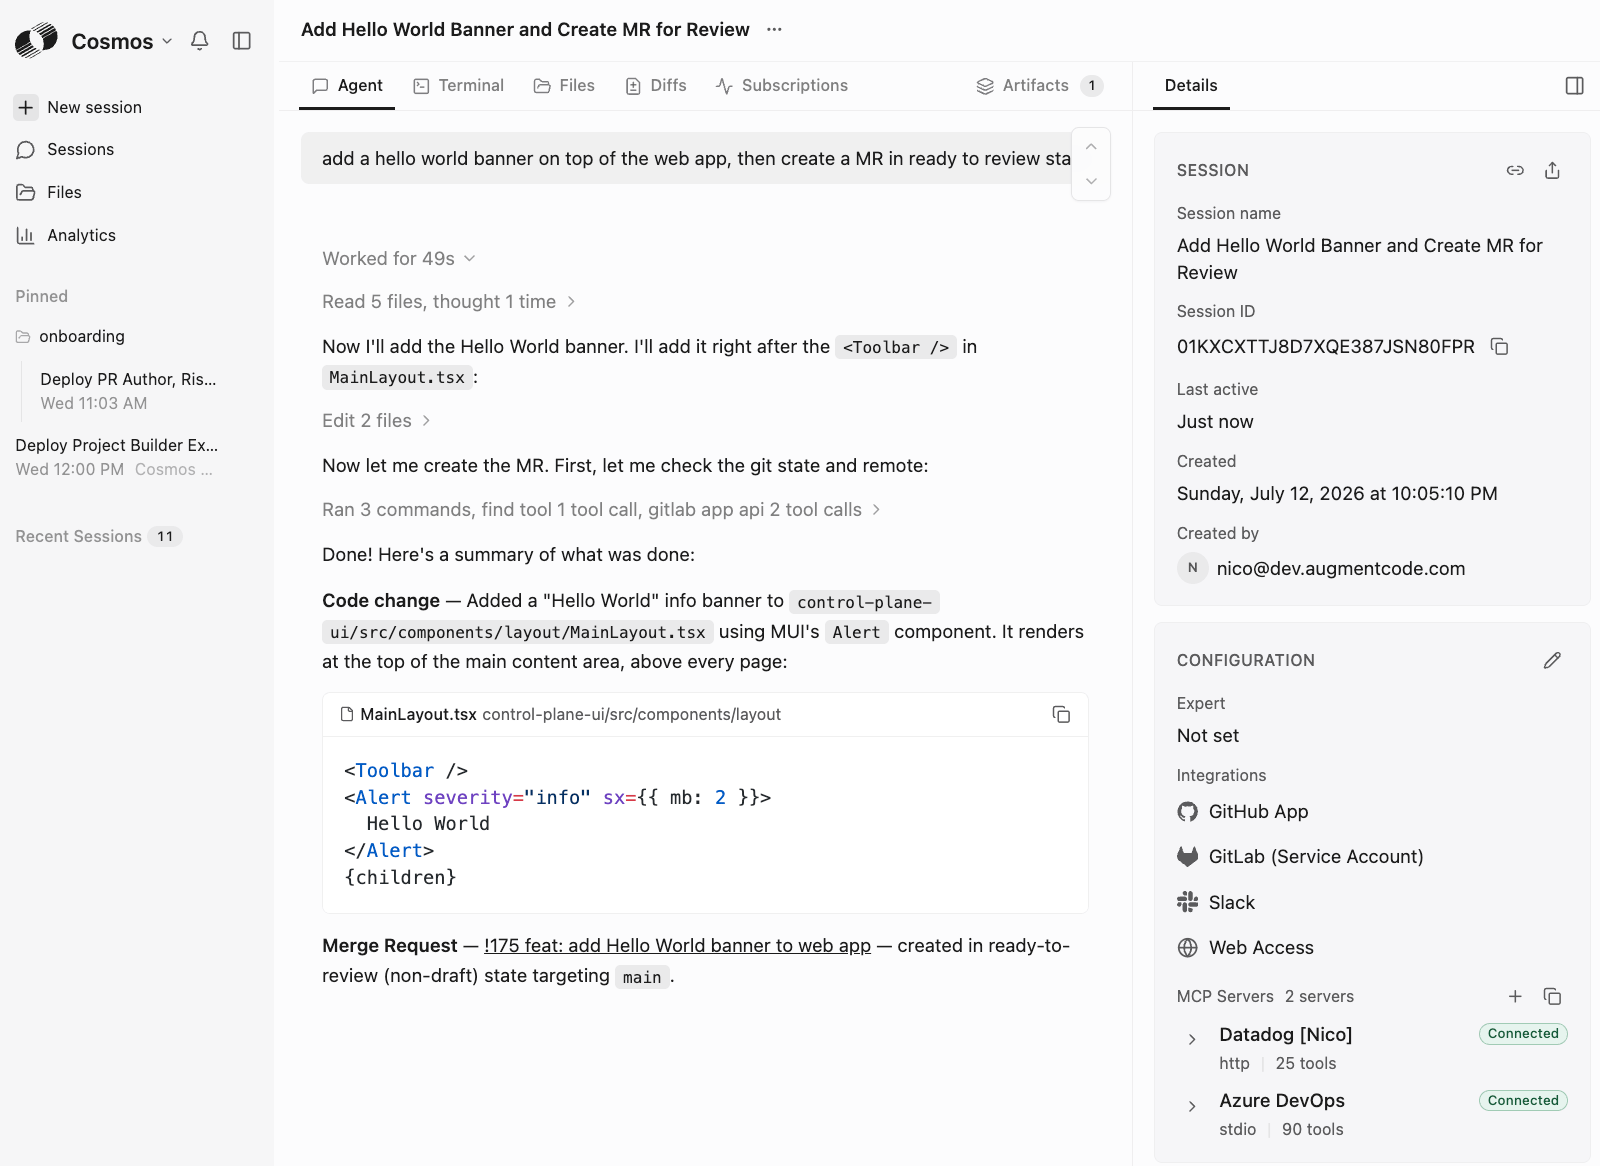
* Create a new session ([https://cosmos.augmentcode.com/home](https://cosmos.augmentcode.com/home)), implement a simple change ex: prompt with “add a hello world banner on top of the web app, then create a MR in ready to review state”
## Step 4 - Create a new MR and observe your experts at work
* Create a new session ([https://cosmos.augmentcode.com/home](https://cosmos.augmentcode.com/home)), implement a simple change ex: prompt with “add a hello world banner on top of the web app, then create a MR in ready to review state”
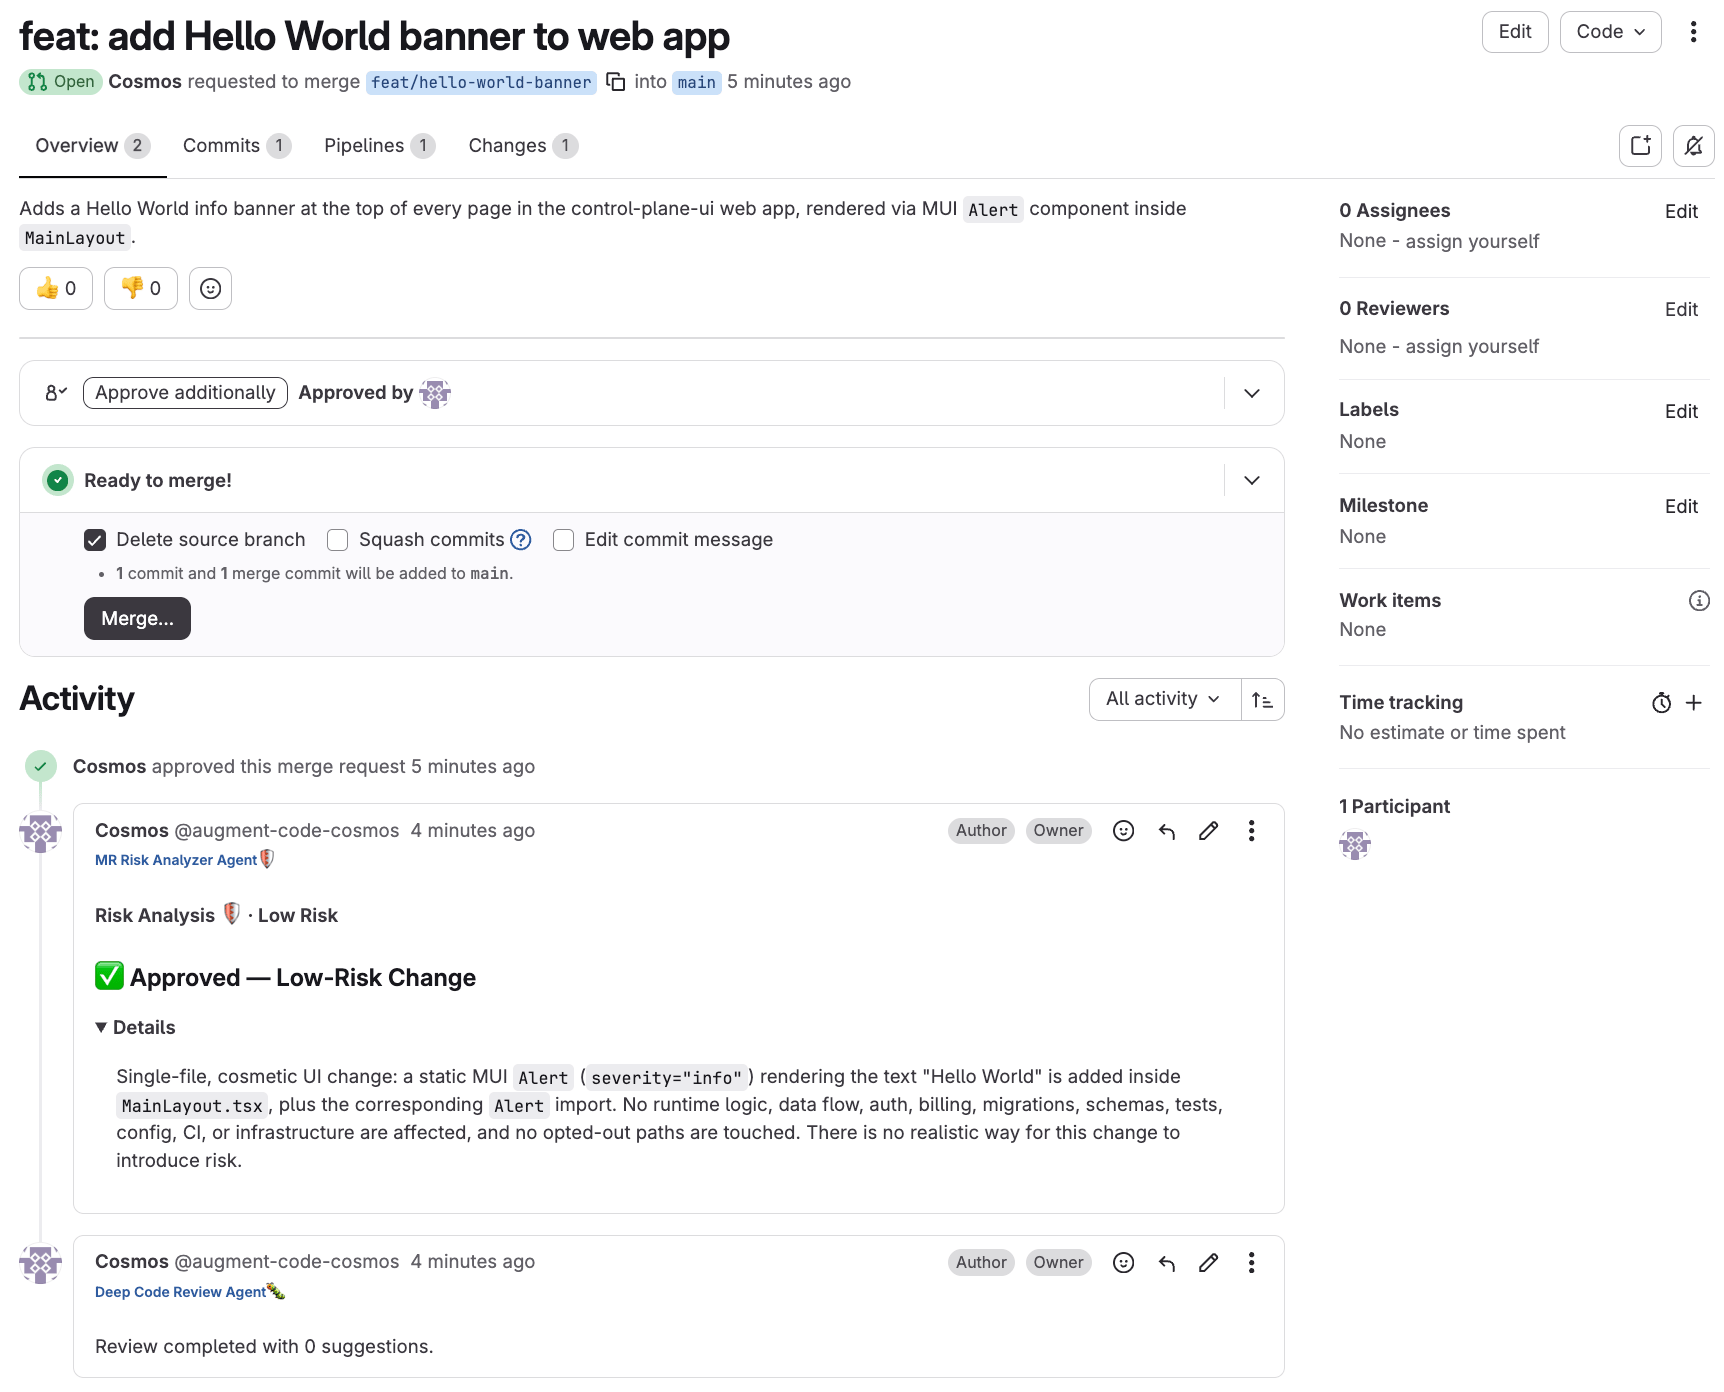
 Then open your MR, you’ll see the MR Risk analyzer expert commenting on the MR, followed by the Deep Code Review expert:
 Congratulations, you’ve configured the native Gitlab integration and your first MR experts!