> ## Documentation Index
> Fetch the complete documentation index at: https://docs.augmentcode.com/llms.txt
> Use this file to discover all available pages before exploring further.
# Integrate Datadog
## Introduction
In this page we’ll learn how to configure 2 things:
* Get Datadog to push events to Augment Cosmos via webhooks
```mermaid theme={null}
sequenceDiagram
autonumber
participant J as Datadog
participant AC as Augment Cosmos
J->>AC: Webhook: Issue Created (Ticket JSON)
```
* Get Augment Cosmos to interact with Datadog via the Datadog MCP server
```mermaid theme={null}
sequenceDiagram
autonumber
participant J as Datadog
participant AC as Augment Cosmos
AC->>J: Read logs via Datadog MCP server
J-->>AC: 200 OK (Sync Complete)
```
## Prerequisites
* Cosmos side: any user who can self-create webhooks and MCP servers
* Datadog side: any user with **Datadog Admin Role** or at least those permissions:
* To create a service account: **Service Account Write** and \*\*User Manage Access \*\*permissions
* To create an Organization API key: **API Keys Write** and **User Application Keys Write** permissions
* To configure a webhook: **Integrations Manage** permission
## Step 1 - Configure Datadog to notify a Cosmos Webhook
Let’s create a new webhook in Cosmos (so Cosmos can listen to Datadog events).
Configuration steps:
* Go to Cosmos ([https://cosmos.augmentcode.com](https://cosmos.augmentcode.com)) > Settings > Organization settings > Configuration > Capabilities > Webhooks ([https://cosmos.augmentcode.com/webhooks](https://cosmos.augmentcode.com/webhooks)) > Create Webhook
* Description “Datadog”
* Type: Bearer Token
* Keep shared toggled on
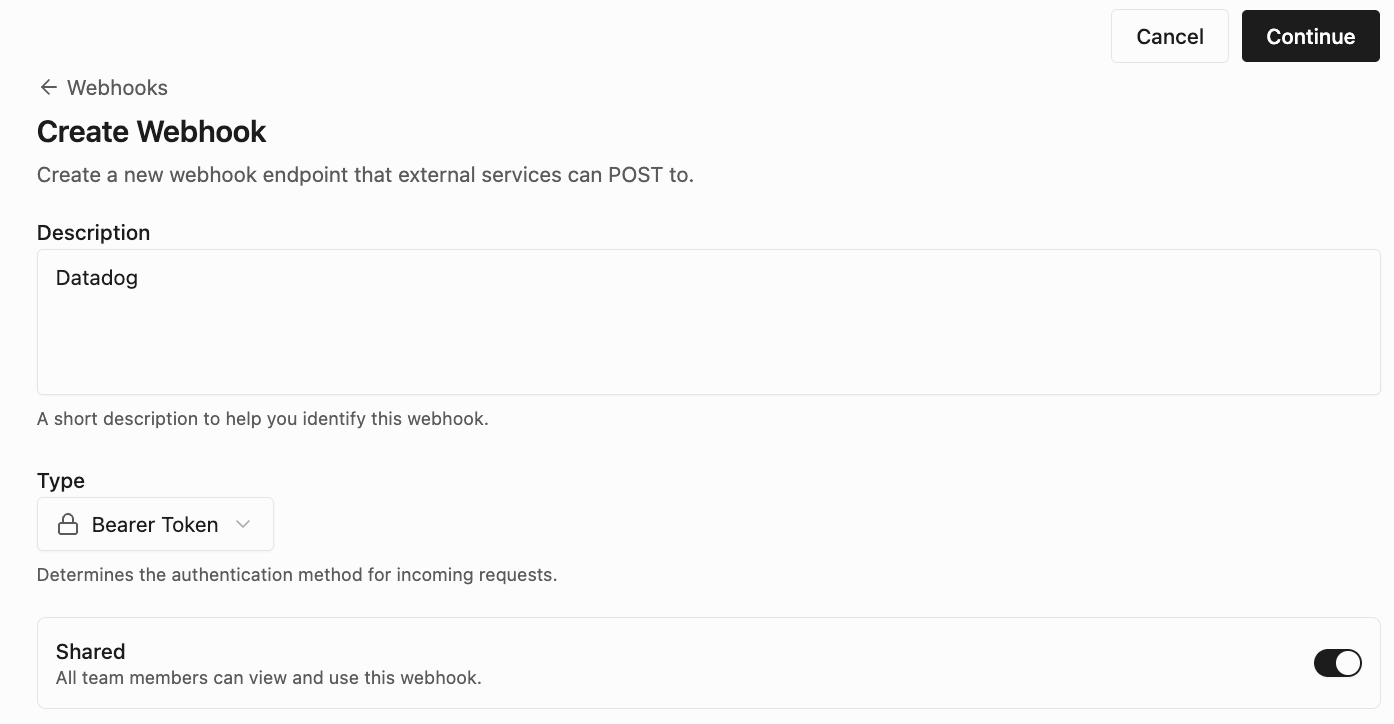 * That gives us a url to POST with a given Bearer token to pass as HTTP header. Curl request would look like:
```shell theme={null}
curl -X POST https://XXX.api.augmentcode.com/webhooks/XXX \
-H "Authorization: Bearer XXX" \
-H "Content-Type: application/json" \
-d '{"event": "test", "data": "your payload here"}'
```
\*\*Create a new webhook config in Datadog \*\*(so Datadog can POST to a given url when certain Datadog events occur)
* In Datadog
* Go to Integrations > search for Webhooks (ex: [https://us5.datadoghq.com/integrations?search=webhook\&integrationId=webhooks](https://us5.datadoghq.com/integrations?search=webhook\&integrationId=webhooks)) > Configure tab
* That gives us a url to POST with a given Bearer token to pass as HTTP header. Curl request would look like:
```shell theme={null}
curl -X POST https://XXX.api.augmentcode.com/webhooks/XXX \
-H "Authorization: Bearer XXX" \
-H "Content-Type: application/json" \
-d '{"event": "test", "data": "your payload here"}'
```
\*\*Create a new webhook config in Datadog \*\*(so Datadog can POST to a given url when certain Datadog events occur)
* In Datadog
* Go to Integrations > search for Webhooks (ex: [https://us5.datadoghq.com/integrations?search=webhook\&integrationId=webhooks](https://us5.datadoghq.com/integrations?search=webhook\&integrationId=webhooks)) > Configure tab
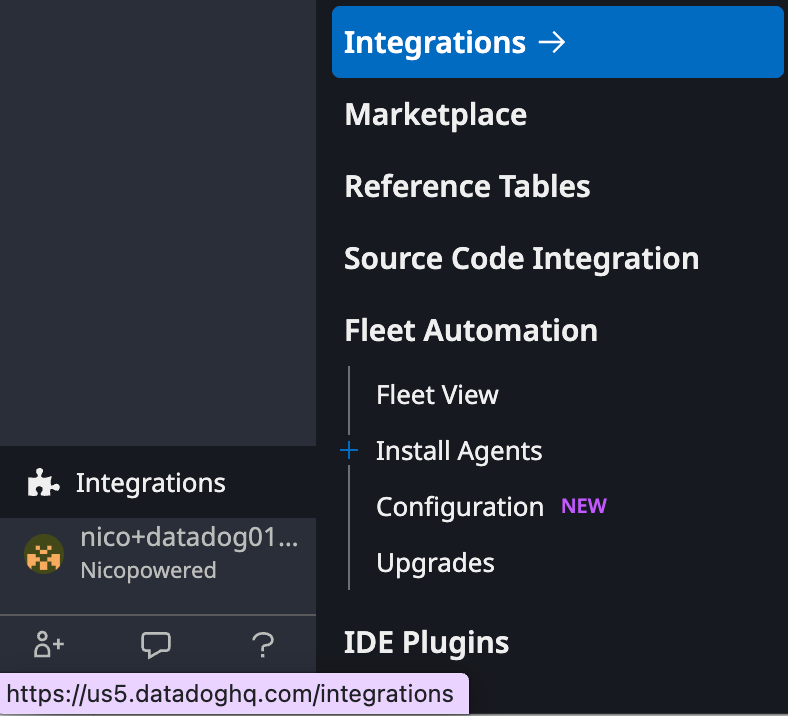
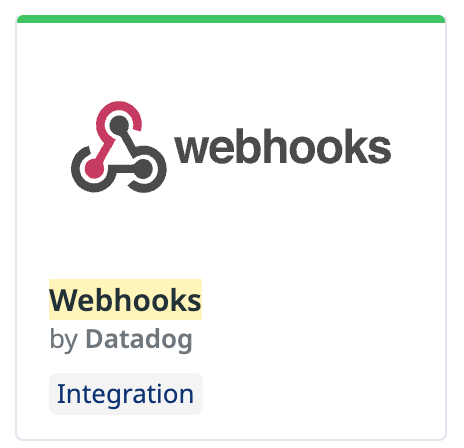 * Variables tab > New Variable and create variable **\$AUTH\_BEARER\_TOKEN** with value **Bearer \**
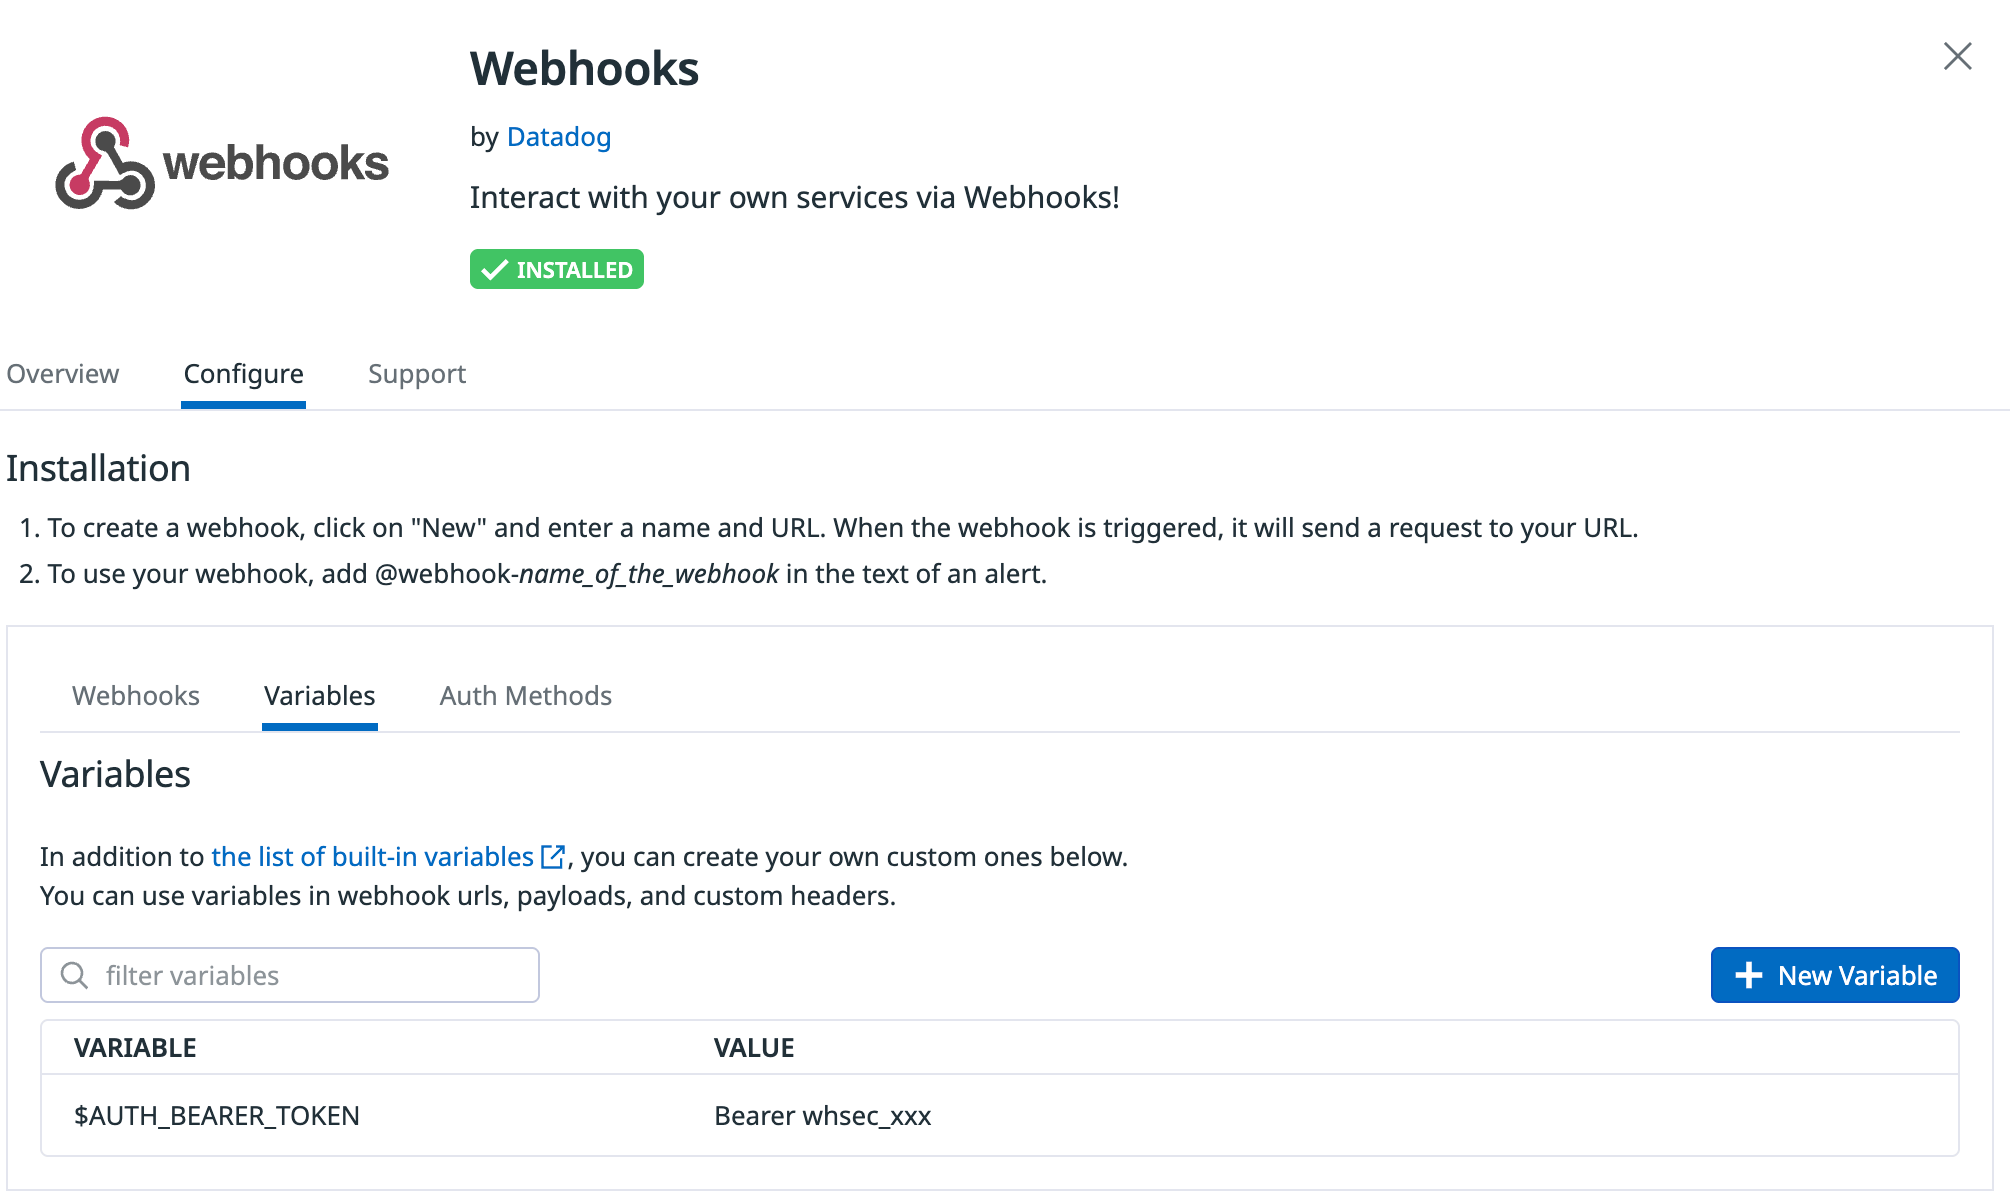 * Webhooks tab > New > Add > Enter the Cosmos webhook url, keep auth method empty, select Custom header and add
```plain text theme={null}
{
"Authorization": "$AUTH_BEARER_TOKEN"
}
```
* Webhooks tab > New > Add > Enter the Cosmos webhook url, keep auth method empty, select Custom header and add
```plain text theme={null}
{
"Authorization": "$AUTH_BEARER_TOKEN"
}
```
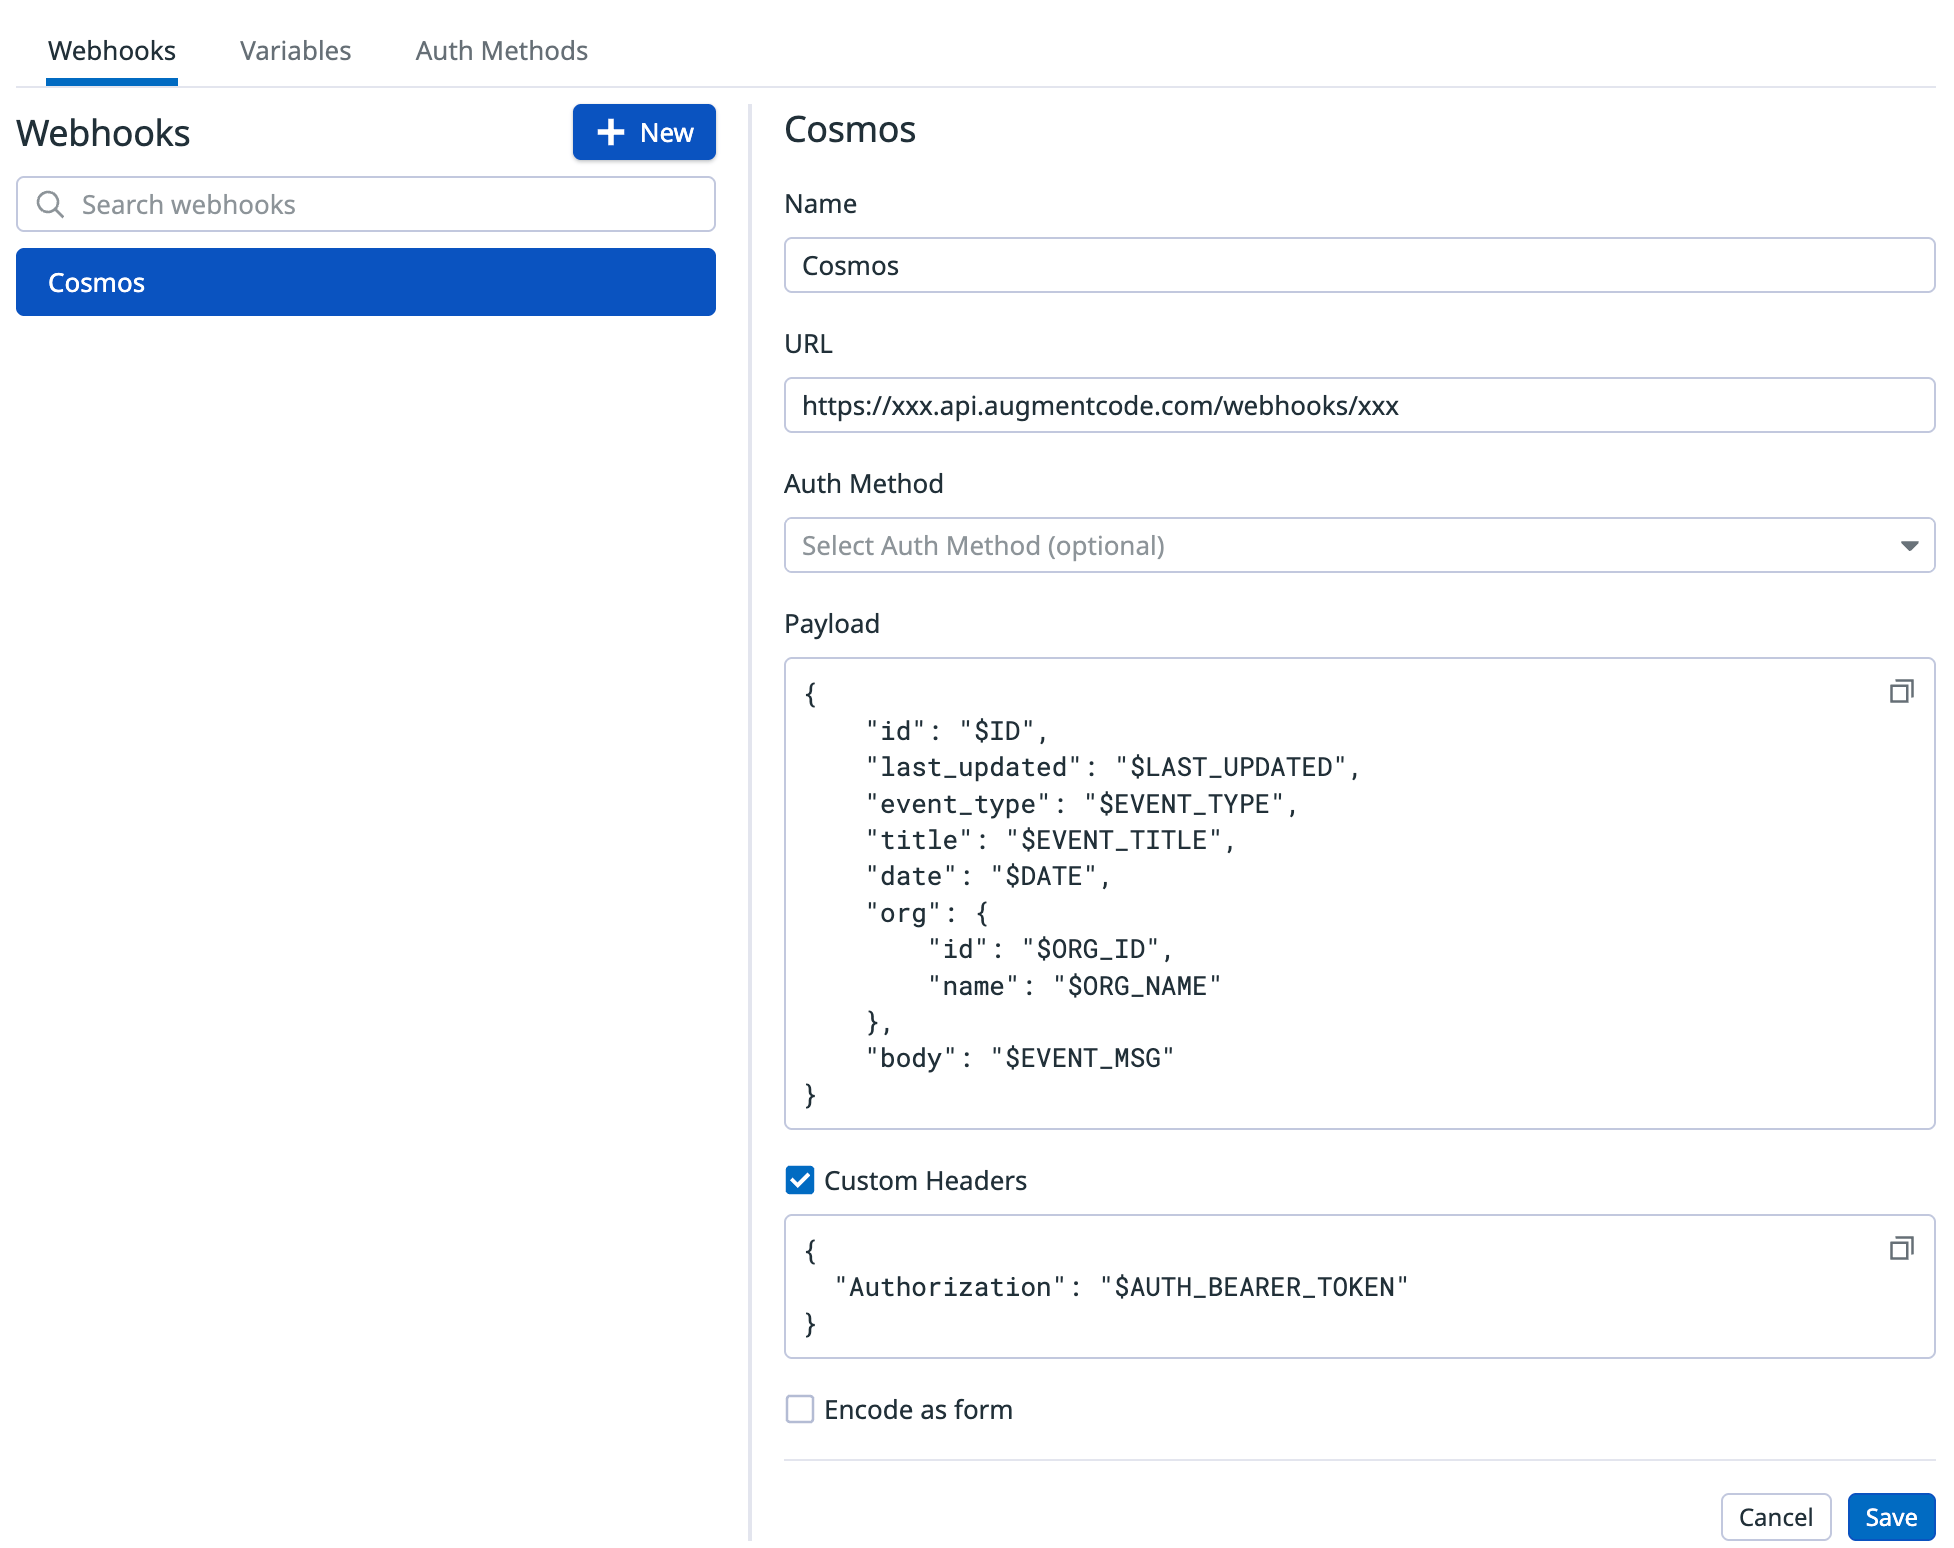 * Click on Save
Now let’s run a test with a Datadog monitor:
* Datadog home > Monitoring > New monitor
* Click on Save
Now let’s run a test with a Datadog monitor:
* Datadog home > Monitoring > New monitor
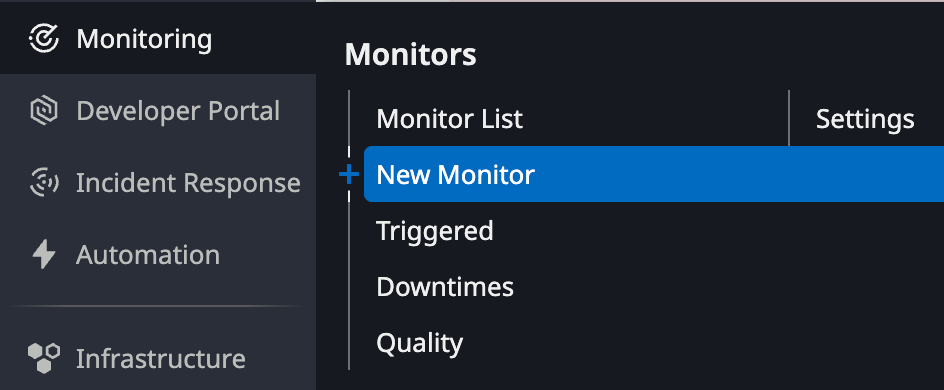 * Enter those parameters
* detection method: **Threshold Alert**
* Set alert conditions > Alert threshold > enter value “**1**”
* Configure notifications & automations
* Monitor name: Test Cosmos webhook config
* Edit section: type in @ and select your webhook name in the drop down list
* Enter those parameters
* detection method: **Threshold Alert**
* Set alert conditions > Alert threshold > enter value “**1**”
* Configure notifications & automations
* Monitor name: Test Cosmos webhook config
* Edit section: type in @ and select your webhook name in the drop down list
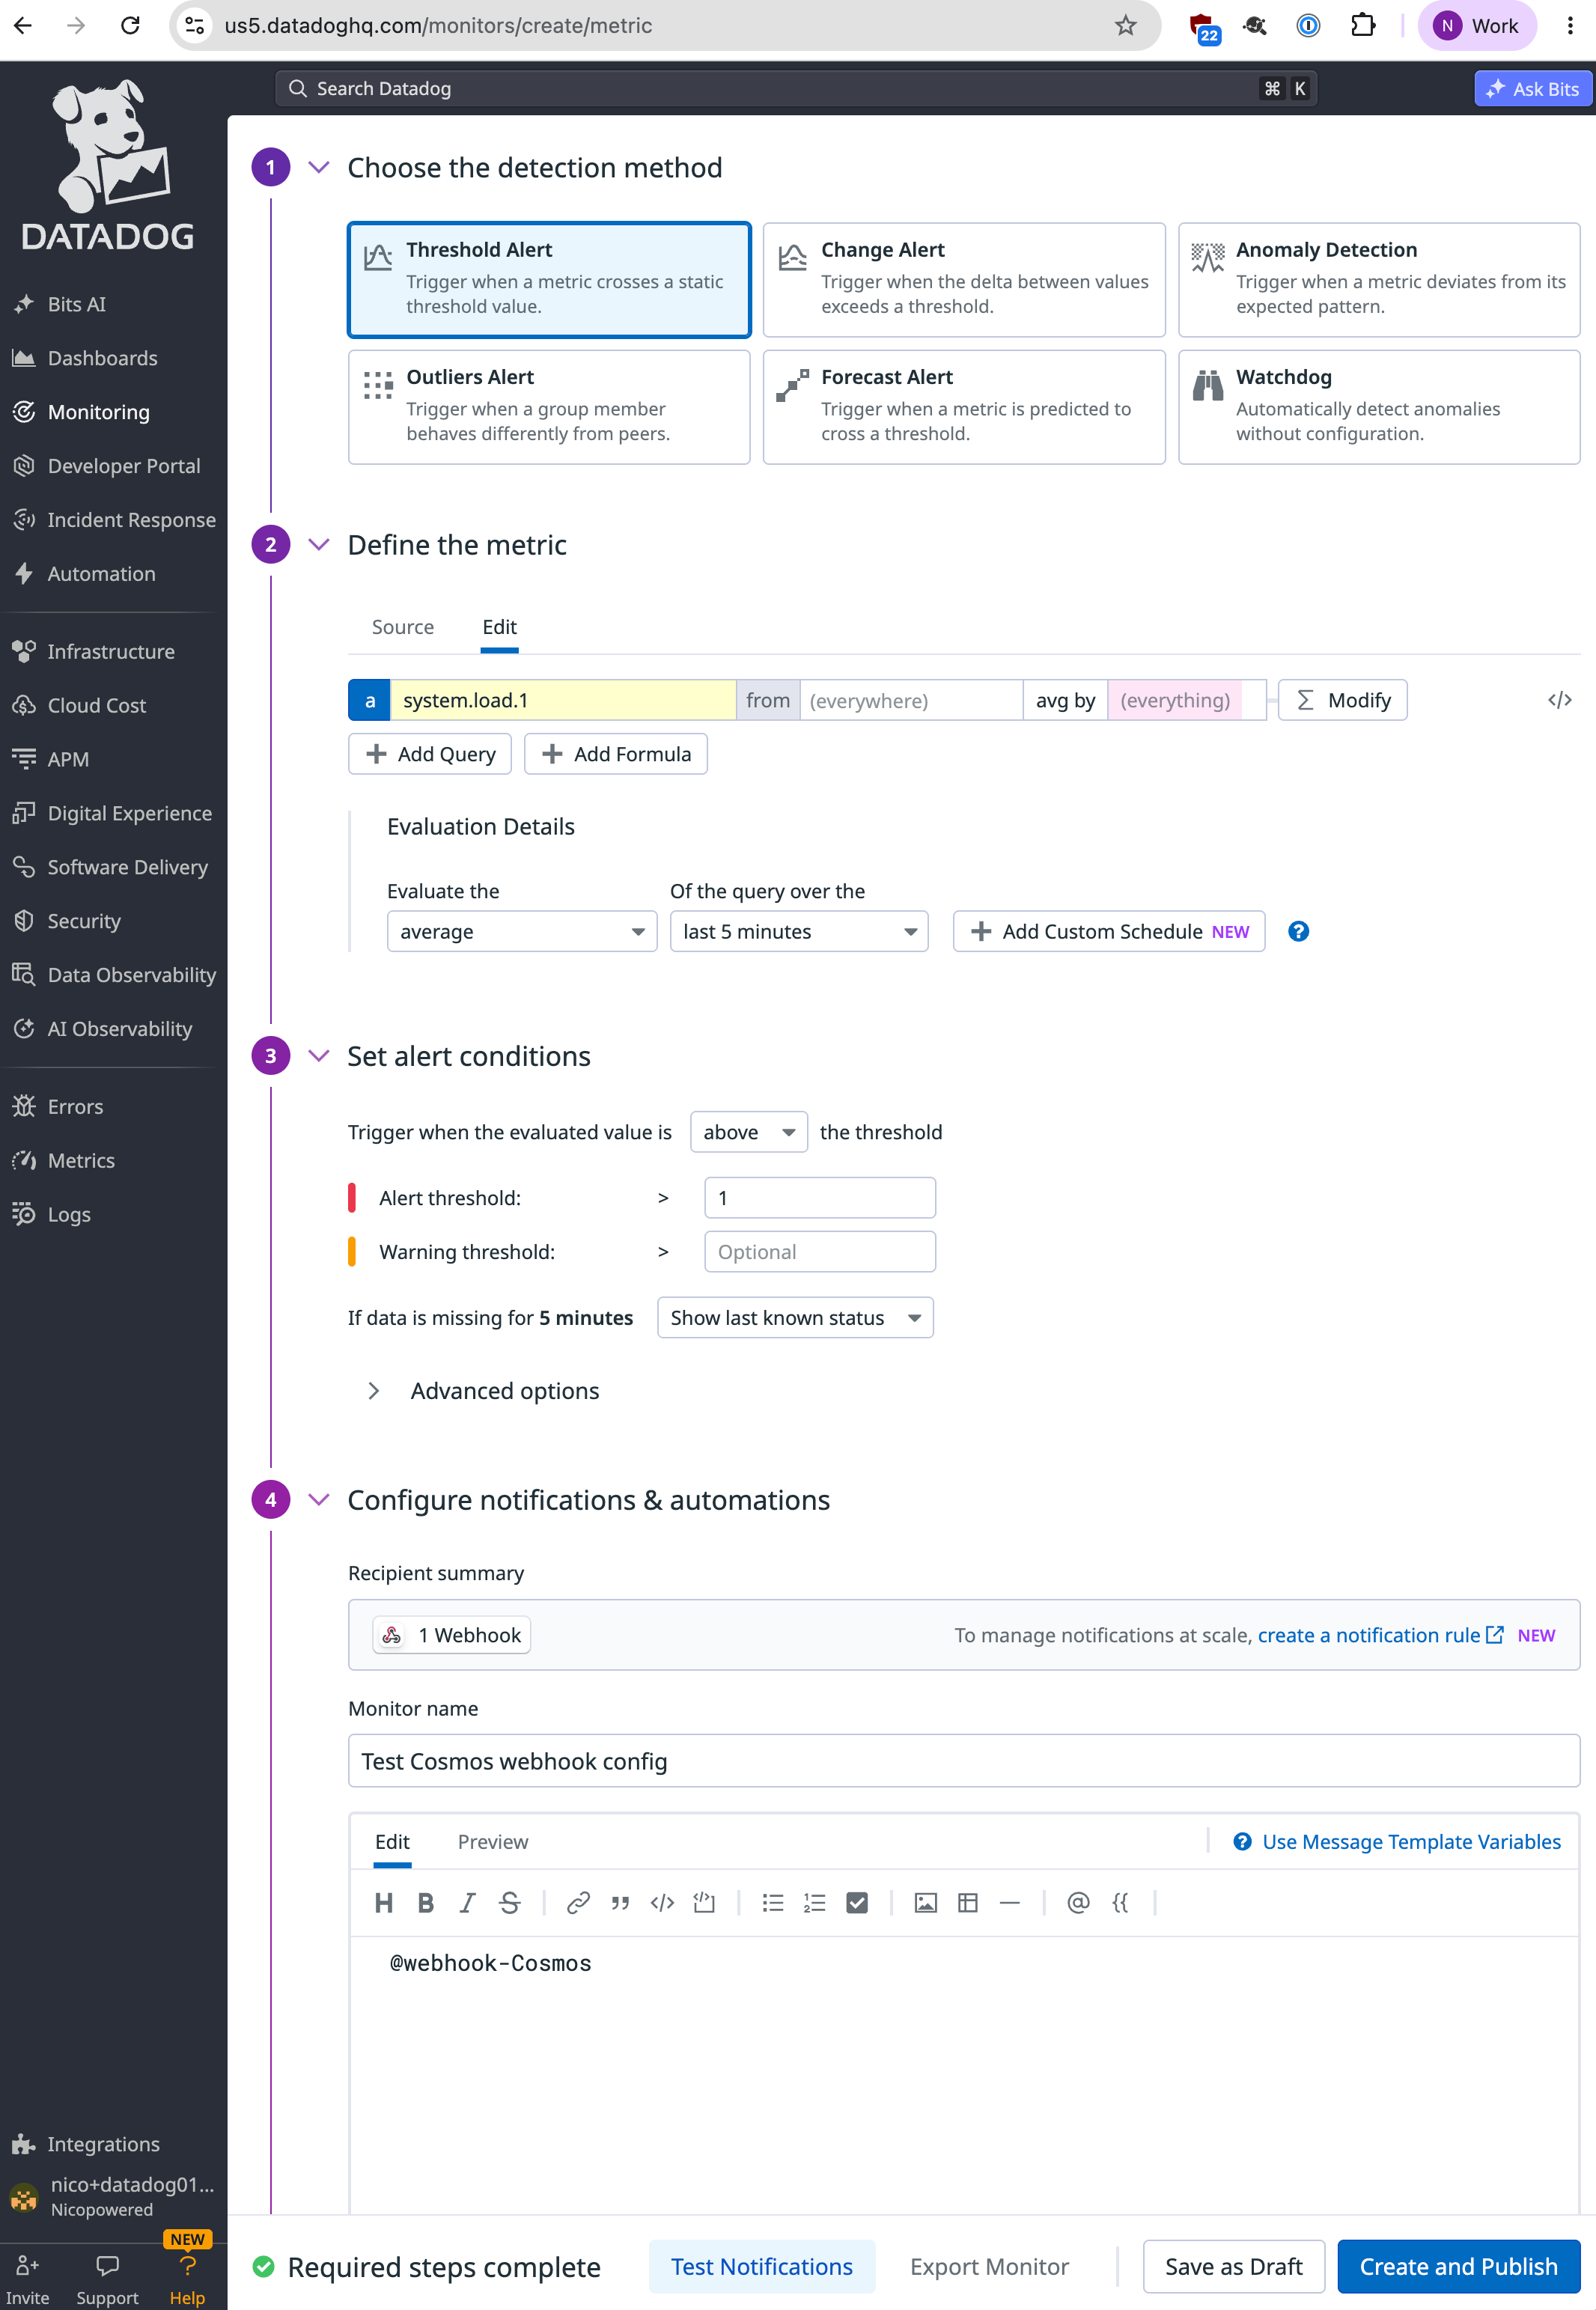 * Now click on Test Notifications > Run Test
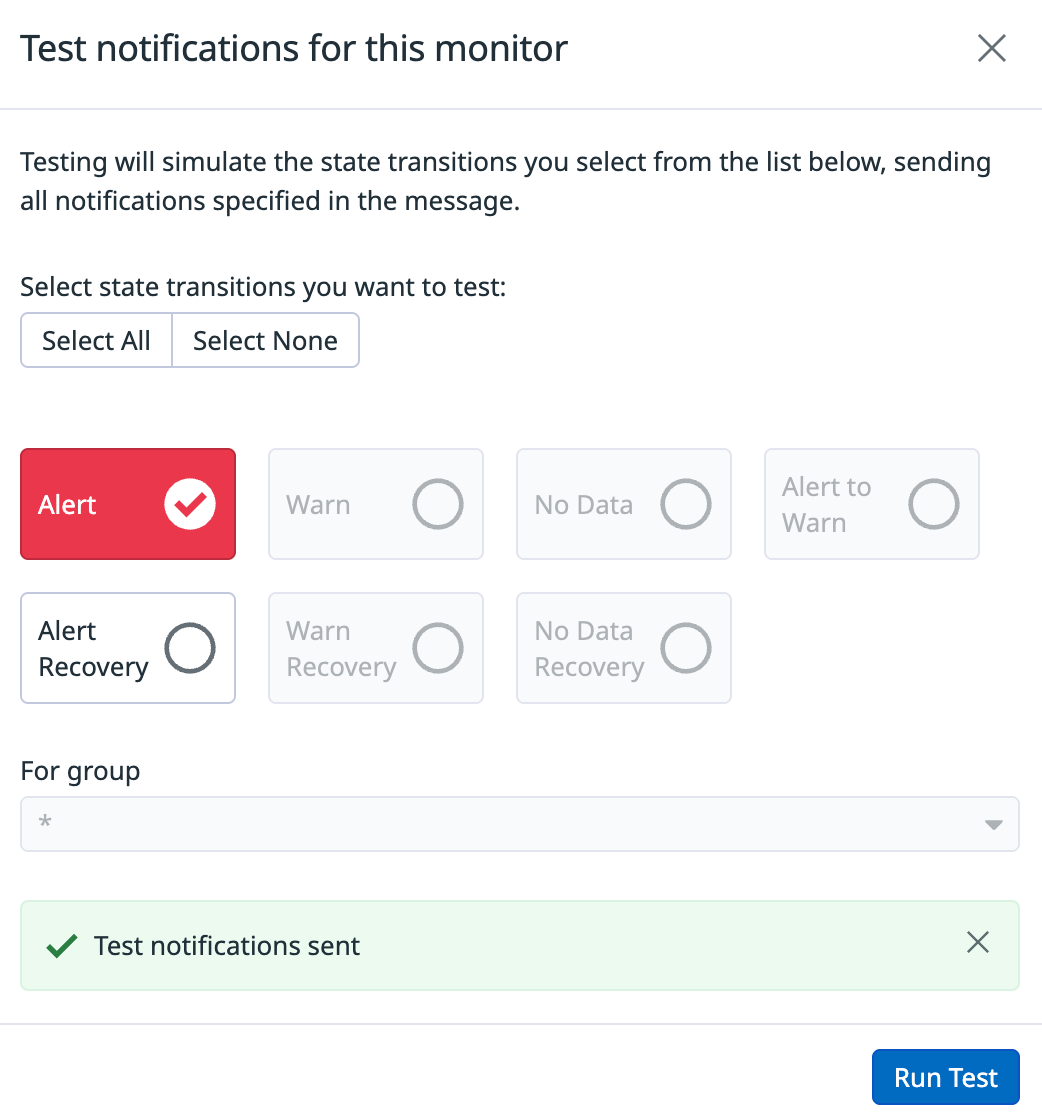 Now let’s check that Cosmos received that event.
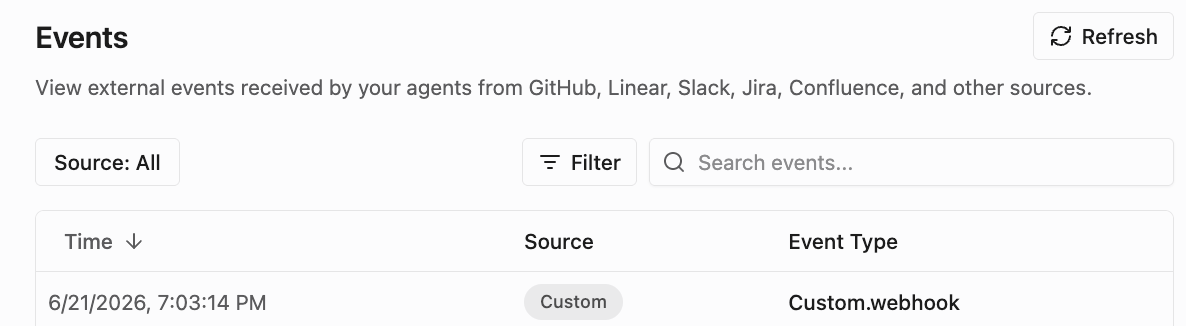
* Go to Cosmos > Settings > Organization Settings > Automations > Event Log [https://cosmos.augmentcode.com/automations/events](https://cosmos.augmentcode.com/automations/events). You should see a new Custom.webhook entry
Now let’s check that Cosmos received that event.
* Go to Cosmos > Settings > Organization Settings > Automations > Event Log [https://cosmos.augmentcode.com/automations/events](https://cosmos.augmentcode.com/automations/events). You should see a new Custom.webhook entry
 * Click on that event entry and you’ll see the test payload from Datadog
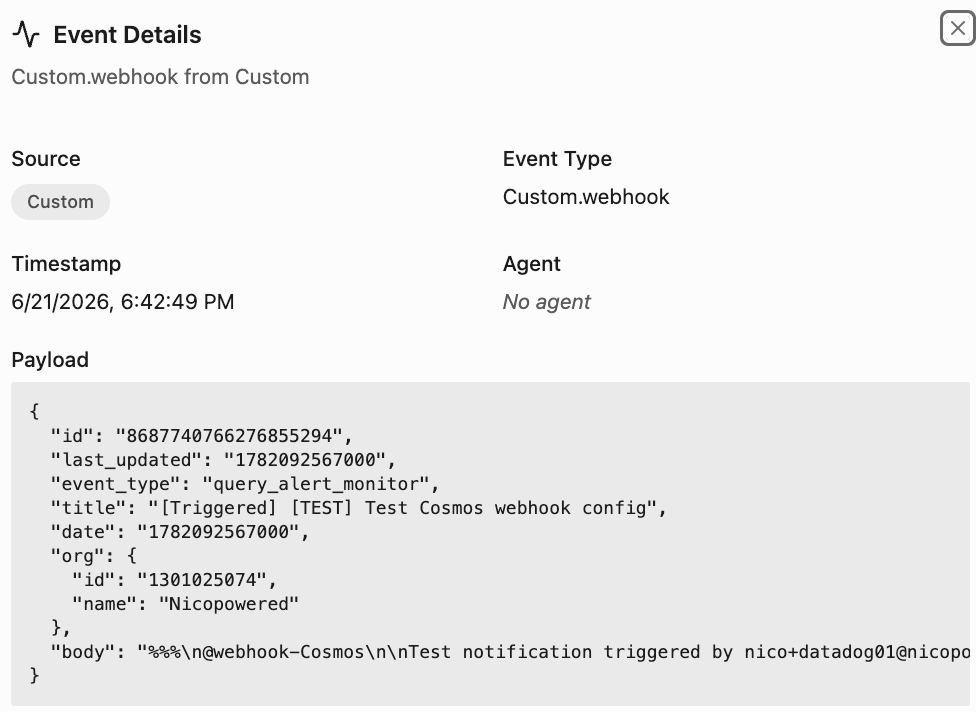 At this point Datadog can invoke Cosmos ✅
## Step 2: Integrate with Datadog via a Service Account
For Cosmos to interact with Datadog via a Datadog service account we’ll leverage the Datadog remote MCP server and authenticate it with said service account as we’d want Cosmos to run headless automations.
We’ll need 3 parameters:
* A Datadog tenant region
* A Datadog organization API key
* A Datadog service account application key
You should be able to tell what is your Datadog region from the dashboard url. If it’s [https://us5.datadoghq.com/monitors/create/metric](https://us5.datadoghq.com/monitors/create/metric) then your region is us5. We’ll use that value for the rest of this tutorial, just remember to replace it with yours.
Now let’s create an organization API key:
* Click on your username bottom left > Organization Settings > API Keys
At this point Datadog can invoke Cosmos ✅
## Step 2: Integrate with Datadog via a Service Account
For Cosmos to interact with Datadog via a Datadog service account we’ll leverage the Datadog remote MCP server and authenticate it with said service account as we’d want Cosmos to run headless automations.
We’ll need 3 parameters:
* A Datadog tenant region
* A Datadog organization API key
* A Datadog service account application key
You should be able to tell what is your Datadog region from the dashboard url. If it’s [https://us5.datadoghq.com/monitors/create/metric](https://us5.datadoghq.com/monitors/create/metric) then your region is us5. We’ll use that value for the rest of this tutorial, just remember to replace it with yours.
Now let’s create an organization API key:
* Click on your username bottom left > Organization Settings > API Keys
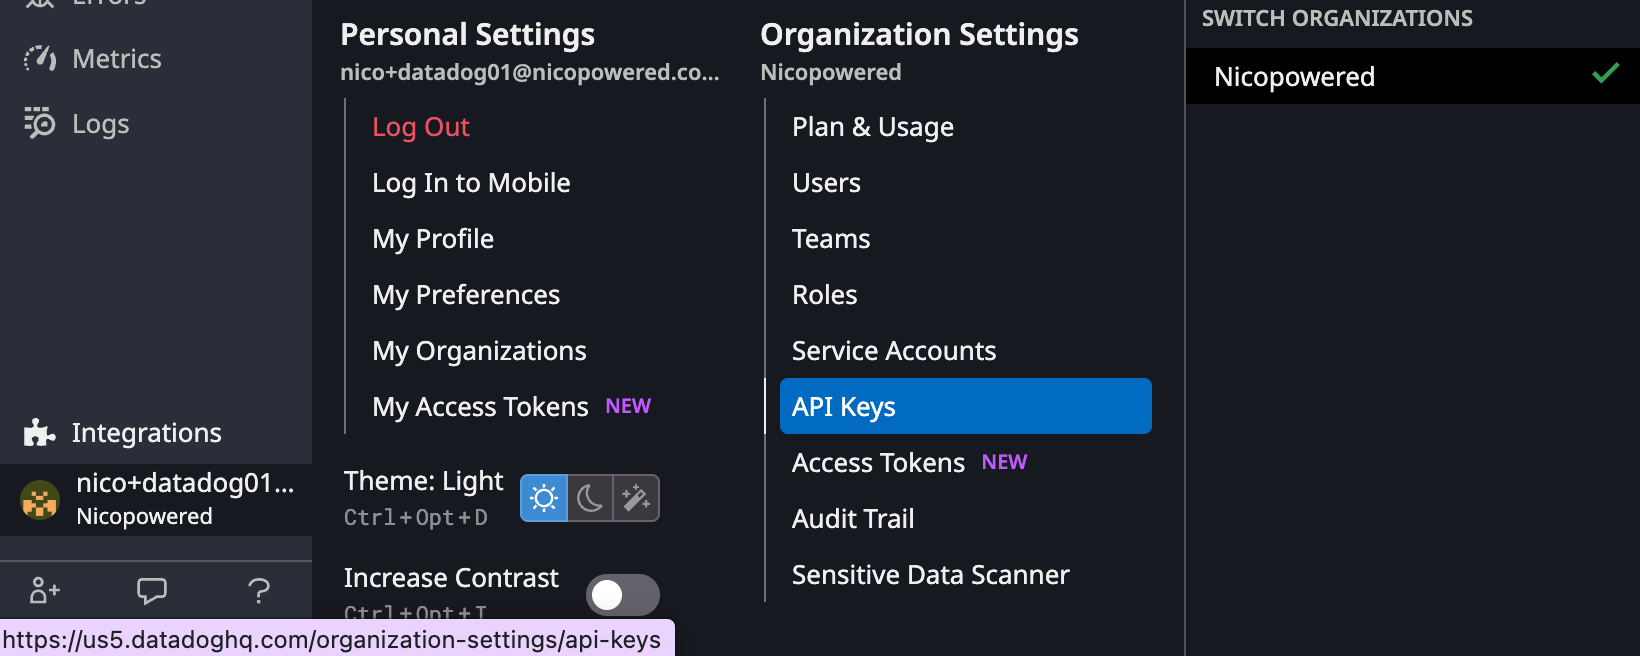 * Click on New Key > Enter name: Cosmos > Create Key
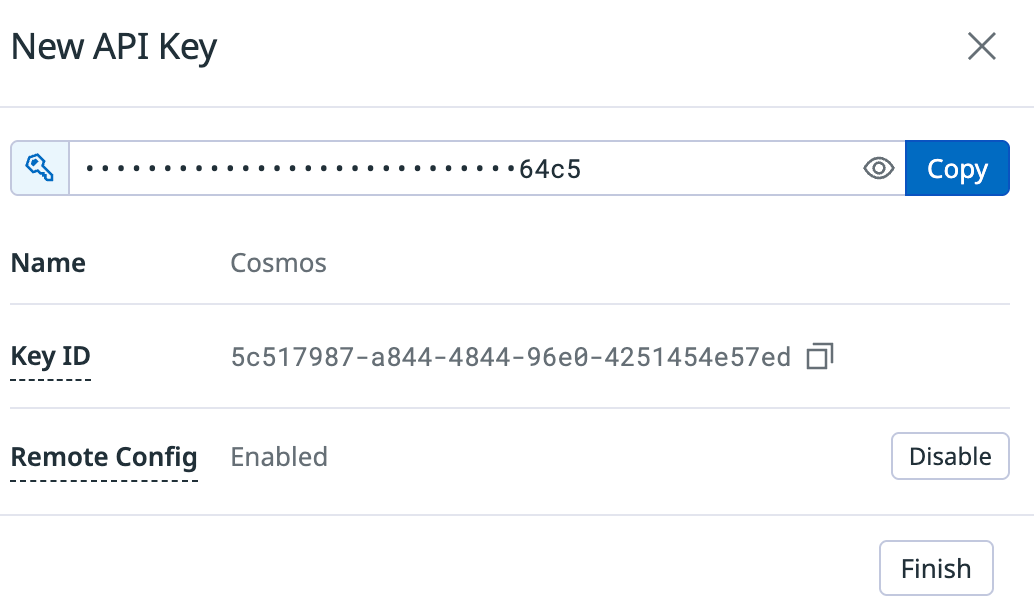 Copy your API Key, we’ll need it later on.
Now let’s create a service account application key:
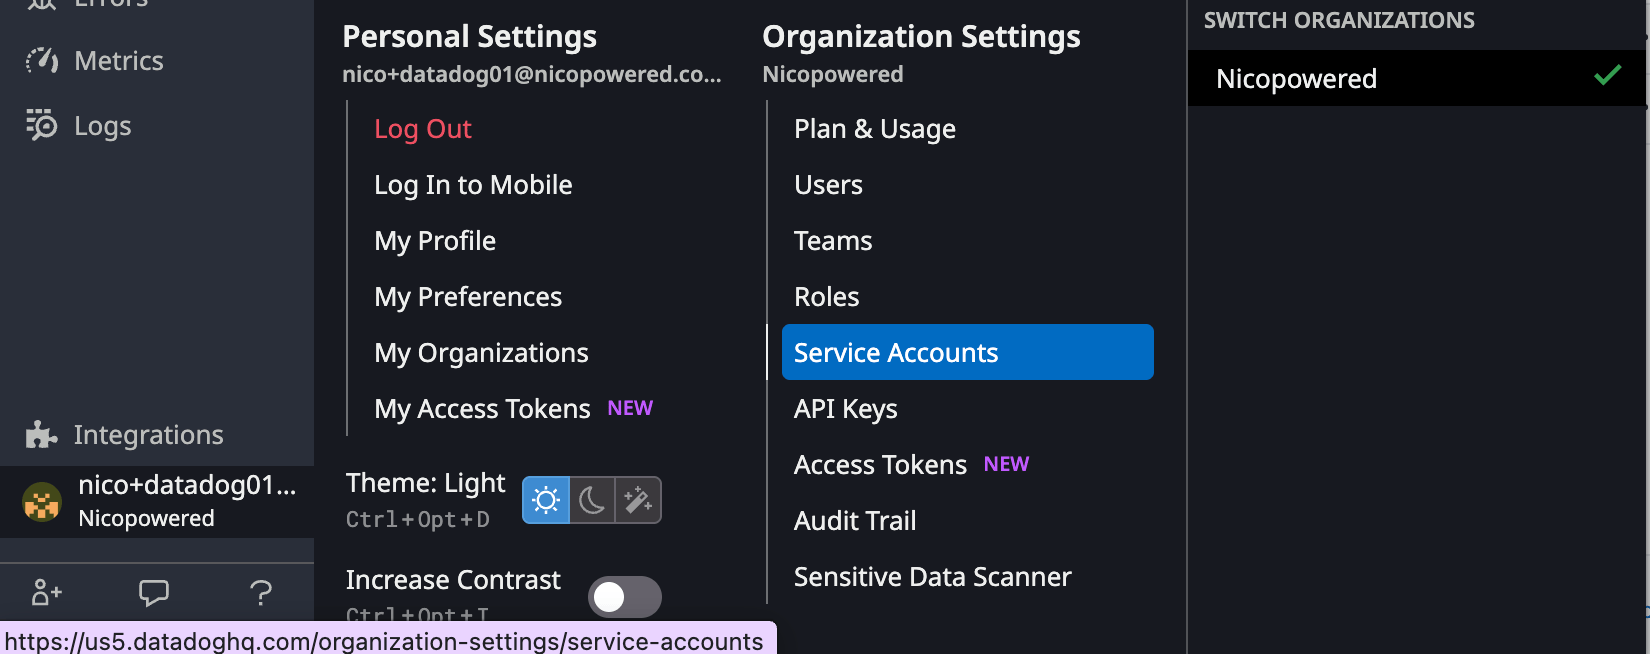
* Click on your username bottom left > Organization Settings > Service Accounts
Copy your API Key, we’ll need it later on.
Now let’s create a service account application key:
* Click on your username bottom left > Organization Settings > Service Accounts
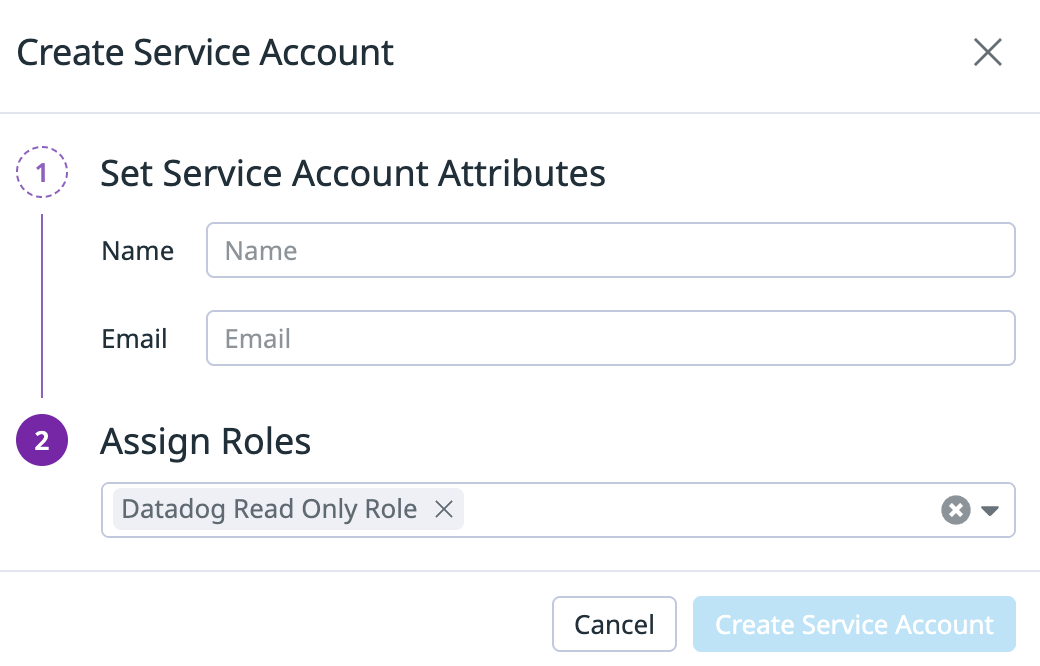
 * Click on New Service Account > Enter a name, email, assign role \*\*Datadog Read Only Role \*\*> Create Service acccount
 * In the section Application Keys > Click on New Key > Name: Cosmos > Click on Create Key
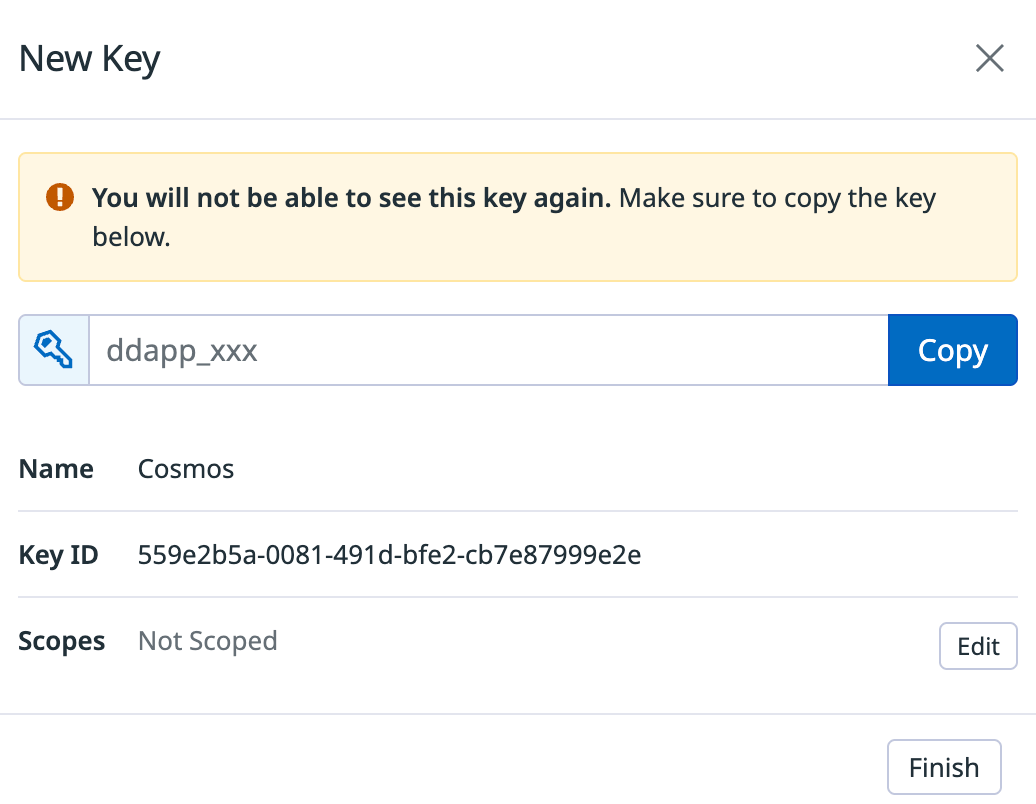 * Stay on that view. In front of Scopes click on Edit > make sure that all those scopes are selected:
* **mcp\_read**
* **monitors\_read**
* **dashboards\_read**
* **metrics\_read**
* **events\_read**
* **logs\_read\_data**
* **incident\_read**
* Then click on Save. You should see this:
* Stay on that view. In front of Scopes click on Edit > make sure that all those scopes are selected:
* **mcp\_read**
* **monitors\_read**
* **dashboards\_read**
* **metrics\_read**
* **events\_read**
* **logs\_read\_data**
* **incident\_read**
* Then click on Save. You should see this:
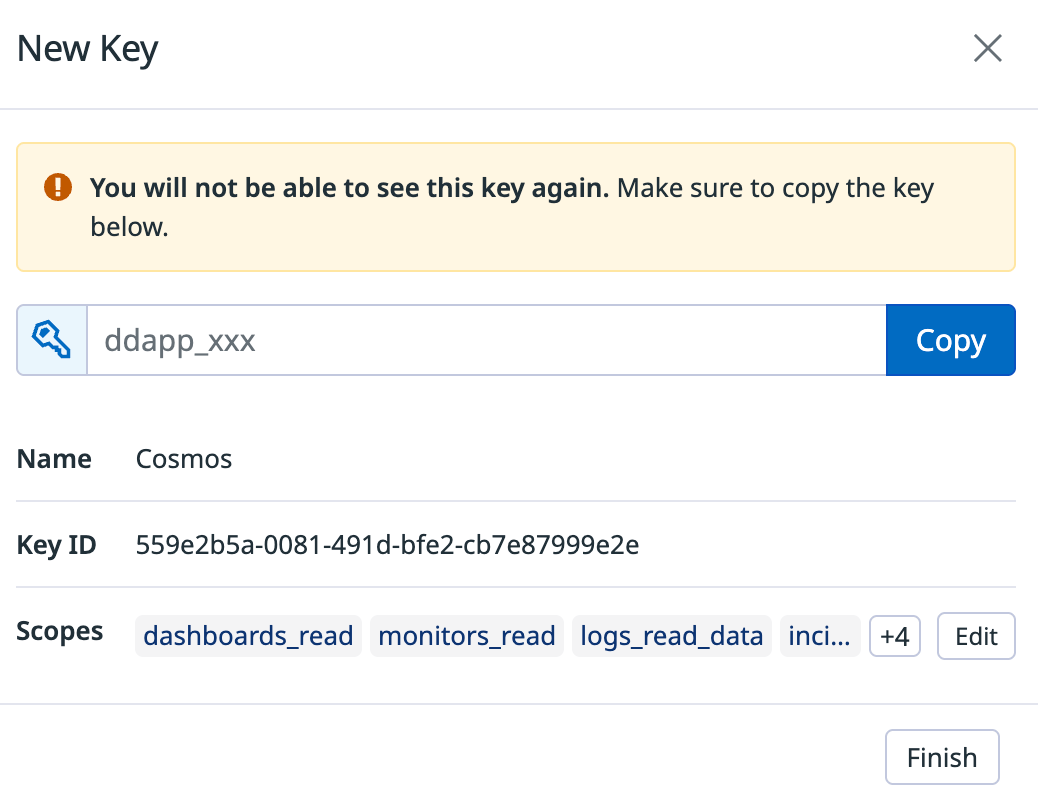 * Click on Copy to copy the application key (we’ll need it shortly), then click on Finish. Your Service account view should look like this:
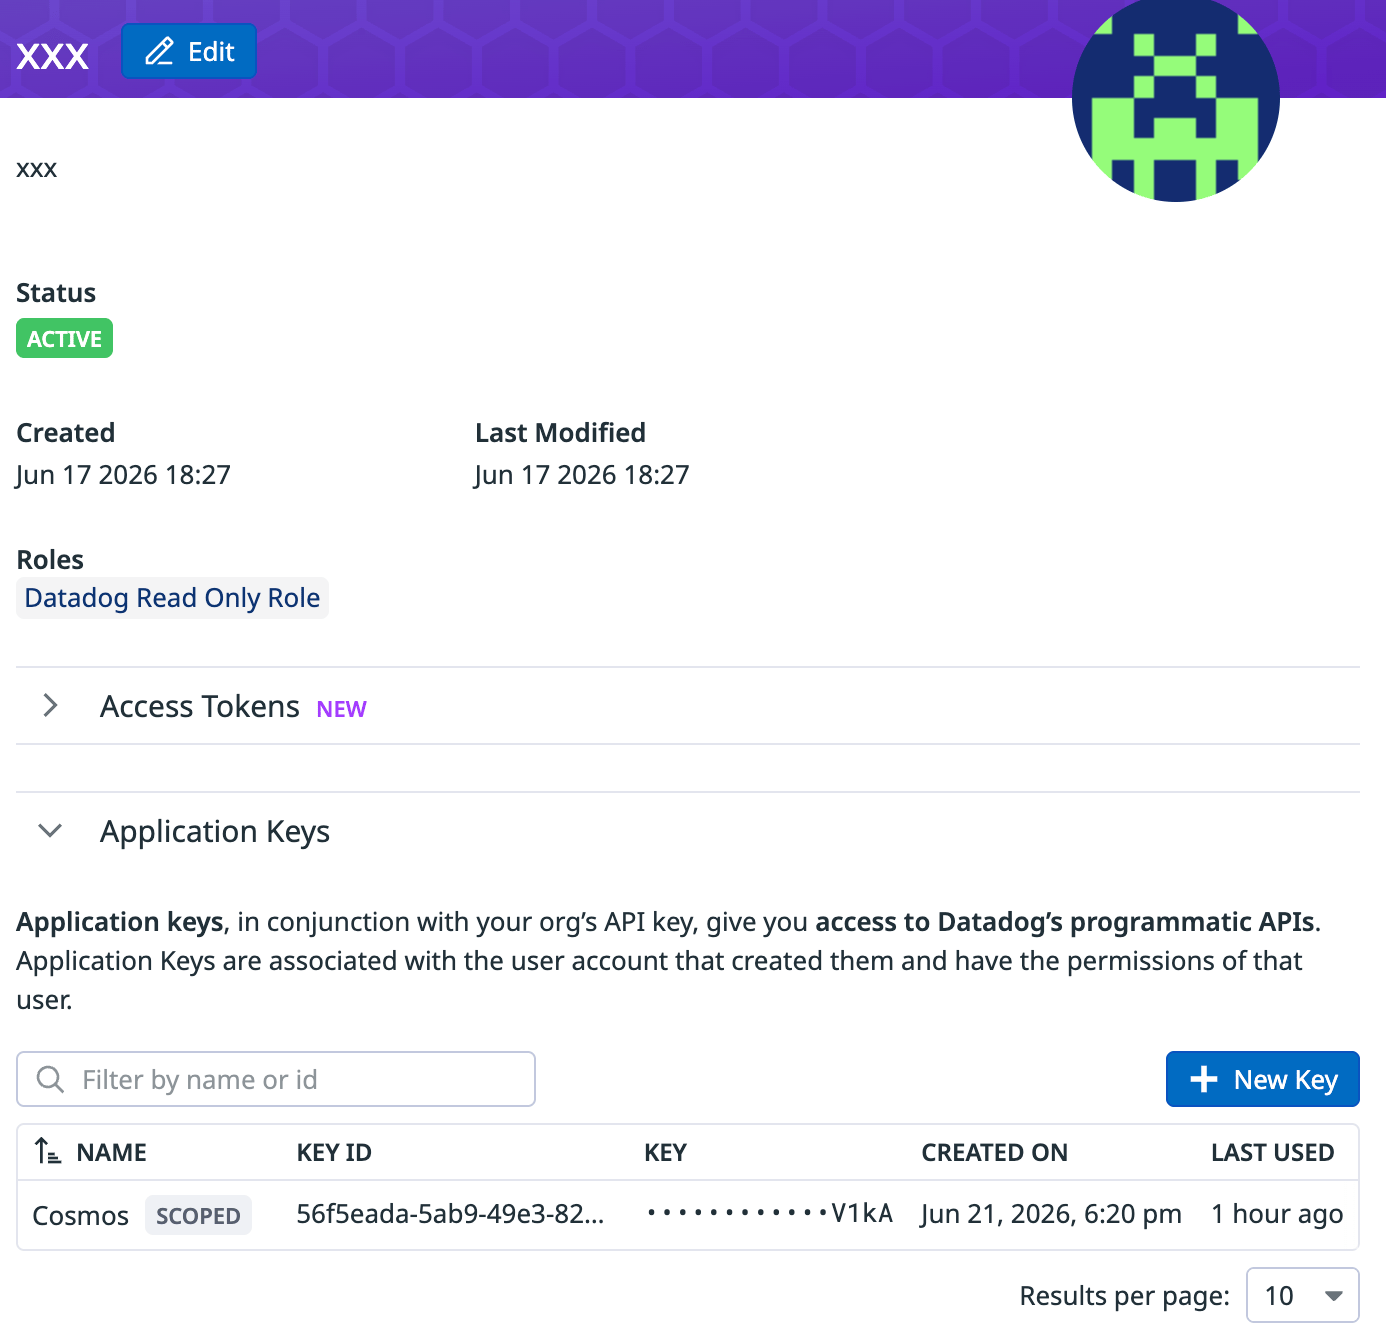 Now, let’s verify that your Datadog parameters are valid. Open a terminal on your laptop, edit and run this command (make sure to also edit your instance region in the url):
```bash theme={null}
curl -s -w "\n%{http_code}" \
-X POST \
-H "DD-API-KEY: " \
-H "DD-APPLICATION-KEY: " \
-H "Content-Type: application/json" \
"https://mcp.us5.datadoghq.com/api/unstable/mcp-server/mcp" \
-d '{"jsonrpc":"2.0","method":"tools/list","id":1}'
```
If everything is properly configured, you’ll get a 200 response. If you don’t, stop and review again the instructions above.
Now you’re ready to configure the Datadog MCP server in Cosmos.
* Go to Cosmos > Settings > Organization Settings > Capabilities > MCP Registry ([https://cosmos.augmentcode.com/mcp](https://cosmos.augmentcode.com/mcp)) > Add Server
* Name: **Datadog**
* Server URL: **[https://mcp.us5.datadoghq.com/api/unstable/mcp-server/mcp](https://mcp.us5.datadoghq.com/api/unstable/mcp-server/mcp)** (make sure to edit your instance region)
* Authentication Type: Header > Add those 2 headers
* **DD-API-KEY**: \
* **DD-APPLICATION-KEY**: \
* Keep enabled products CLI and Cosmos Agent toggled on
* Visibility > Shared toggled on
* Click on Save Changes
Now, let’s verify that your Datadog parameters are valid. Open a terminal on your laptop, edit and run this command (make sure to also edit your instance region in the url):
```bash theme={null}
curl -s -w "\n%{http_code}" \
-X POST \
-H "DD-API-KEY: " \
-H "DD-APPLICATION-KEY: " \
-H "Content-Type: application/json" \
"https://mcp.us5.datadoghq.com/api/unstable/mcp-server/mcp" \
-d '{"jsonrpc":"2.0","method":"tools/list","id":1}'
```
If everything is properly configured, you’ll get a 200 response. If you don’t, stop and review again the instructions above.
Now you’re ready to configure the Datadog MCP server in Cosmos.
* Go to Cosmos > Settings > Organization Settings > Capabilities > MCP Registry ([https://cosmos.augmentcode.com/mcp](https://cosmos.augmentcode.com/mcp)) > Add Server
* Name: **Datadog**
* Server URL: **[https://mcp.us5.datadoghq.com/api/unstable/mcp-server/mcp](https://mcp.us5.datadoghq.com/api/unstable/mcp-server/mcp)** (make sure to edit your instance region)
* Authentication Type: Header > Add those 2 headers
* **DD-API-KEY**: \
* **DD-APPLICATION-KEY**: \
* Keep enabled products CLI and Cosmos Agent toggled on
* Visibility > Shared toggled on
* Click on Save Changes
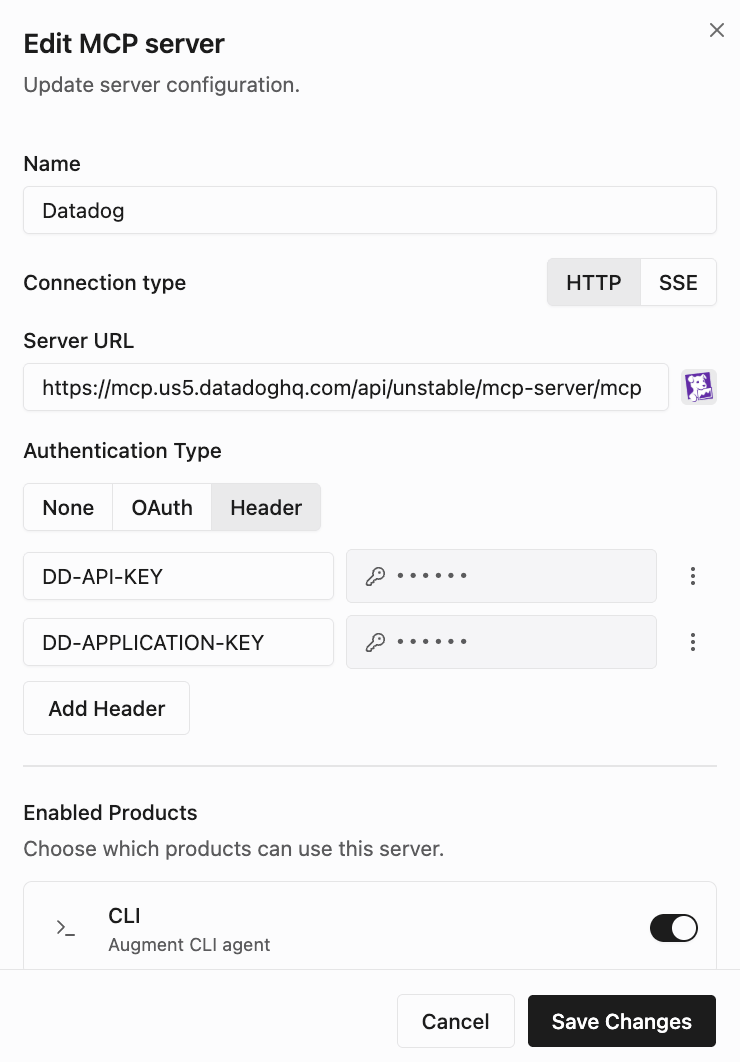 Now let’s test end2end connectivity with a new Cosmos session using that MCP server.
* Go to Cosmos > New session [https://cosmos.augmentcode.com/home](https://cosmos.augmentcode.com/home)
* Make sure the Datadog MCP server is selected
Now let’s test end2end connectivity with a new Cosmos session using that MCP server.
* Go to Cosmos > New session [https://cosmos.augmentcode.com/home](https://cosmos.augmentcode.com/home)
* Make sure the Datadog MCP server is selected
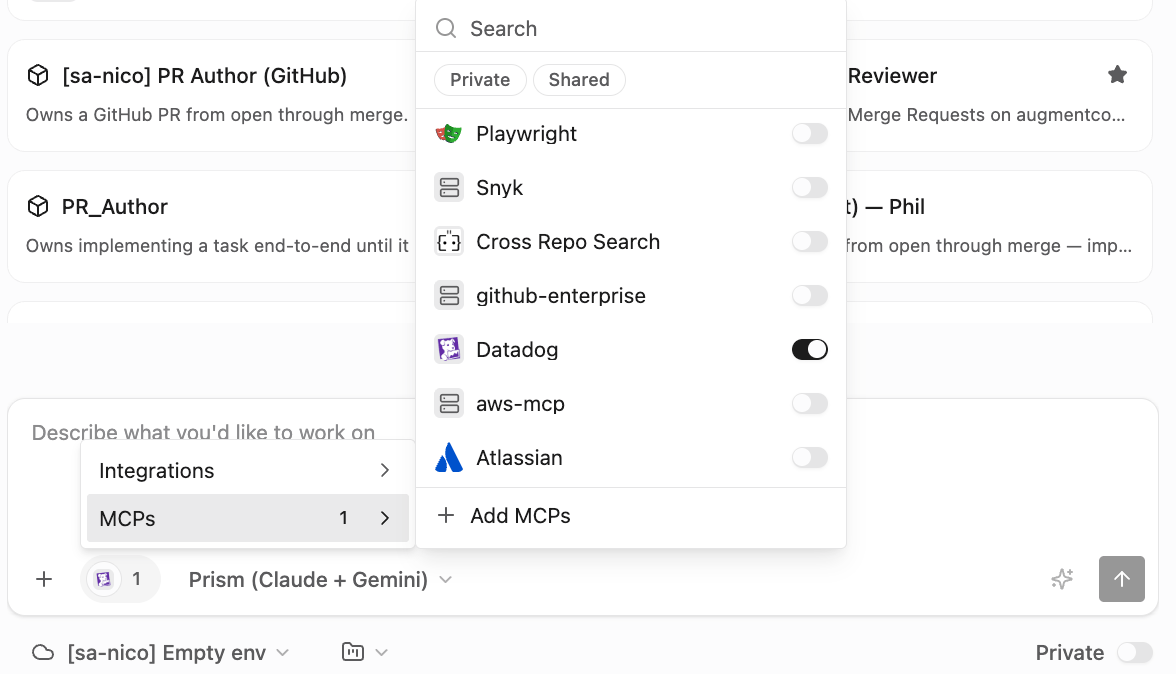 * Submit this prompt “What tools can I access with the connected datadog mcp? what user/service account it is using?”. In your session’s right drawer you should see the Datadog MCP tools:
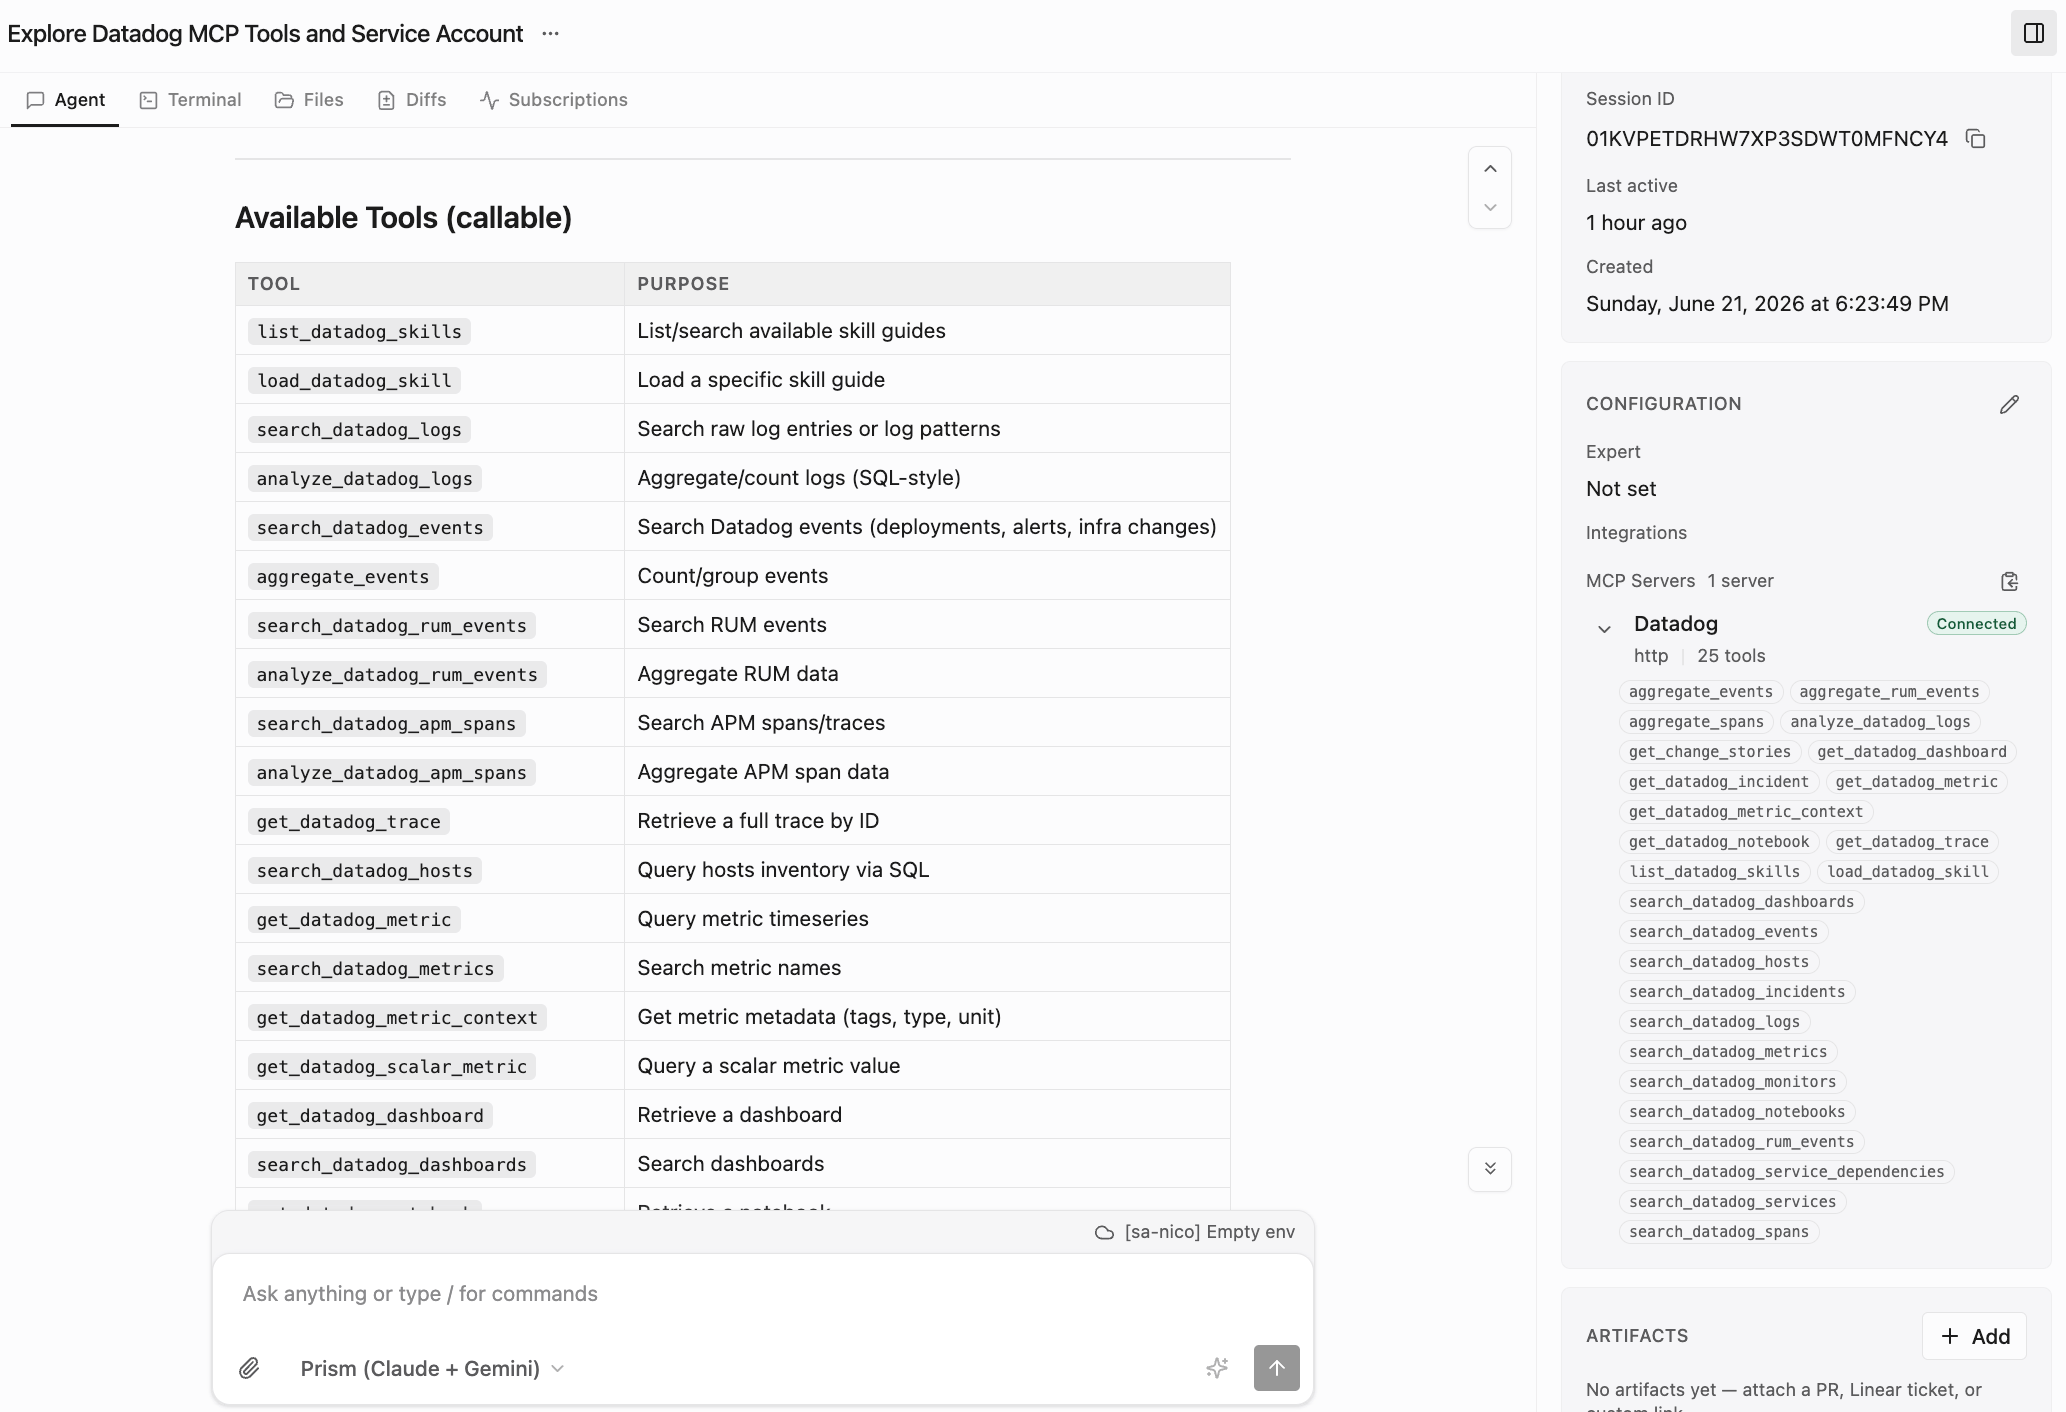 Congrats, you can now create Cosmos expert agents that integrate with Datadog! ✅