> ## Documentation Index
> Fetch the complete documentation index at: https://docs.augmentcode.com/llms.txt
> Use this file to discover all available pages before exploring further.
# Integrate Jira Cloud
## Introduction
In this page we’ll learn how to configure 2 things:
* Get JIRA to push events to Augment Cosmos via webhooks
```mermaid theme={null}
sequenceDiagram
autonumber
participant J as Jira
participant AC as Augment Cosmos
J->>AC: Webhook: Issue Created (Ticket JSON)
```
* Get Augment Cosmos to interact with Jira via the Jira MCP server
```mermaid theme={null}
sequenceDiagram
autonumber
participant J as Jira
participant AC as Augment Cosmos
AC->>J: Read/Update Ticket via Jira MCP server
J-->>AC: 200 OK (Sync Complete)
```
## Step 1 - Configure Jira to notify a Cosmos Webhook
Let’s create a new webhook in Cosmos (so Cosmos can listen to Jira events).
Prerequisites:
* Cosmos side: any user can self-create webhooks
* Jira Cloud side: any user (non-admin) can create automation-based webhooks as a "THEN" action. In this document we will not use legacy global Jira webhooks (only jira admins can create those)
Configuration steps
* Go to Cosmos ([https://cosmos.augmentcode.com](https://cosmos.augmentcode.com)) > Settings > Capabilities > Webhooks > Create Webhook
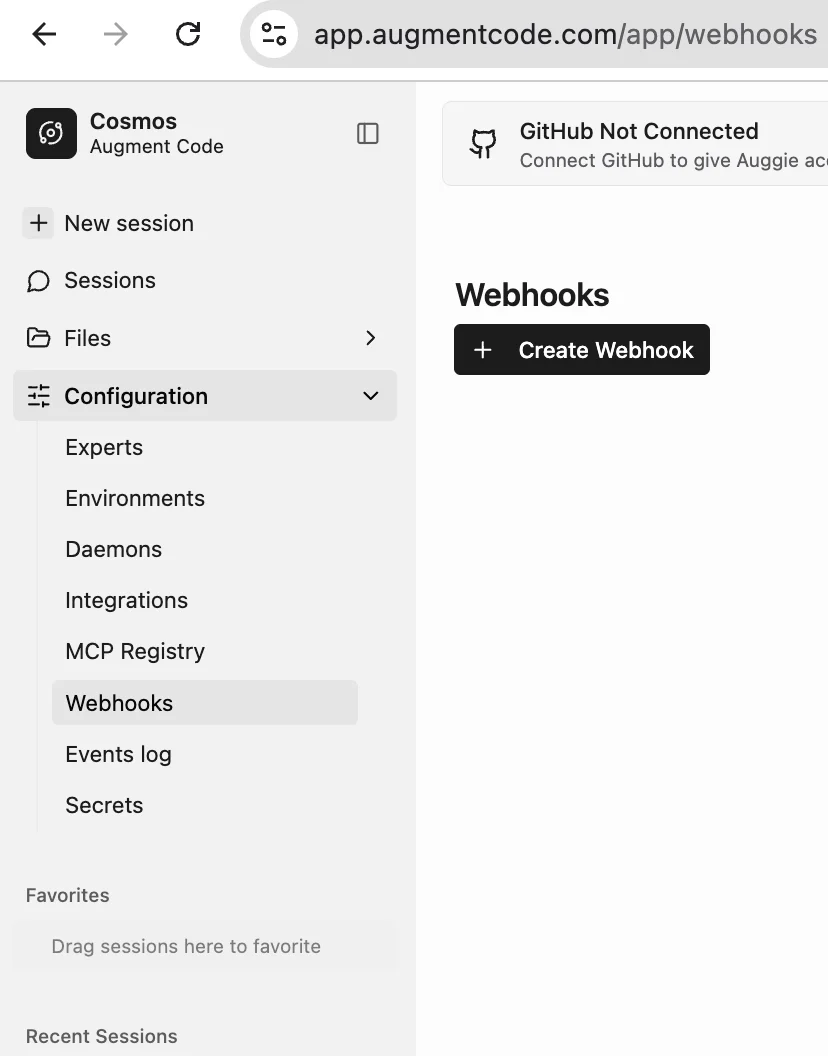 * That gives us a url to POST with a given Bearer token to pass as HTTP header. Curl request would look like:
```shell theme={null}
curl -X POST https://XXX.api.augmentcode.com/webhooks/XXX \
-H "Authorization: Bearer XXX" \
-H "Content-Type: application/json" \
-d '{"event": "test", "data": "your payload here"}'
```
**Create a new webhook config in Jira** (so Jira can POST to a given url when certain Jira events occur)
* Go to your Jira env ([https://augmentcode-demo.atlassian.net/jira/](https://augmentcode-demo.atlassian.net/jira/))
* Wheel icon > System
* That gives us a url to POST with a given Bearer token to pass as HTTP header. Curl request would look like:
```shell theme={null}
curl -X POST https://XXX.api.augmentcode.com/webhooks/XXX \
-H "Authorization: Bearer XXX" \
-H "Content-Type: application/json" \
-d '{"event": "test", "data": "your payload here"}'
```
**Create a new webhook config in Jira** (so Jira can POST to a given url when certain Jira events occur)
* Go to your Jira env ([https://augmentcode-demo.atlassian.net/jira/](https://augmentcode-demo.atlassian.net/jira/))
* Wheel icon > System
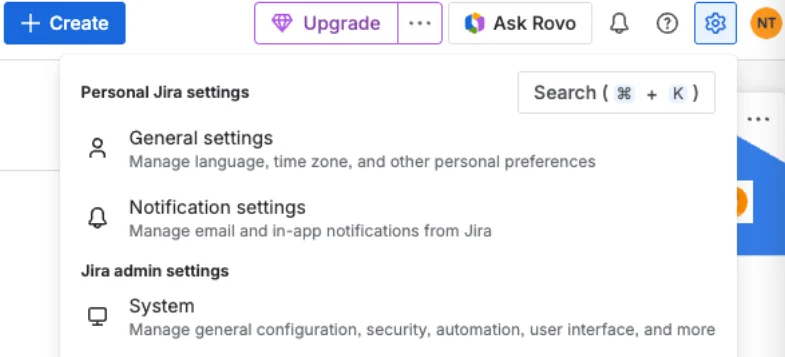 * Left nav bar > Automation > Global automation
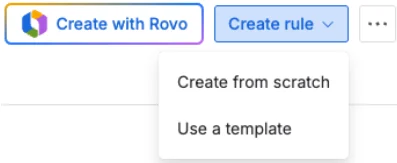
* Top right: Create rule > Create from scratch
* Left nav bar > Automation > Global automation
* Top right: Create rule > Create from scratch
 * On the “Add a trigger” view, add trigger “Work item created”:
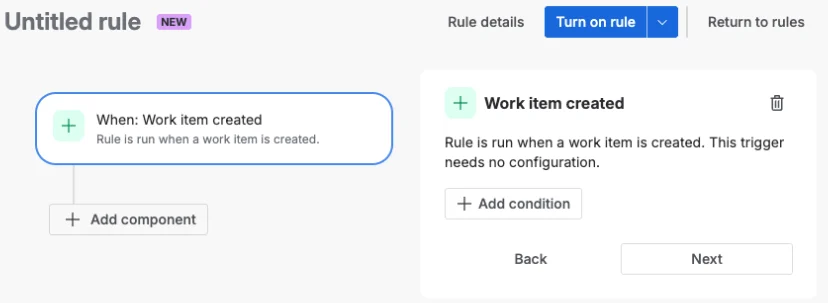 * Click on add component under the When block:
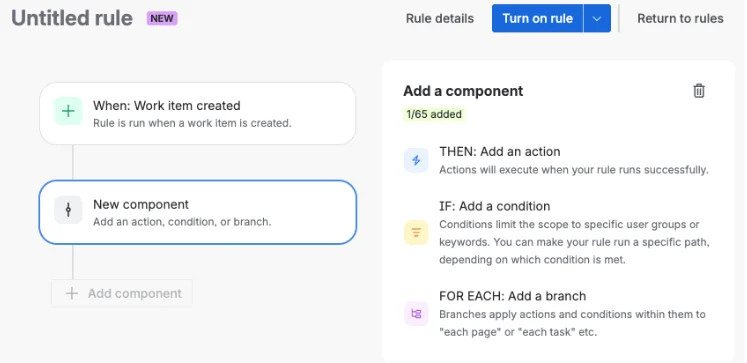 * Click on “THEN: Add an action”, search “Send web request”:
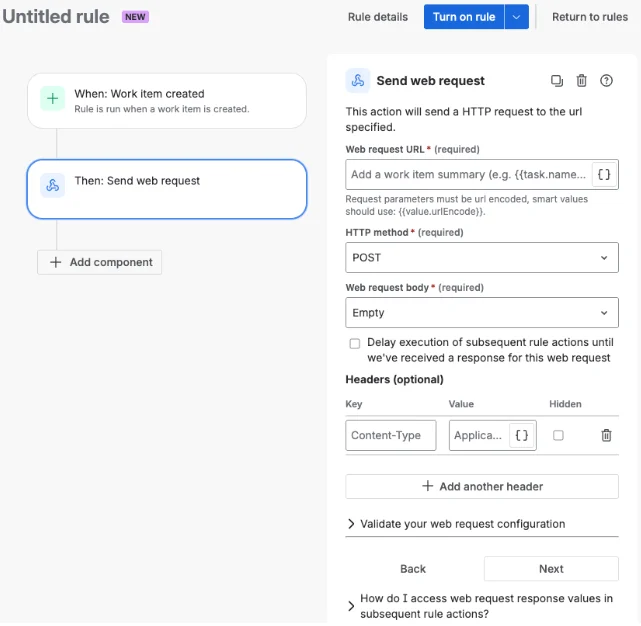 * Add
* Web request URL: the Augment webhook url
* Keep HTTP method to POST
* Web request body: select Issue data (Automation format)
* Headers, add:
* Authorization: Bearer \
* Content-Type: application/json
* Add
* Web request URL: the Augment webhook url
* Keep HTTP method to POST
* Web request body: select Issue data (Automation format)
* Headers, add:
* Authorization: Bearer \
* Content-Type: application/json
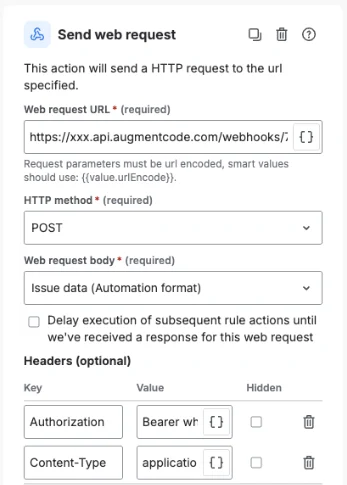 * Then click on rule details and add
* Name
* Keep scope: Global
* Keep owner: yourself
* Keep Actor: Automation for Jira
* Click on turn on rule
Now create a new Jira ticket.
Then go back to Cosmos and check that Cosmos received the event:
* Settings > Automations > Event Log. You should see your event with source “Custom”
* Then click on rule details and add
* Name
* Keep scope: Global
* Keep owner: yourself
* Keep Actor: Automation for Jira
* Click on turn on rule
Now create a new Jira ticket.
Then go back to Cosmos and check that Cosmos received the event:
* Settings > Automations > Event Log. You should see your event with source “Custom”
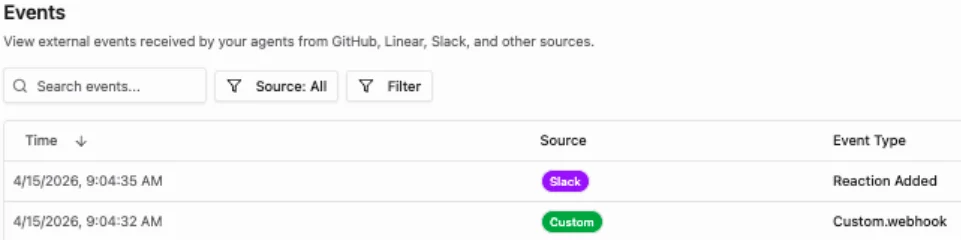 * Click on the event:
* Verify it contains details about the Jira ticket you just created:
* Click on the event:
* Verify it contains details about the Jira ticket you just created:
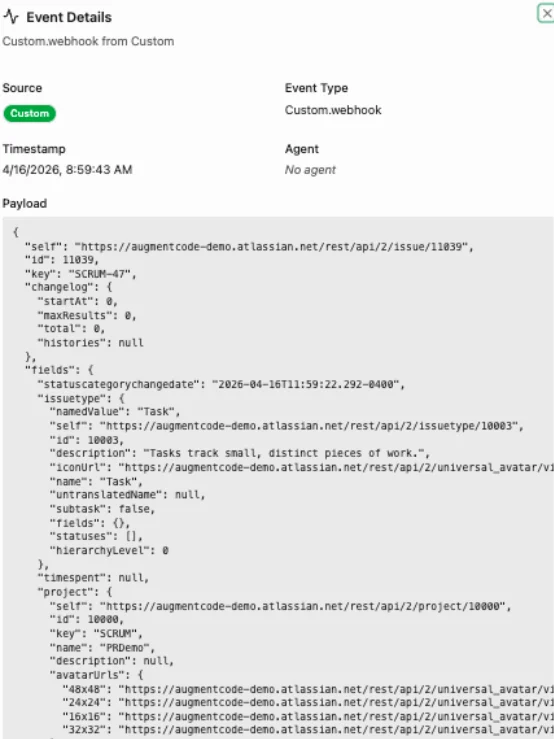 At this point Jira can invoke Cosmos ✅.
## Step 2 - Integrate with Jira using your own identity
### Prerequisites
Your Atlassian organization admin must authorize access from [https://cosmos.augmentcode.com/mcp/callback](https://cosmos.augmentcode.com/mcp/callback) to your Atlassian space
### Configure the native Atlassian integration via MCP server
We’ll leverage the native Atlassian MCP Server integration:
* Go to Cosmos [https://cosmos.augmentcode.com](https://cosmos.augmentcode.com) > Settings > Capabilities > MCP Registry
* Search for Atlassian > click on “+” > My Identity (OAuth):
At this point Jira can invoke Cosmos ✅.
## Step 2 - Integrate with Jira using your own identity
### Prerequisites
Your Atlassian organization admin must authorize access from [https://cosmos.augmentcode.com/mcp/callback](https://cosmos.augmentcode.com/mcp/callback) to your Atlassian space
### Configure the native Atlassian integration via MCP server
We’ll leverage the native Atlassian MCP Server integration:
* Go to Cosmos [https://cosmos.augmentcode.com](https://cosmos.augmentcode.com) > Settings > Capabilities > MCP Registry
* Search for Atlassian > click on “+” > My Identity (OAuth):
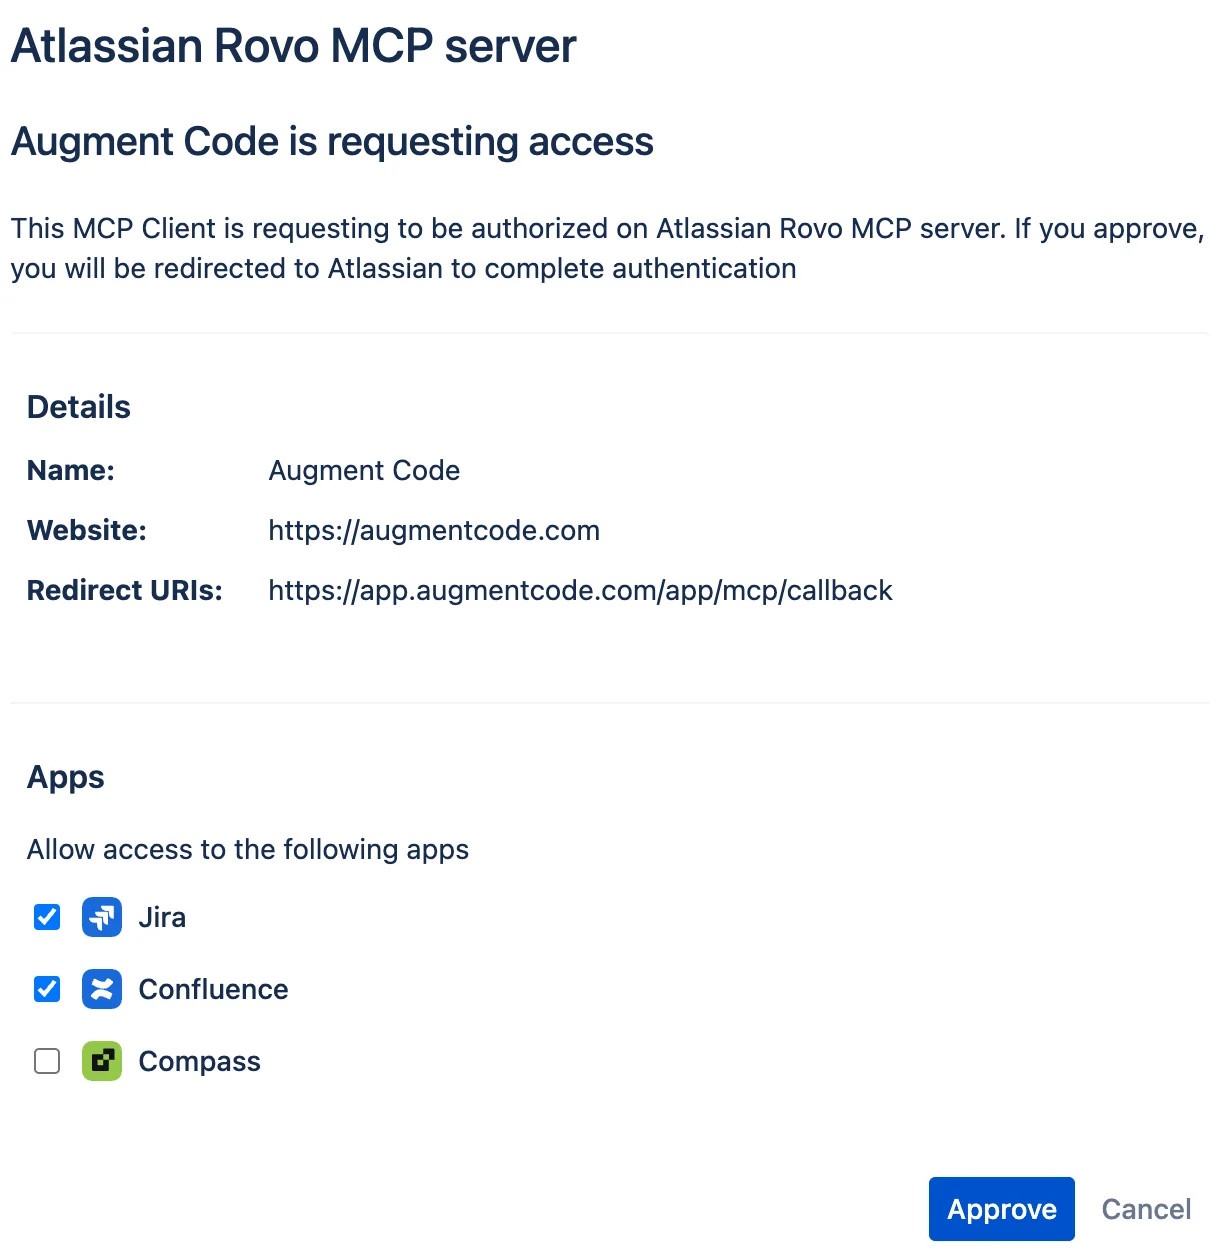
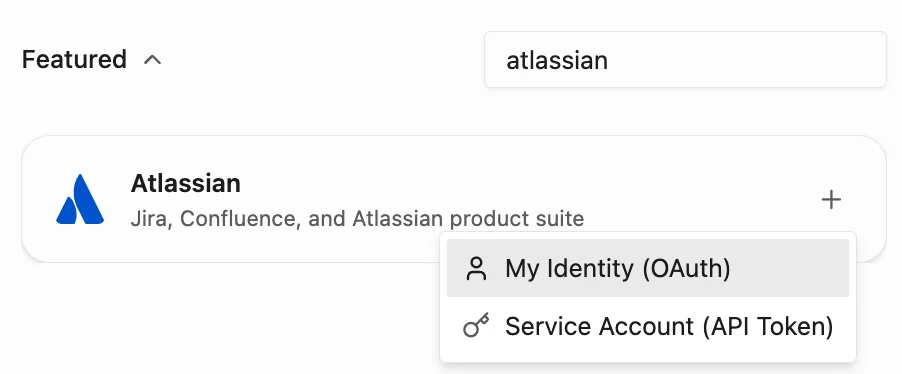 * Make sure Jira and Confluence are selected, click on approve
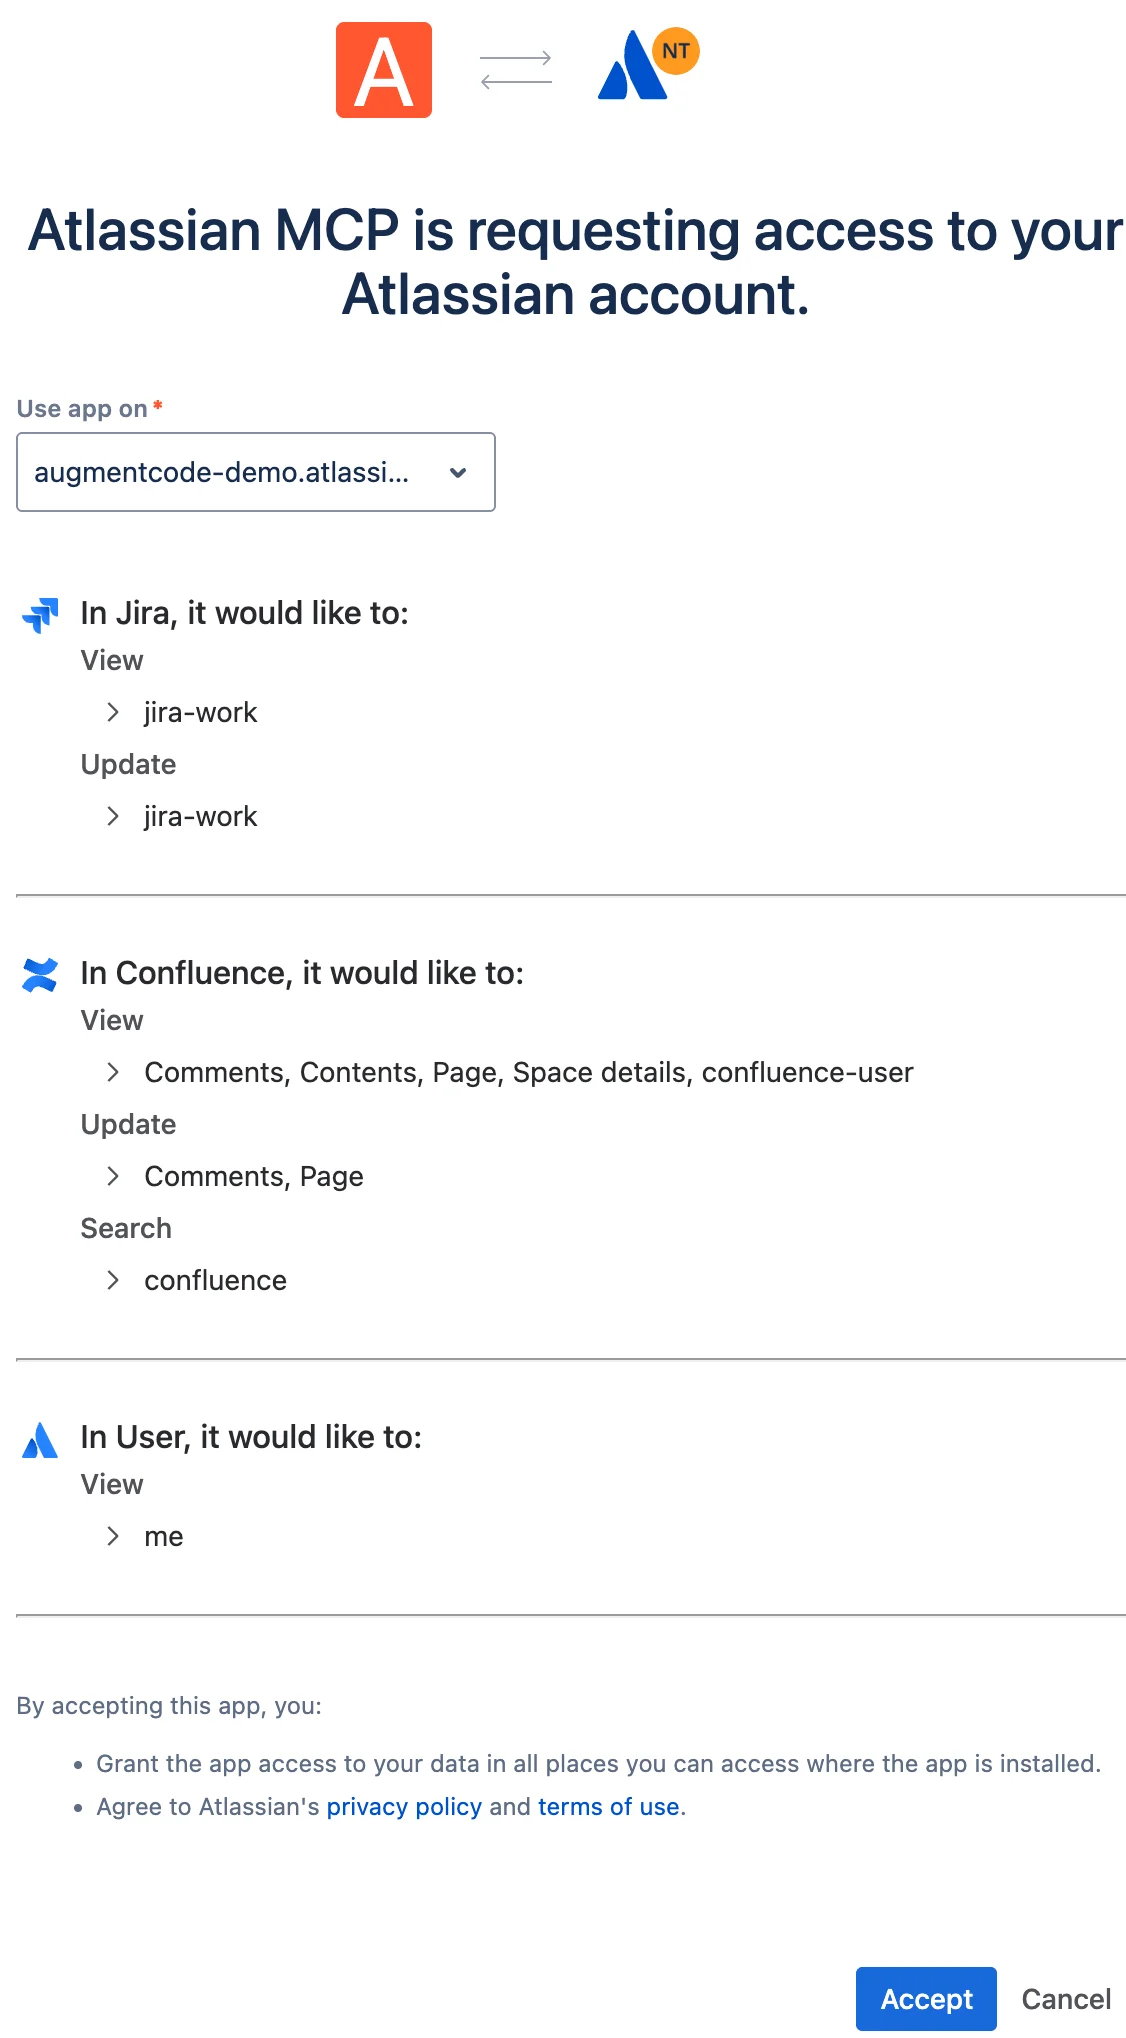
 * Select your Atlassian space, review the scopes/permissions and click on Accept:
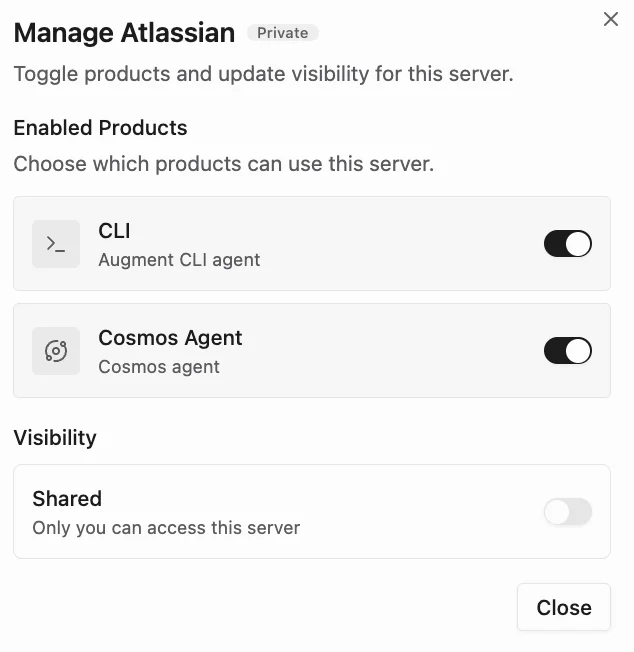
 * Toggle on “Cosmos Agent” and optionally “CLI”, then click on Close:
 ### Run a test
* Open a new session ([https://cosmos.augmentcode.com](https://cosmos.augmentcode.com)) > New session
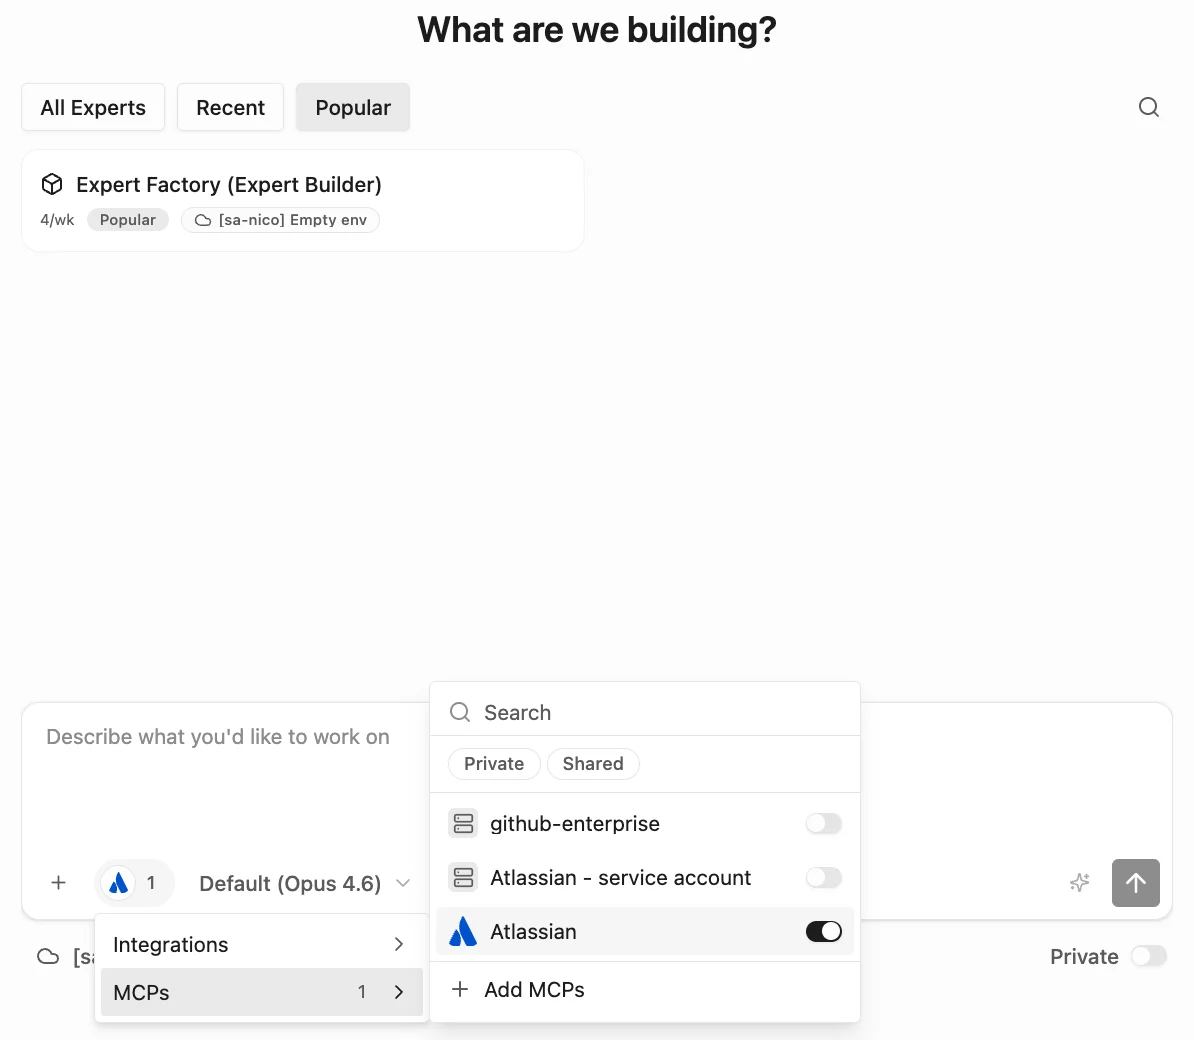
* In the prompt, click on the Atlassian icon > MCPs > make sure Atlassian is toggled on:
### Run a test
* Open a new session ([https://cosmos.augmentcode.com](https://cosmos.augmentcode.com)) > New session
* In the prompt, click on the Atlassian icon > MCPs > make sure Atlassian is toggled on:
 * Now prompt Cosmos to look up a given ticket by its url:
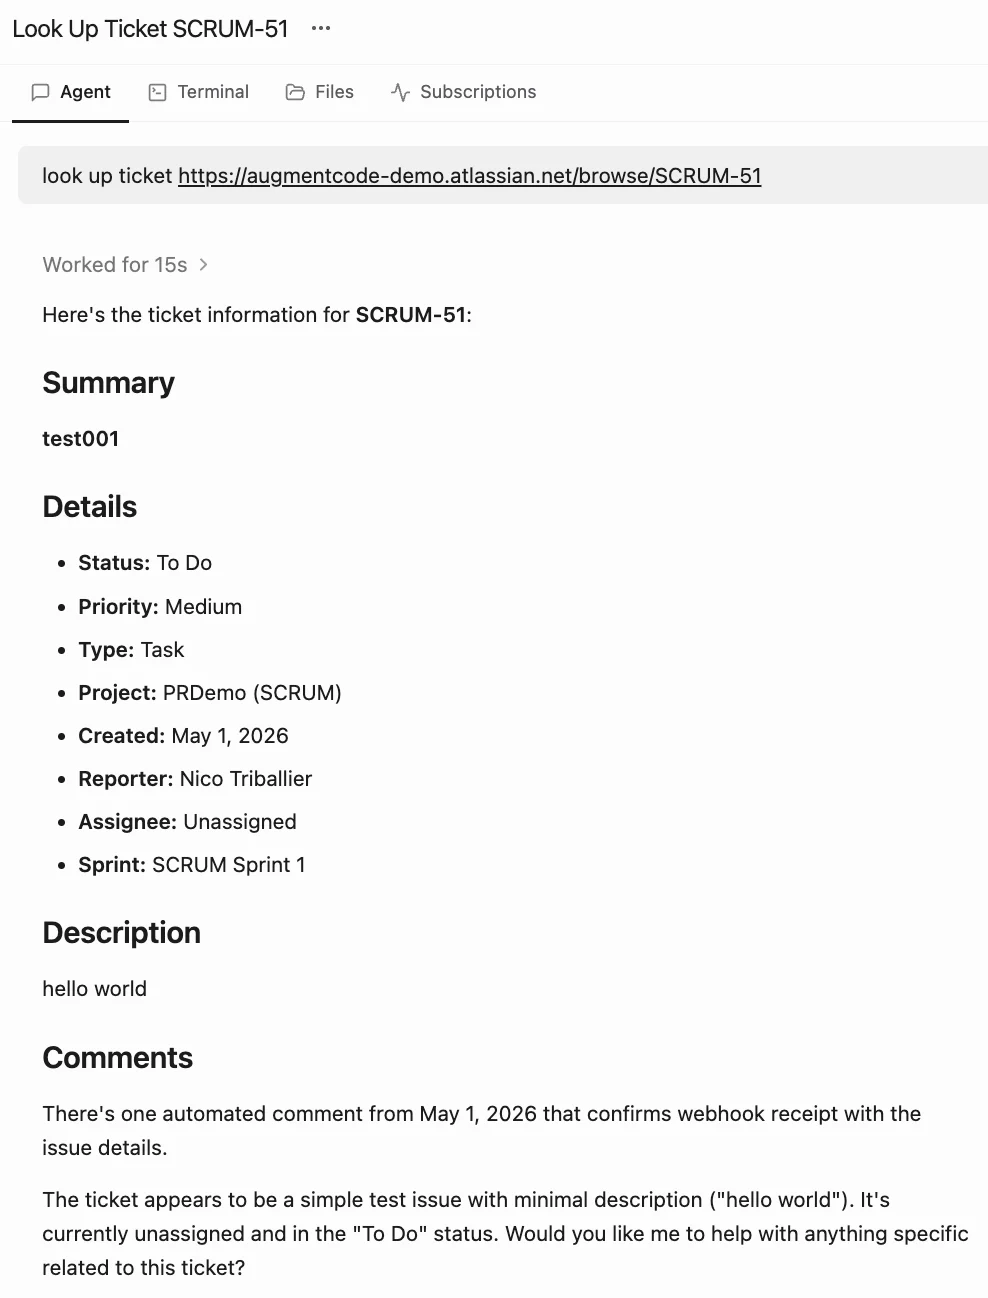
* Verify that Cosmos was able to look up the ticket:
* Now prompt Cosmos to look up a given ticket by its url:
* Verify that Cosmos was able to look up the ticket:
 Congrats, now you can create a Cosmos expert that listens to the corresponding webhook and post to Jira/Confluence on your behalf 🚀
## **Bonus: Integrate with Jira via a Service Account (recommended for headless automation)**
### **Create a Jira Service Account**
For Cosmos to interact with Jira via a Jira service account we’ll leverage the Atlassian remote mcp server and authenticate it with said service account as we’d want Cosmos to run headless automations.
Let’s create a dedicated Jira service account and its access token:
As a Atlassian admin go to:
* [https://admin.atlassian.com/](https://admin.atlassian.com/)
* Directory > Service Account > Create a Service account
* Enter the name “Augment Code”
* Select app “Jira” with role “User”
* Save
* On that newly created Service account > click on Create credentials
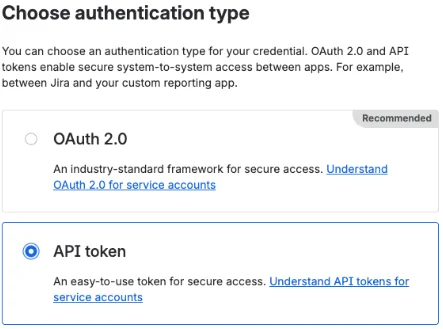
* Choose authentication type “API token”
Congrats, now you can create a Cosmos expert that listens to the corresponding webhook and post to Jira/Confluence on your behalf 🚀
## **Bonus: Integrate with Jira via a Service Account (recommended for headless automation)**
### **Create a Jira Service Account**
For Cosmos to interact with Jira via a Jira service account we’ll leverage the Atlassian remote mcp server and authenticate it with said service account as we’d want Cosmos to run headless automations.
Let’s create a dedicated Jira service account and its access token:
As a Atlassian admin go to:
* [https://admin.atlassian.com/](https://admin.atlassian.com/)
* Directory > Service Account > Create a Service account
* Enter the name “Augment Code”
* Select app “Jira” with role “User”
* Save
* On that newly created Service account > click on Create credentials
* Choose authentication type “API token”
 * Next
* Pick a name and expiration date (max 1 year out)
* Select those scopes (look them up using the search bar):
```plain text theme={null}
Read
read:jira-work
read:jira-user
read:comment:jira
read:comment.property:jira
Manage (optional)
manage:servicedesk-customer
manage:jira-webhook
manage:jira-project
manage:jira-data-provider
manage:jira-configuration
Write
write:jira-work
write:comment:jira
write:comment.property:jira
write:request.comment:jira-service-management
```
* Next, then Create
* Copy the API token
### Configure the Atlassian MCP server
Now let’s configure the Atlassian MCP server with that service account’s access token in Cosmos:
* Go to Settings > MCP Registry ([https://cosmos.augmentcode.com/mcp](https://cosmos.augmentcode.com/mcp))
* If you had an existing Atlassian MCP server configured with your human identity, delete it.
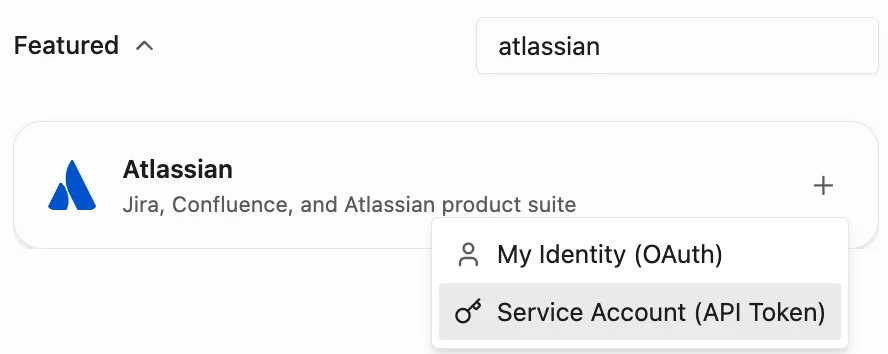
* Search for Atlassian > click on “+” > Service Account (API Token):
* Next
* Pick a name and expiration date (max 1 year out)
* Select those scopes (look them up using the search bar):
```plain text theme={null}
Read
read:jira-work
read:jira-user
read:comment:jira
read:comment.property:jira
Manage (optional)
manage:servicedesk-customer
manage:jira-webhook
manage:jira-project
manage:jira-data-provider
manage:jira-configuration
Write
write:jira-work
write:comment:jira
write:comment.property:jira
write:request.comment:jira-service-management
```
* Next, then Create
* Copy the API token
### Configure the Atlassian MCP server
Now let’s configure the Atlassian MCP server with that service account’s access token in Cosmos:
* Go to Settings > MCP Registry ([https://cosmos.augmentcode.com/mcp](https://cosmos.augmentcode.com/mcp))
* If you had an existing Atlassian MCP server configured with your human identity, delete it.
* Search for Atlassian > click on “+” > Service Account (API Token):
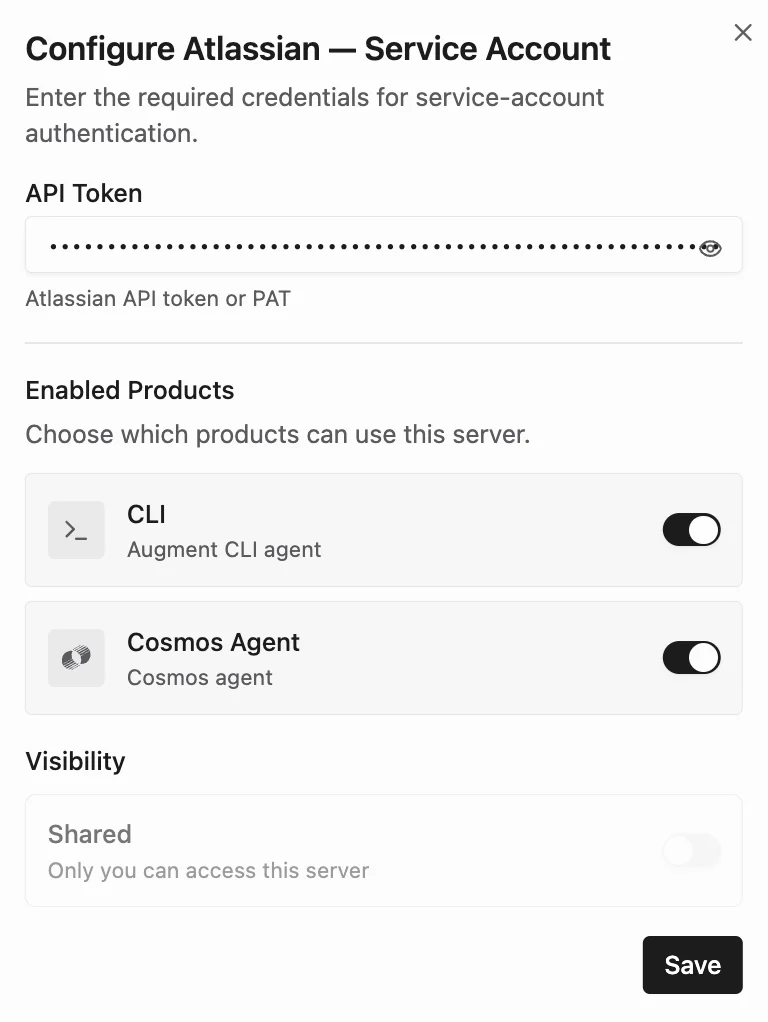
 * API token: paste YOUR\_ATLASSIAN\_SERVICE\_ACCOUNT\_API\_TOKEN
* Keep enabled products CLI and Cosmos Agent selected
* Visibility: switch to shared to make that MCP server + service account reusable by other users
* Click on Save
* API token: paste YOUR\_ATLASSIAN\_SERVICE\_ACCOUNT\_API\_TOKEN
* Keep enabled products CLI and Cosmos Agent selected
* Visibility: switch to shared to make that MCP server + service account reusable by other users
* Click on Save
 Note: when you save this configuration, the value of the Authorization header is stored securely in Cosmos’ secret manager. If you go to Cosmos ([https://cosmos.augmentcode.com](https://cosmos.augmentcode.com)) > Settings > Capabilities > Secrets it will look like:
 In your MCP registry you should now see your MCP server.
### Run a test
Let’s now create a session to test the connectivity:
* Left nav bar > + New session
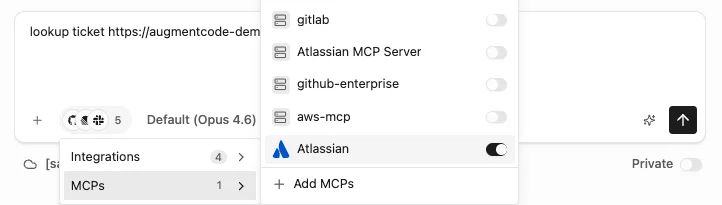
* Make sure the “Atlassian MCP server - service account” is attached to the session and that the native Atlassian integration is disabled
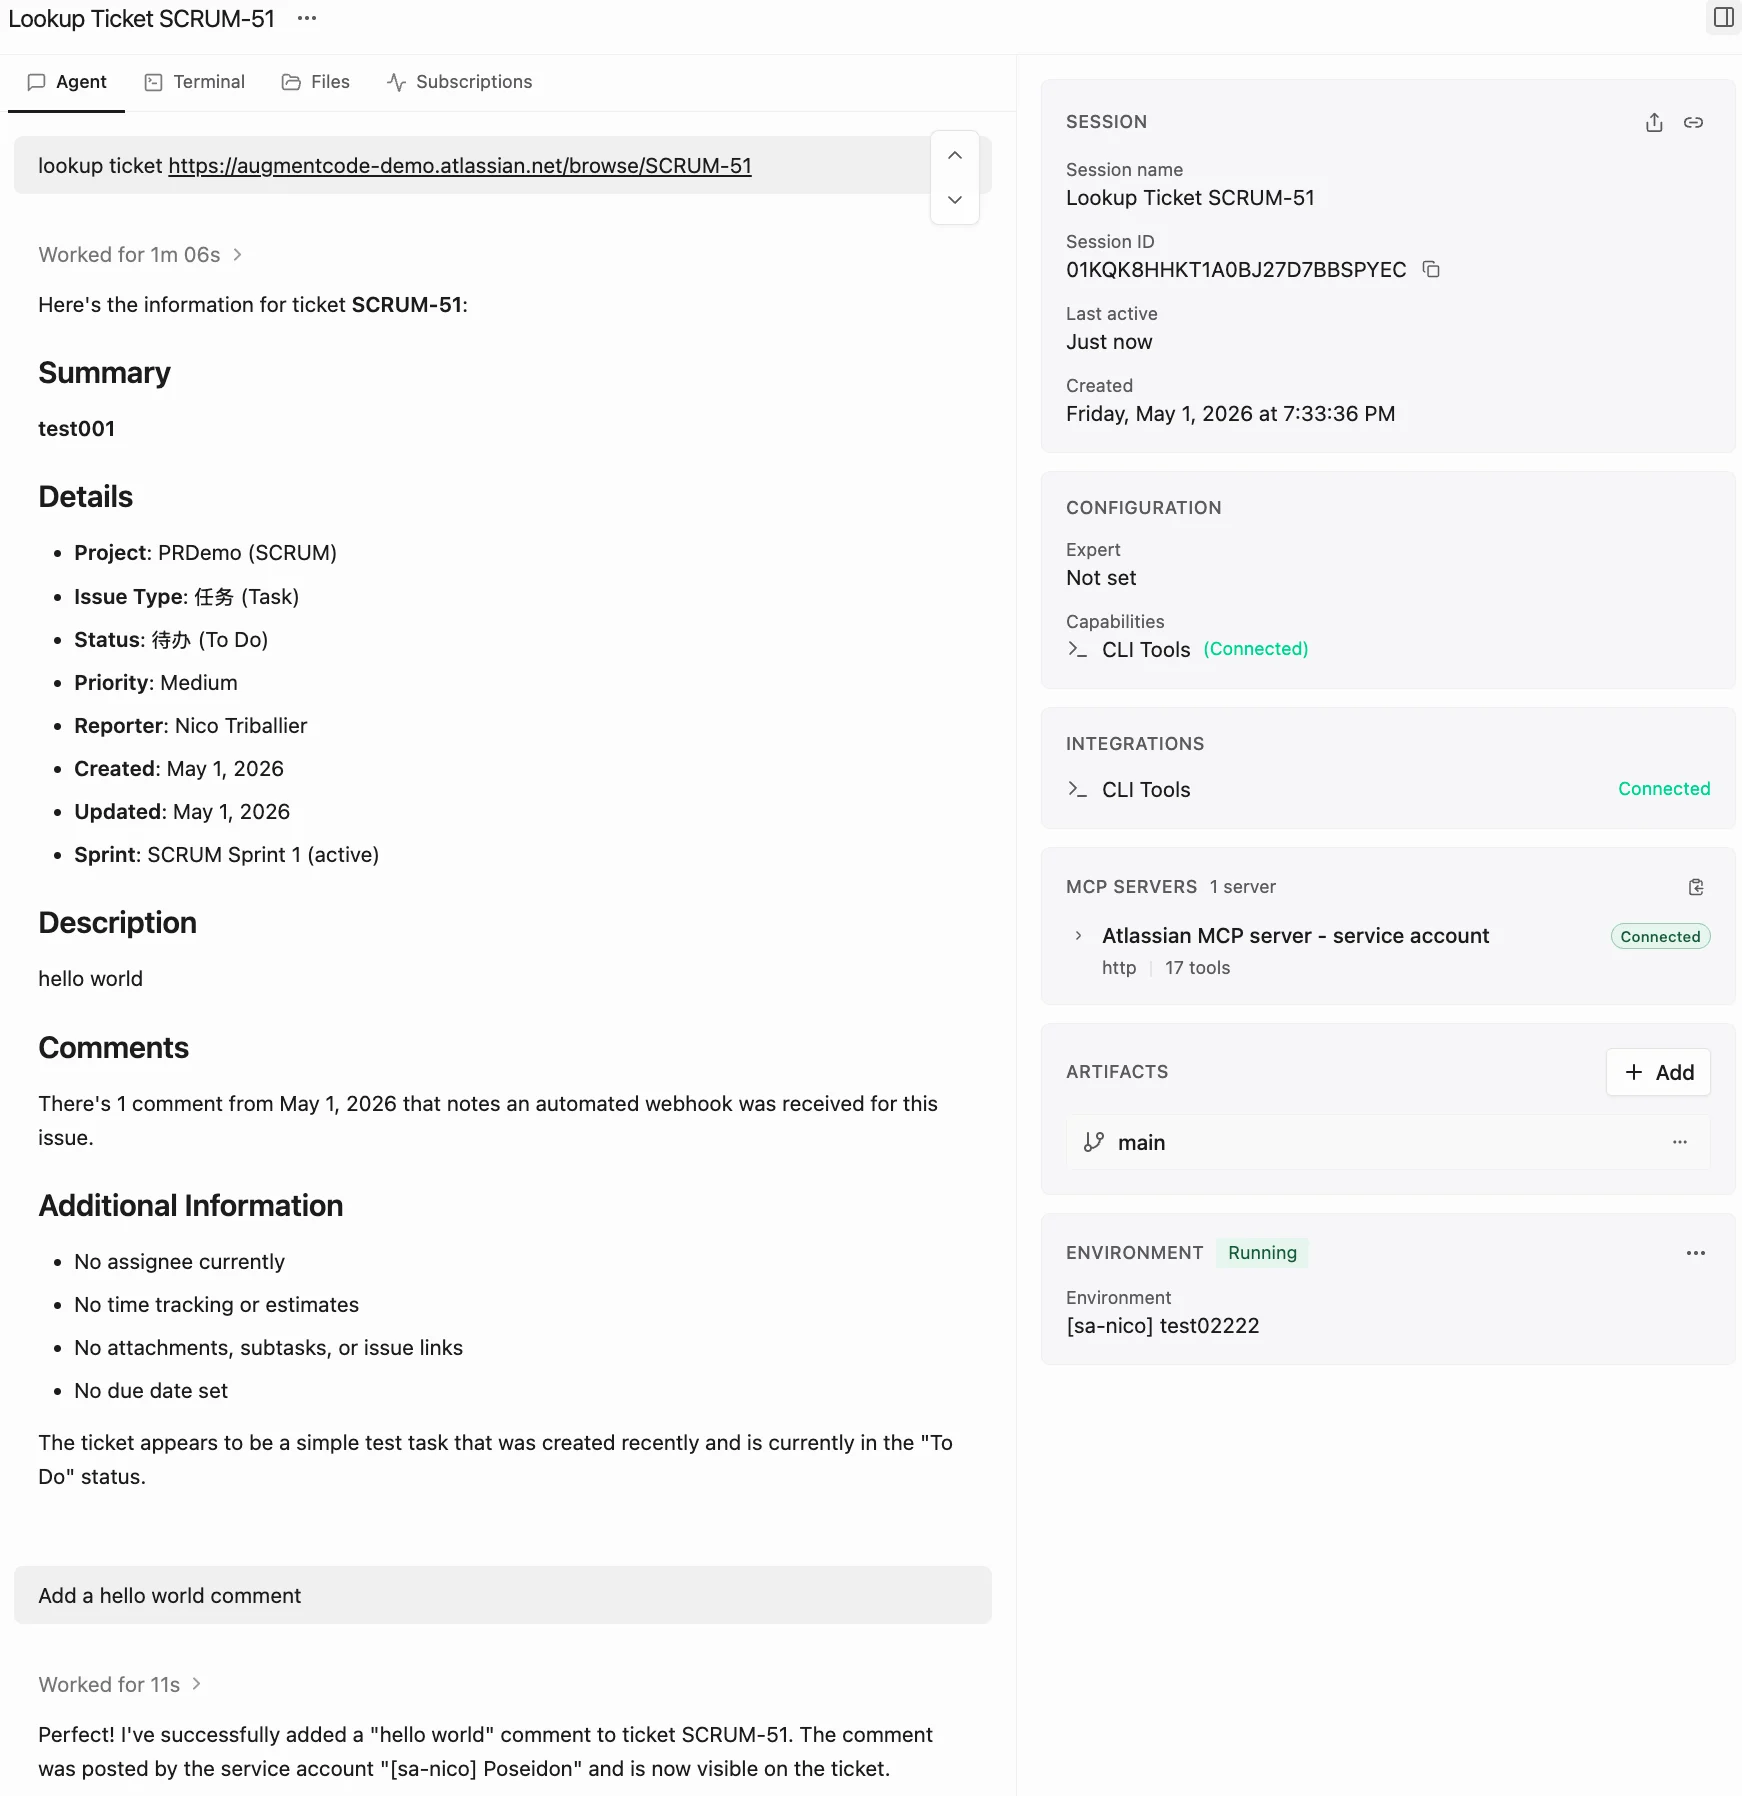
* Prompt: lookup a given Jira ticket via its url
* Send
In your MCP registry you should now see your MCP server.
### Run a test
Let’s now create a session to test the connectivity:
* Left nav bar > + New session
* Make sure the “Atlassian MCP server - service account” is attached to the session and that the native Atlassian integration is disabled
* Prompt: lookup a given Jira ticket via its url
* Send
 * Then prompt the agent to add a hello world comment onto the ticket
 Verify that your Jira ticket has been updated:
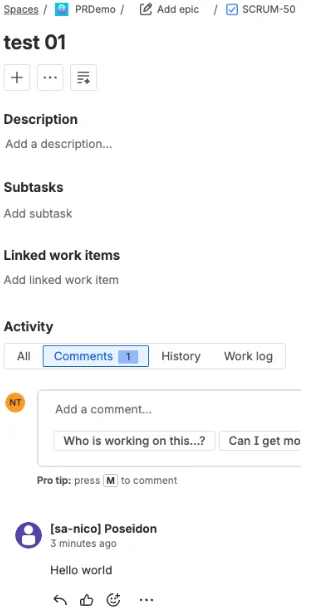 Congrats, now you can create a Cosmos expert that listens to the corresponding webhook, and leverage that Atlassian MCP server for full headless automation 🚀