> ## Documentation Index
> Fetch the complete documentation index at: https://docs.augmentcode.com/llms.txt
> Use this file to discover all available pages before exploring further.
# Integrate Twingate
## Introduction
In this page we’ll explore how to configure a Cosmos cloud environment to connect to resources (ex: a local .html file) on a remote Linux VM via Twingate.
```mermaid theme={null}
sequenceDiagram
autonumber
participant C as Cosmos Cloud Env
participant TG as Twingate
participant VM as Linux VM
C->>TG: Outbound request
(Resource FQDN/IP)
TG->>TG: Verify identity &
Zero Trust policy
TG->>VM: Route traffic via
secure tunnel
VM->>VM: Process request
VM-->>TG: Response payload
TG-->>C: Encrypted response
```
## Prerequisites
To configure the connectivity between Cosmos and ADO:
* Cosmos
* you must have edit access to the cloud env that will connect to a Twingate-protected resource
* Twingate
* you need a Twingate paid account (or active free trial)
* you must have permissions to create a service account
* you must have permissions to add a new connector: set of access token + refresh token to deploy a connector on the resource/network that will later be accessed by the Cosmos cloud env
* AWS/GCP/Azure/on-prem
* you must have SSH access to the Linux VM - this is where the Twingate connector will be deployed
## Step 1 - Twingate Connector configuration
Go to your Twingate admin console > Network > Overview > Deploy connector > Cloud & Infrastructure > Linux. You should see “Install and Launch Connector Service”:
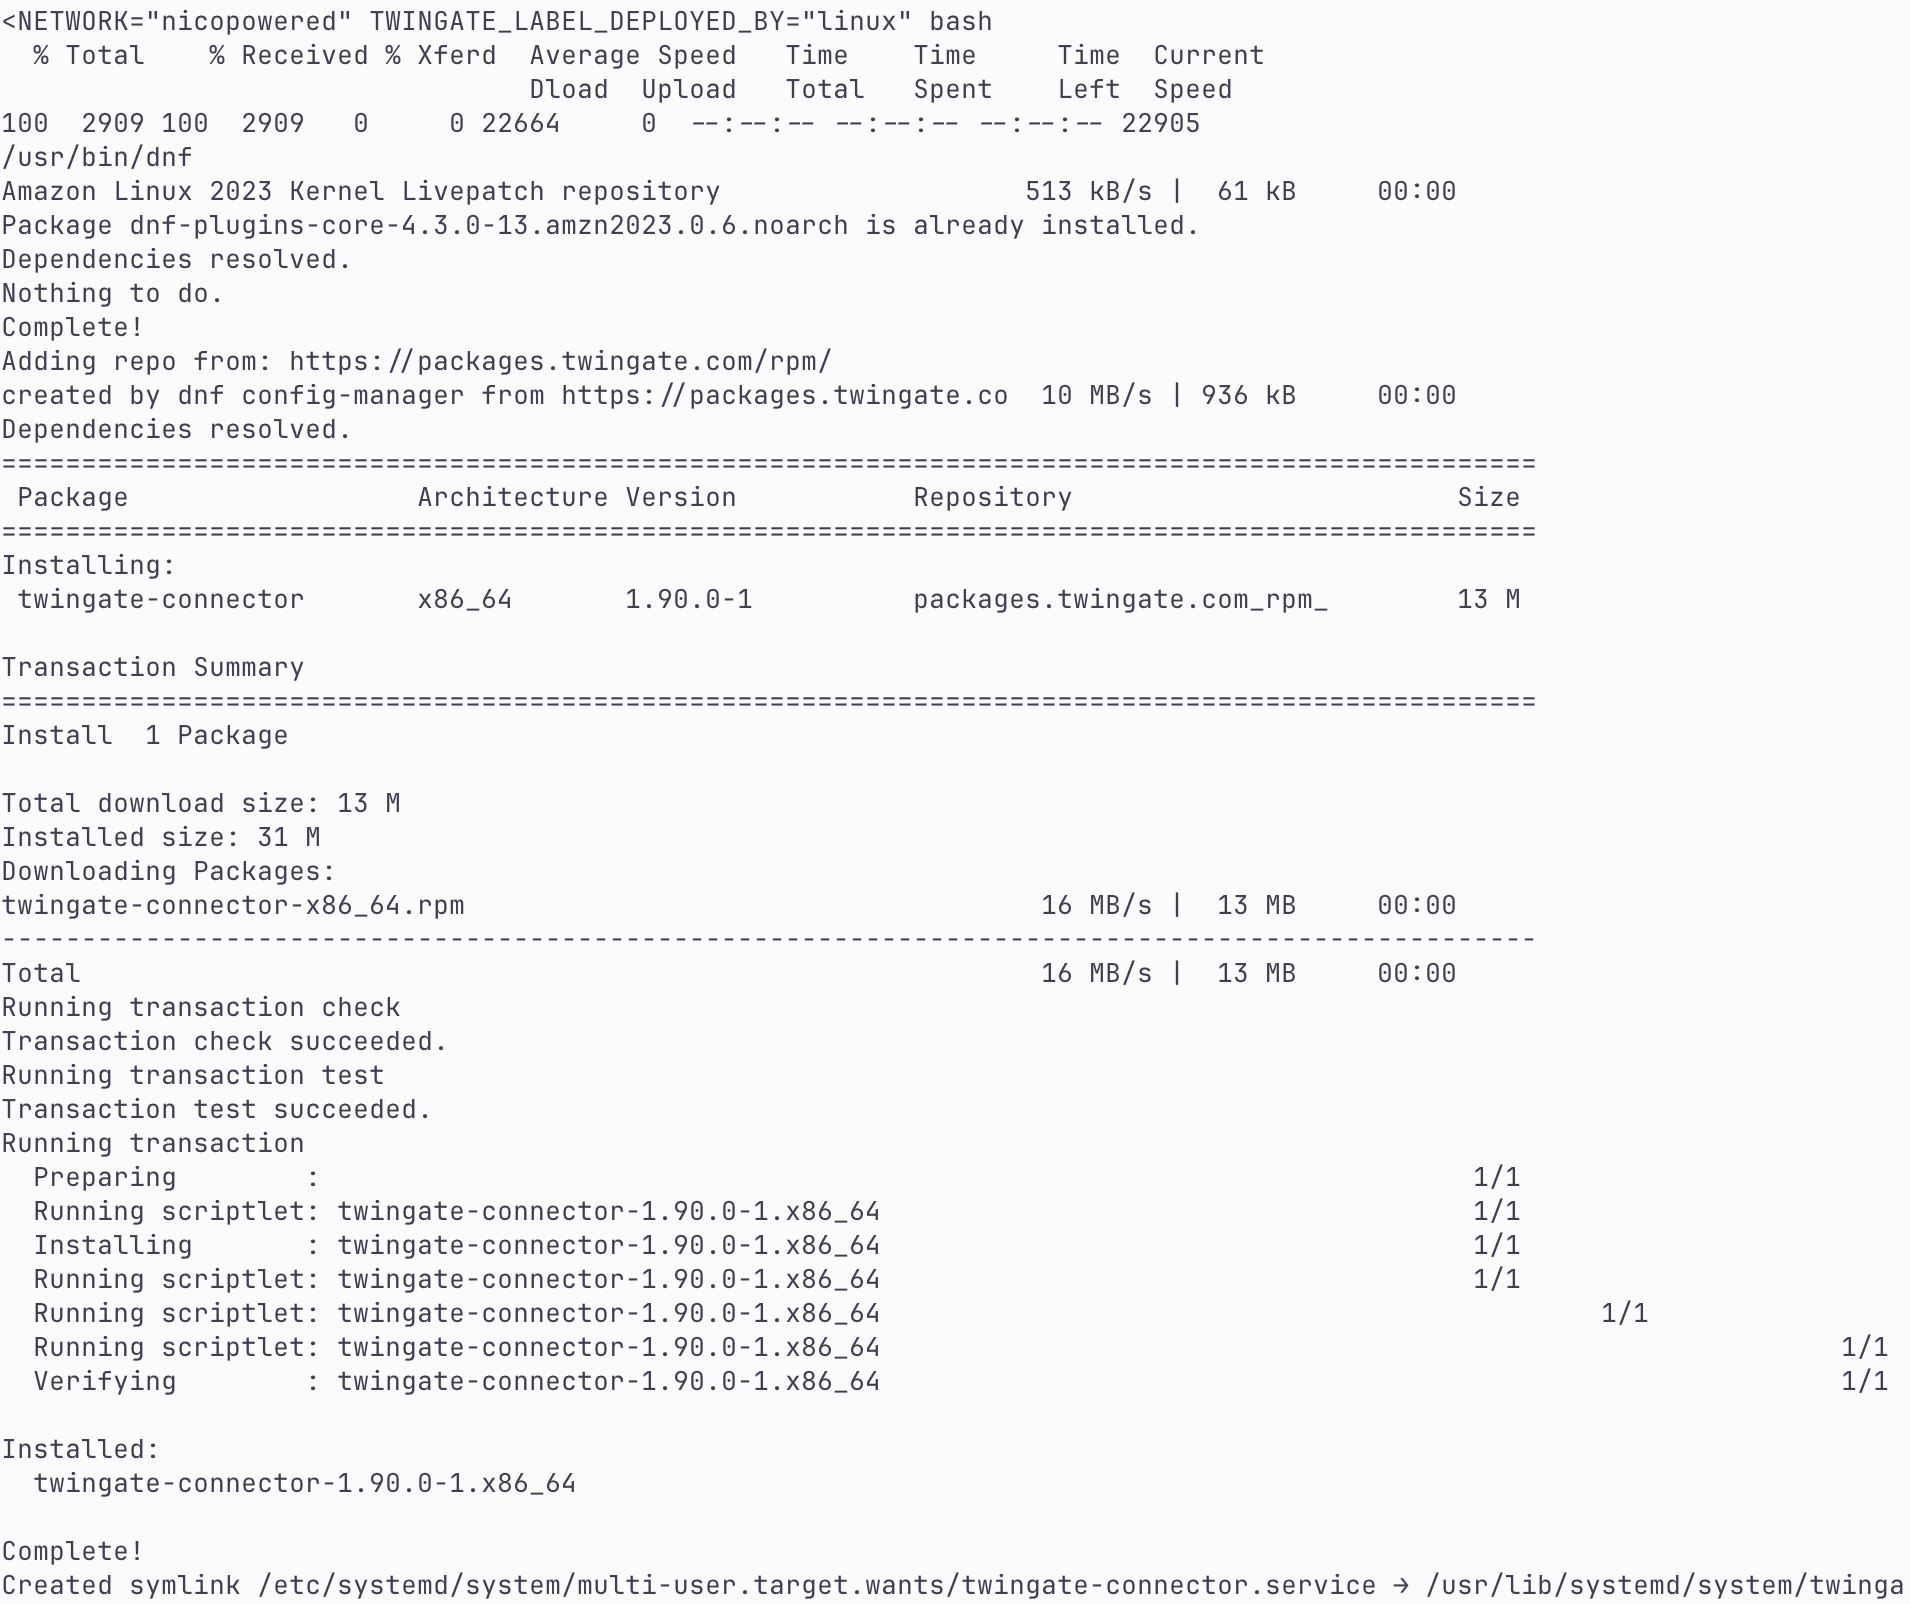
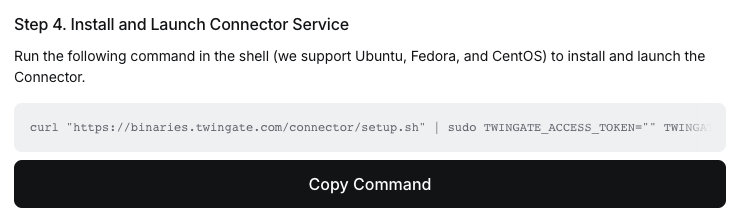 Click on ‘Copy Command’, then ssh into your Linux VM and run the command copied above. You should see this:
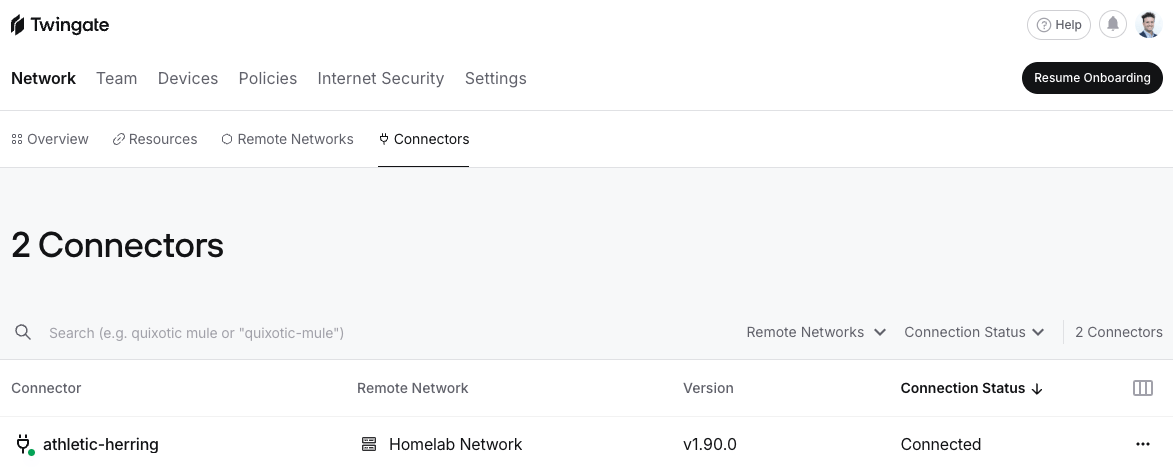
 Then go back to Twingate > Networks > Connectors and observe that your connector has connected:
 Now let’s create a test python server on that VM (that we’ll later allow-list as Resource in Twingate).
First, get the private IP of that VM. From that VM run:
```text theme={null}
hostname -I | awk '{print $1}'
```
You’ll get something like: 172.31.28.194
From that VM:
* Create a test html file:
```text theme={null}
echo "Hello, World!" > index.html
```
* Start a test python server (which will be serving the html file):
```text theme={null}
python3 -c "import http.server, urllib.parse; H = type('H', (http.server.SimpleHTTPRequestHandler,), {'translate_path': lambda s, p: http.server.SimpleHTTPRequestHandler.translate_path(s, urllib.parse.urlparse(p).path)}); http.server.HTTPServer(('0.0.0.0', 8000), H).serve_forever()"
```
You should see this:
Now let’s create a test python server on that VM (that we’ll later allow-list as Resource in Twingate).
First, get the private IP of that VM. From that VM run:
```text theme={null}
hostname -I | awk '{print $1}'
```
You’ll get something like: 172.31.28.194
From that VM:
* Create a test html file:
```text theme={null}
echo "Hello, World!" > index.html
```
* Start a test python server (which will be serving the html file):
```text theme={null}
python3 -c "import http.server, urllib.parse; H = type('H', (http.server.SimpleHTTPRequestHandler,), {'translate_path': lambda s, p: http.server.SimpleHTTPRequestHandler.translate_path(s, urllib.parse.urlparse(p).path)}); http.server.HTTPServer(('0.0.0.0', 8000), H).serve_forever()"
```
You should see this:
 ## Step 2 - Twingate Service Account configuration
Go to your Twingate admin console > Team > Services > Click on “+ Service” > Service Name = Cosmos > Create Service Account:
## Step 2 - Twingate Service Account configuration
Go to your Twingate admin console > Team > Services > Click on “+ Service” > Service Name = Cosmos > Create Service Account:
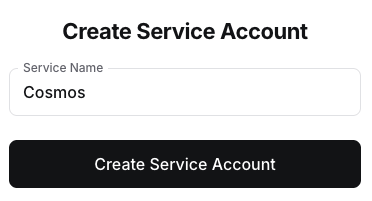 You should see this:
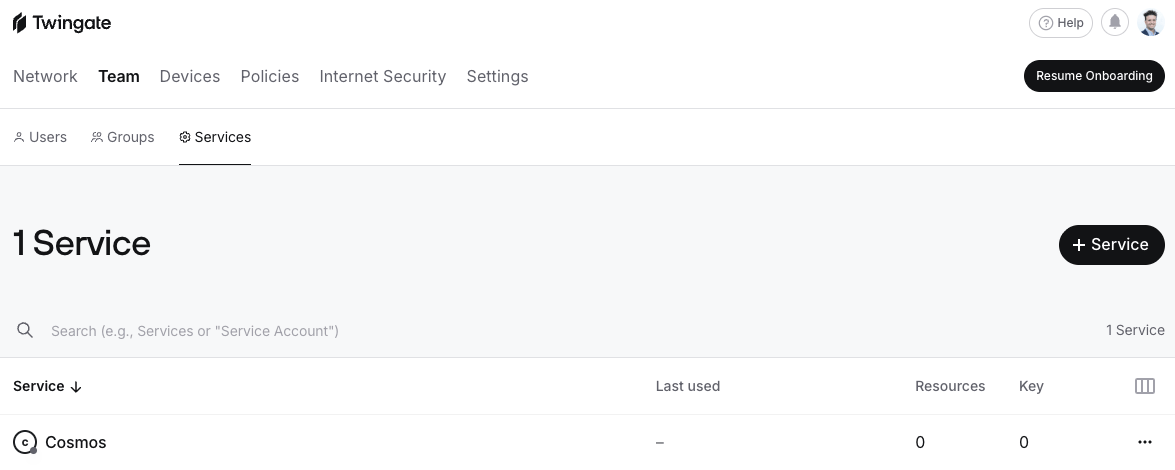 Click on the service account name, the click on “+Service Key”:
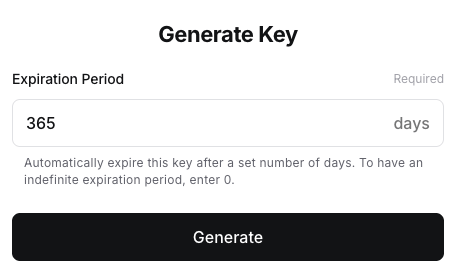
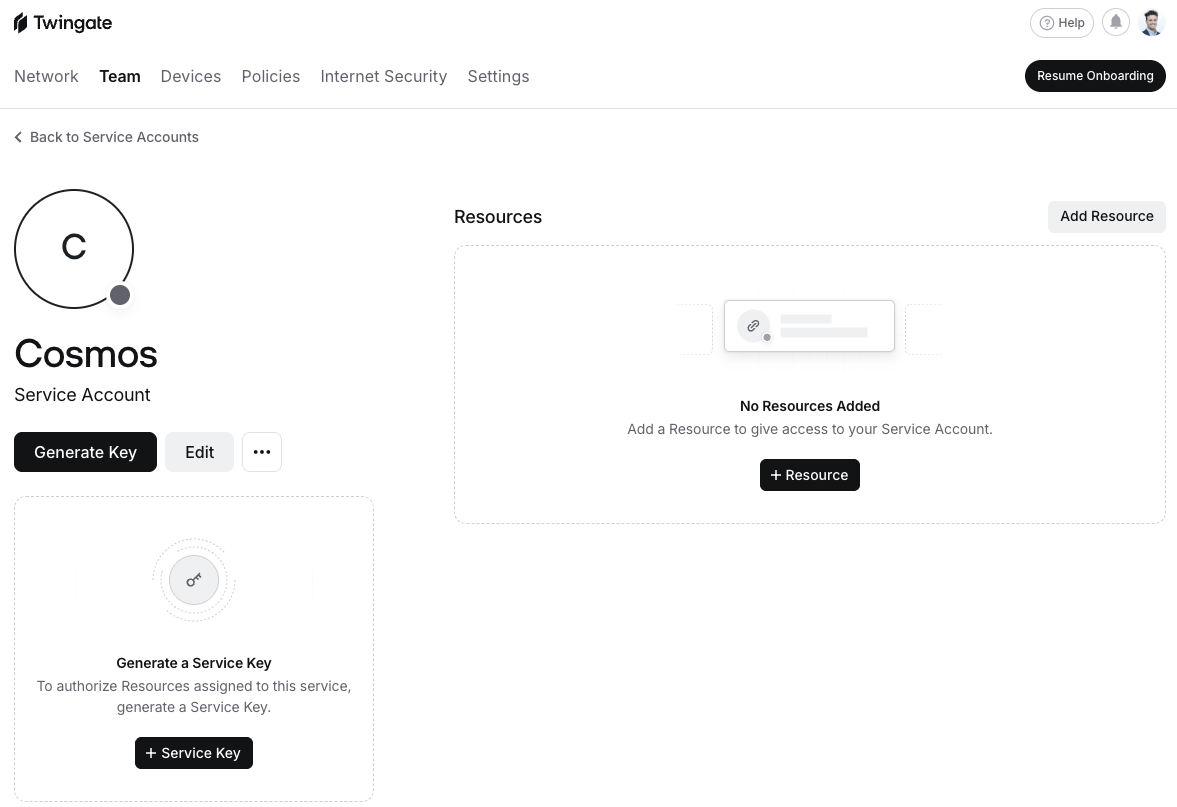 Keep expiration = 365 days, then Generate:
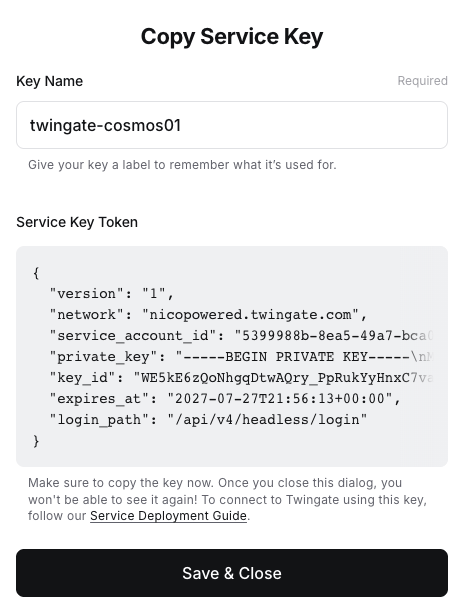
 You’ll be offered to rename your key and download the service key token (ex: twingate-cosmos01.json). Then click on “Save & Close”
 ## Step 3 - Twingate Resource configuration
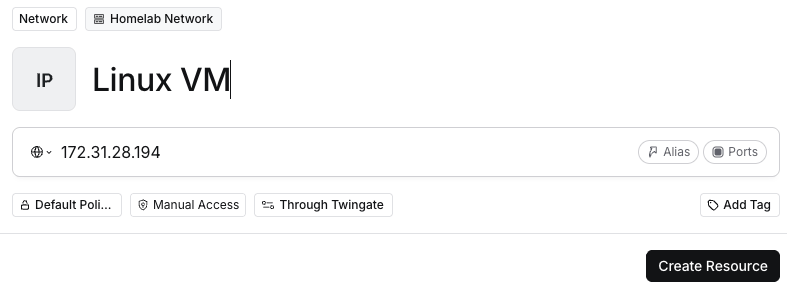
Now we’ll add the Linux VM as “Resource” in Twingate.
Go to your Twingate admin console > Network > Resources > “+Resource” > Select your network, enter as name “Linux VM”, enter the private IP of your Linux VM > click on Create Resource:
## Step 3 - Twingate Resource configuration
Now we’ll add the Linux VM as “Resource” in Twingate.
Go to your Twingate admin console > Network > Resources > “+Resource” > Select your network, enter as name “Linux VM”, enter the private IP of your Linux VM > click on Create Resource:
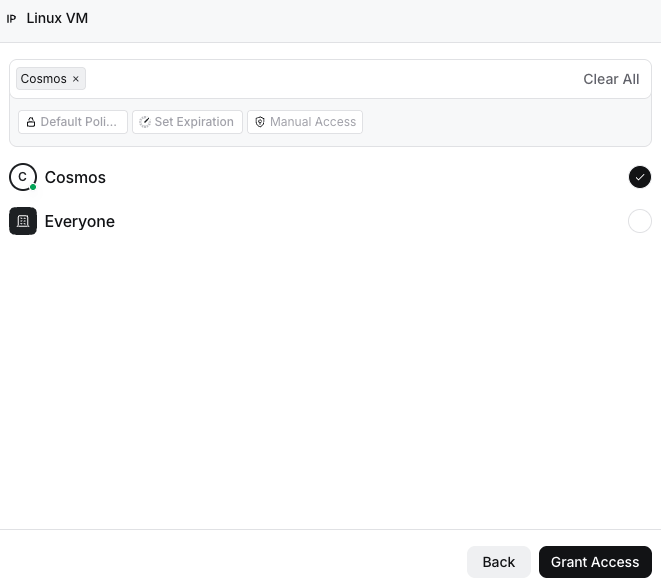
 Then select your Cosmos service account > Grant Access:
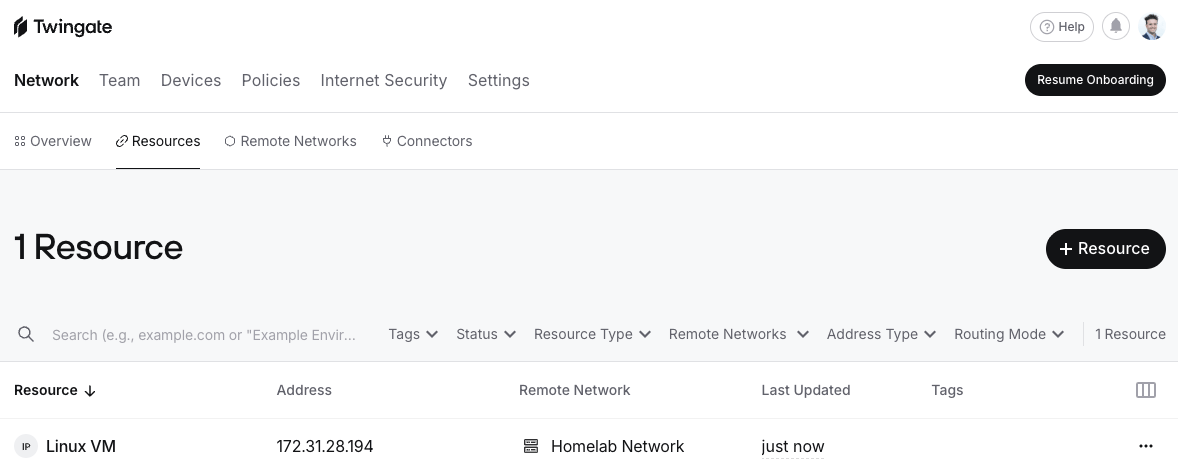
 You should see this:
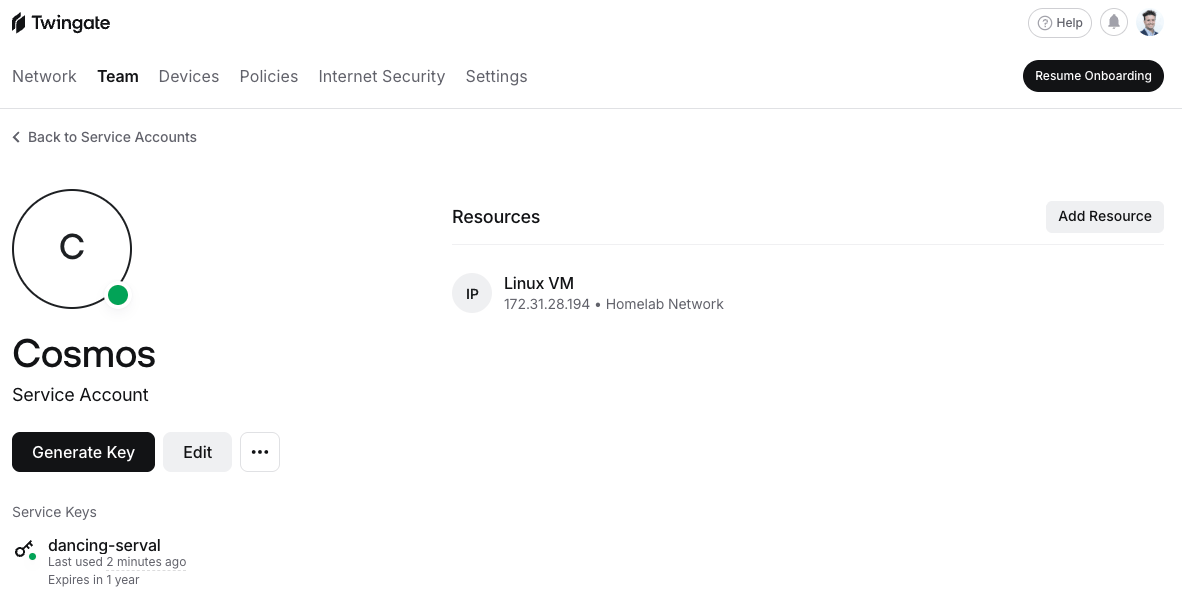
 If you now go to your Cosmos service account view (Twingate admin console > Team > Services > Cosmos) you should see the granted resource:
 ## Step 4 - Cosmos cloud env configuration
Go to your Cosmos cloud env from where you’d like to access your Twingate-protected resource. If you don’t have any, create a brand new env: [cosmos.augmentcode.com](http://cosmos.augmentcode.com) > Settings > Environments > Create an environment > Cloud Machine:
* Name: Test-Twingate
* Base image: keep the Cosmos default
* Repositories: select your repos
* Refresh: toggle on
* Click on Create Environment
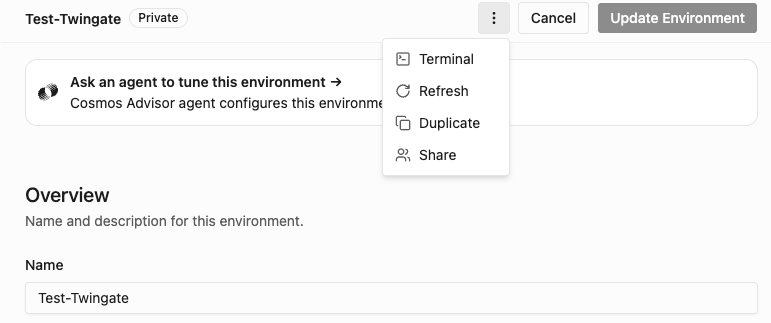
If you reopen your env, top right click on the 3 dots > Terminal:
## Step 4 - Cosmos cloud env configuration
Go to your Cosmos cloud env from where you’d like to access your Twingate-protected resource. If you don’t have any, create a brand new env: [cosmos.augmentcode.com](http://cosmos.augmentcode.com) > Settings > Environments > Create an environment > Cloud Machine:
* Name: Test-Twingate
* Base image: keep the Cosmos default
* Repositories: select your repos
* Refresh: toggle on
* Click on Create Environment
If you reopen your env, top right click on the 3 dots > Terminal:
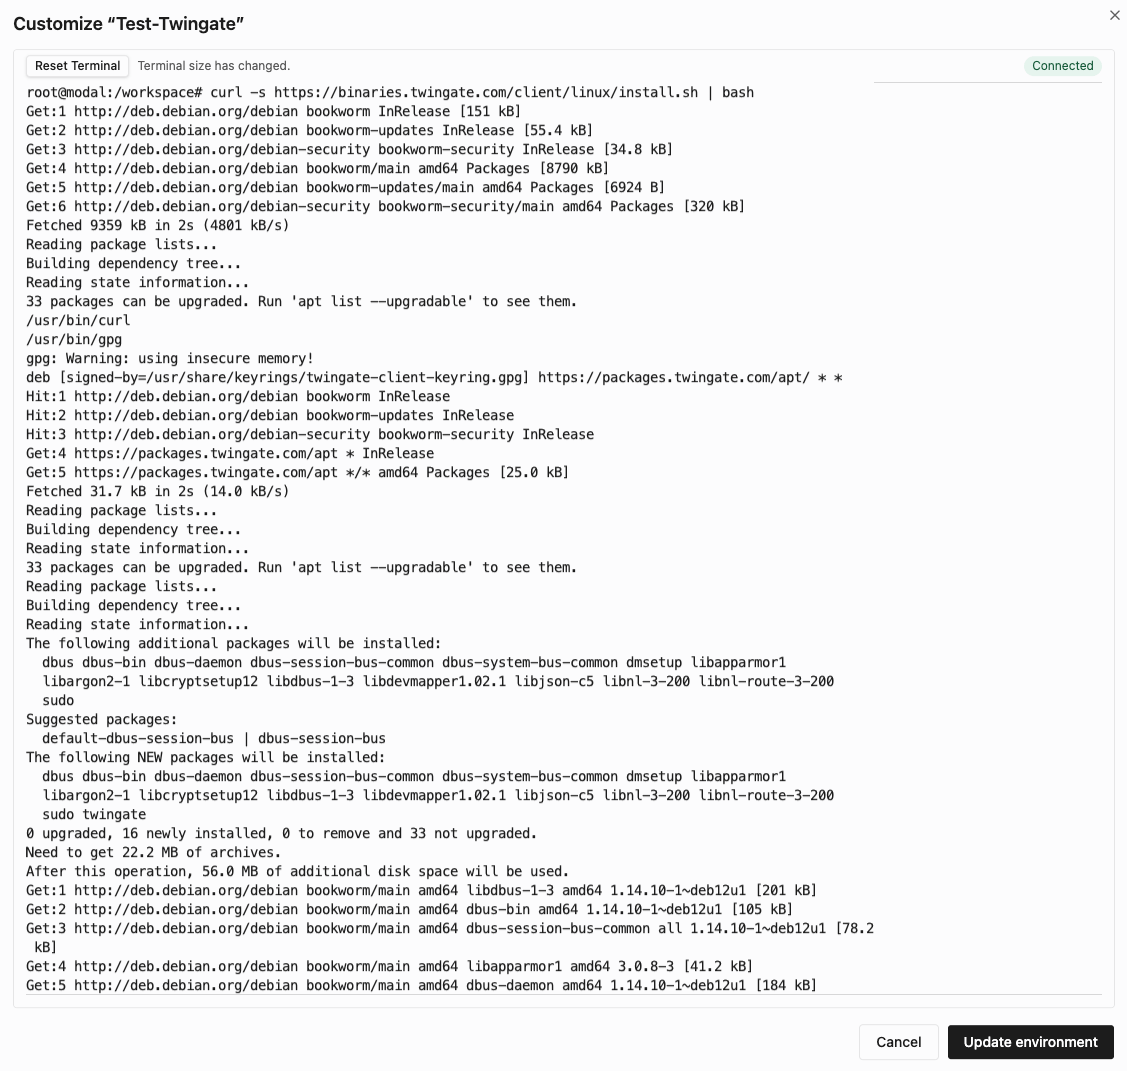
 Install Twingate by running:
```text theme={null}
curl -s https://binaries.twingate.com/client/linux/install.sh | bash
```
Install Twingate by running:
```text theme={null}
curl -s https://binaries.twingate.com/client/linux/install.sh | bash
```
 Now we’ll bring over the twingate-cosmos01.json key. Run:
```text theme={null}
nano twingate-cosmos01.json
```
Then paste the content of your key, then CTRL-O to save the file, and CTRL-X to exit the file
Now we’ll bring over the twingate-cosmos01.json key. Run:
```text theme={null}
nano twingate-cosmos01.json
```
Then paste the content of your key, then CTRL-O to save the file, and CTRL-X to exit the file
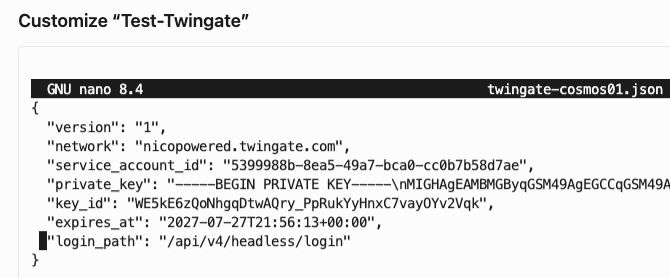 Make sure twingate-cosmos01.json has been created:
 Move up 1 folder:
```text theme={null}
cd ..
```
Move up 1 folder:
```text theme={null}
cd ..
```
 Now authenticate to Twingate by running:
```text theme={null}
twingate setup --headless /workspace/twingate-cosmos01.json
```
You should see:
Now authenticate to Twingate by running:
```text theme={null}
twingate setup --headless /workspace/twingate-cosmos01.json
```
You should see:
 Let’s start Twingate in that terminal session:
```text theme={null}
/sbin/twingated --http-proxy 127.0.0.1:9999 --tun off &
```
Then check that this process is running, paste and enter this:
```text theme={null}
ps aux | grep twingated
```
You should see this:
Let’s start Twingate in that terminal session:
```text theme={null}
/sbin/twingated --http-proxy 127.0.0.1:9999 --tun off &
```
Then check that this process is running, paste and enter this:
```text theme={null}
ps aux | grep twingated
```
You should see this:
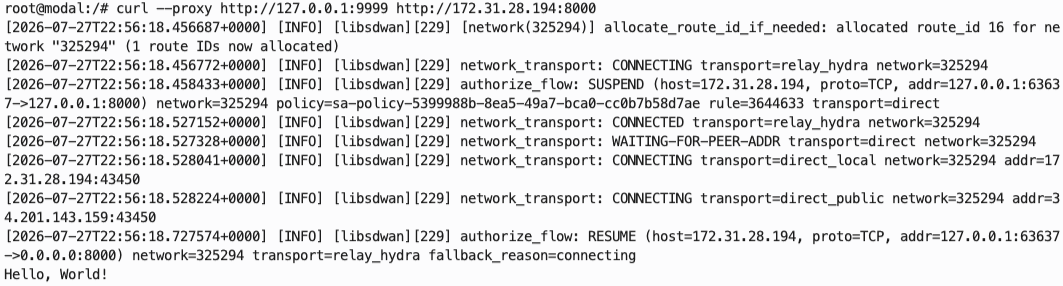
 Now let’s try to reach the index.html page:
```text theme={null}
curl --proxy http://127.0.0.1:9999 http://172.31.28.194:8000
```
And should see your Hello World!:
Now let’s try to reach the index.html page:
```text theme={null}
curl --proxy http://127.0.0.1:9999 http://172.31.28.194:8000
```
And should see your Hello World!:
 Now click on “Update environment” to save your cloud env config,
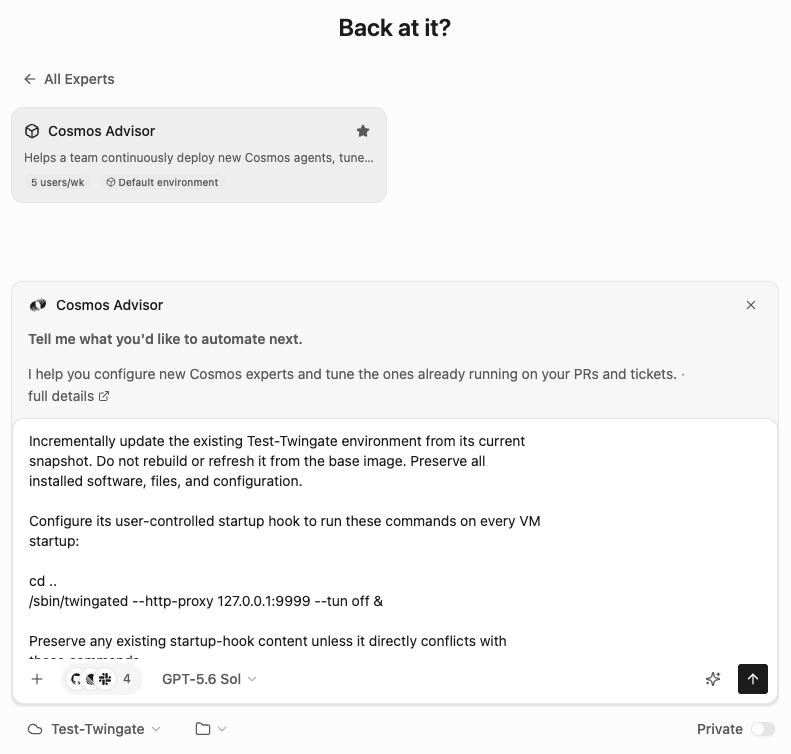
One more step: earlier Twingate was started only in that terminal session. Now we’ll ask Cosmos Advisor to update the cloud env’s startup script so it always starts Twingate upon booting the cloud env across all future sessions.
Open a new Cosmos session (cosmos.augmentcode.com) > New session > select Cosmos Advisor > select the Test-Twingate cloud env, prompt with
```text theme={null}
Incrementally update the existing Test-Twingate environment from its current
snapshot. Do not rebuild or refresh it from the base image. Preserve all
installed software, files, and configuration.
Configure its user-controlled startup hook to run these commands on every VM
startup:
cd ..
/sbin/twingated --http-proxy 127.0.0.1:9999 --tun off &
Preserve any existing startup-hook content unless it directly conflicts with
these commands.
After updating the snapshot, launch a fresh test session using Test-Twingate
and verify:
1. /sbin/twingated still exists.
2. A twingated process is running.
3. The proxy is listening on 127.0.0.1:9999.
Do not report success based only on the environment update completing. Report
the results of all three runtime checks. If any step would require a rebuild,
stop and ask me first.
When you delegate to a worker or background job, do not use its status field as
evidence of completion. Confirm by reading its actual output or transcript. If a
status check is inconclusive twice, switch tools rather than repeating it, and
tell me what you tried. Never tell me "still waiting" more than once without
having read the underlying output directly.
```
You should see:
Now click on “Update environment” to save your cloud env config,
One more step: earlier Twingate was started only in that terminal session. Now we’ll ask Cosmos Advisor to update the cloud env’s startup script so it always starts Twingate upon booting the cloud env across all future sessions.
Open a new Cosmos session (cosmos.augmentcode.com) > New session > select Cosmos Advisor > select the Test-Twingate cloud env, prompt with
```text theme={null}
Incrementally update the existing Test-Twingate environment from its current
snapshot. Do not rebuild or refresh it from the base image. Preserve all
installed software, files, and configuration.
Configure its user-controlled startup hook to run these commands on every VM
startup:
cd ..
/sbin/twingated --http-proxy 127.0.0.1:9999 --tun off &
Preserve any existing startup-hook content unless it directly conflicts with
these commands.
After updating the snapshot, launch a fresh test session using Test-Twingate
and verify:
1. /sbin/twingated still exists.
2. A twingated process is running.
3. The proxy is listening on 127.0.0.1:9999.
Do not report success based only on the environment update completing. Report
the results of all three runtime checks. If any step would require a rebuild,
stop and ask me first.
When you delegate to a worker or background job, do not use its status field as
evidence of completion. Confirm by reading its actual output or transcript. If a
status check is inconclusive twice, switch tools rather than repeating it, and
tell me what you tried. Never tell me "still waiting" more than once without
having read the underlying output directly.
```
You should see:
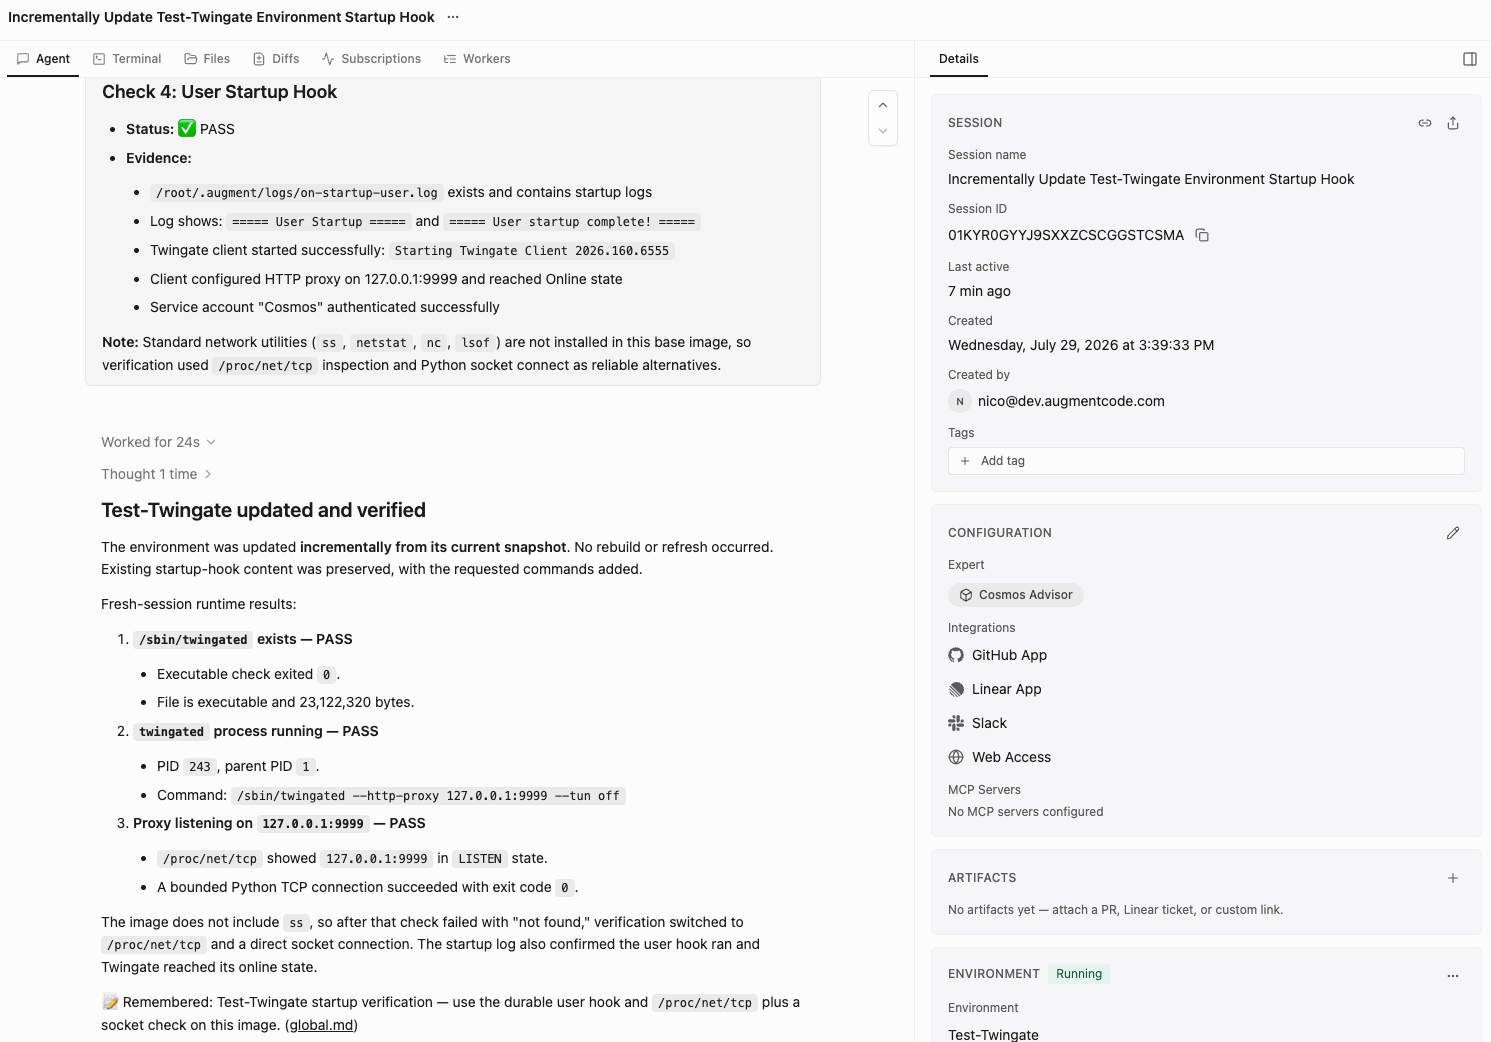 Any new session stemmed from that Test-Twingate cloud env will now have a Twingate tunnel running.
## Step 5 - Final Test
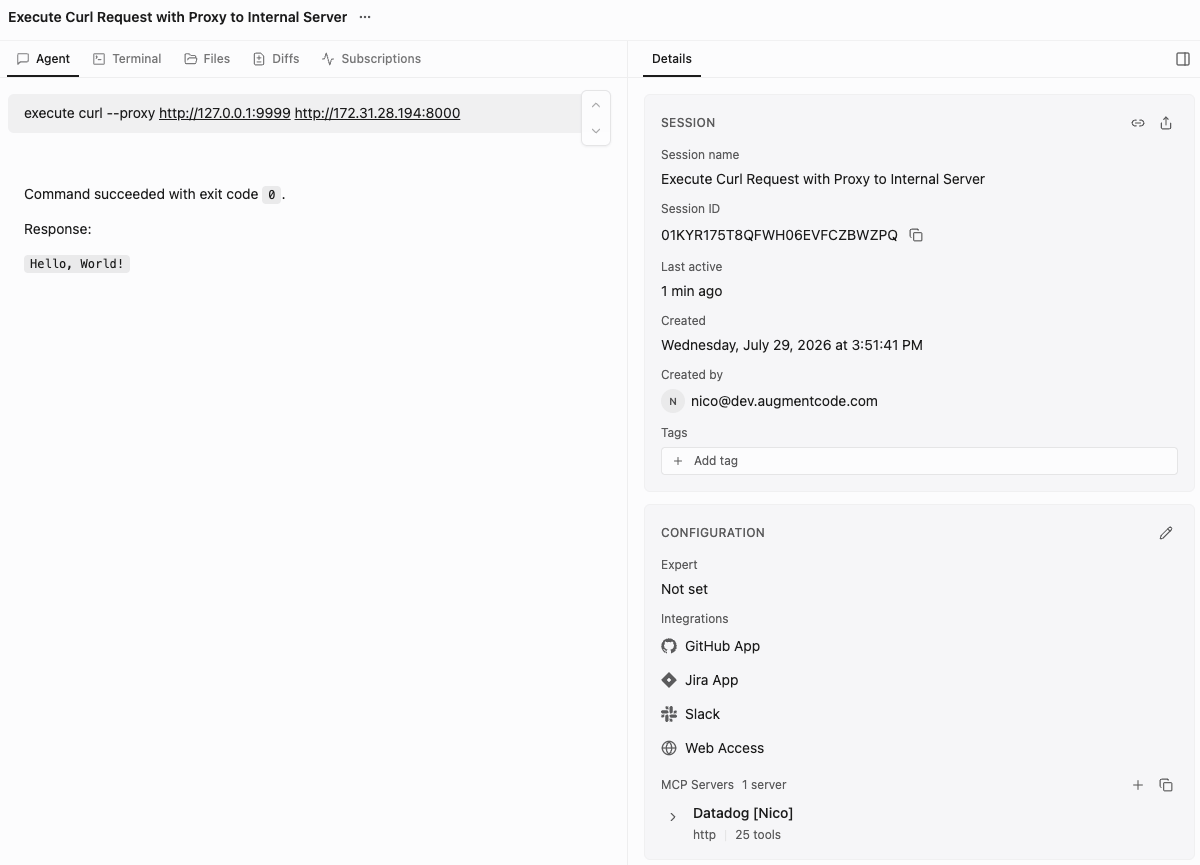
Final check, start a brand new session without any expert and prompt `execute curl --proxy `[`http://127.0.0.1:9999`](http://127.0.0.1:9999/)` `[`http://172.31.28.194:8000`](http://172.31.28.194:8000/) , you should see this:
Any new session stemmed from that Test-Twingate cloud env will now have a Twingate tunnel running.
## Step 5 - Final Test
Final check, start a brand new session without any expert and prompt `execute curl --proxy `[`http://127.0.0.1:9999`](http://127.0.0.1:9999/)` `[`http://172.31.28.194:8000`](http://172.31.28.194:8000/) , you should see this:
 Congrats, you’ve configured Twingate with your Cosmos cloud env! You’re now able to leverage Cosmos experts to orchestrate Twingate-protected resources.