Introduction
In this page we’ll learn how to configure 2 things:- Get Datadog to push events to Augment Cosmos via webhooks
- Get Augment Cosmos to interact with Datadog via the Datadog MCP server
Prerequisites
- Cosmos side: any user who can self-create webhooks and MCP servers
- Datadog side: any user with Datadog Admin Role or at least those permissions:
- To create a service account: Service Account Write and **User Manage Access **permissions
- To create an Organization API key: API Keys Write and User Application Keys Write permissions
- To configure a webhook: Integrations Manage permission
Step 1 - Configure Datadog to notify a Cosmos Webhook
Let’s create a new webhook in Cosmos (so Cosmos can listen to Datadog events). Configuration steps:- Go to Cosmos (https://cosmos.augmentcode.com) > Settings > Webhooks > Create Webhook > Custom Webhook
- Description “Datadog”
- Type: Bearer Token
- Keep Shared toggled on
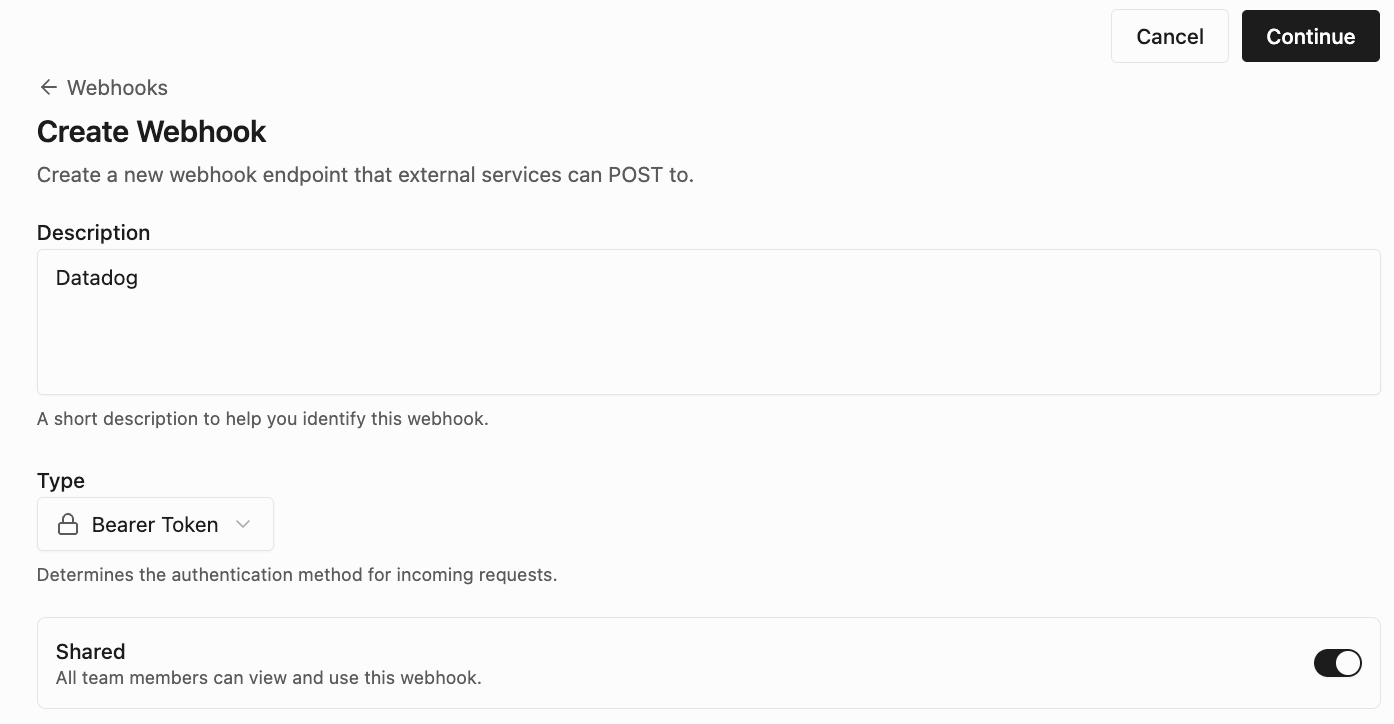
- That gives us a url to POST with a given Bearer token to pass as HTTP header. Curl request would look like:
- In Datadog
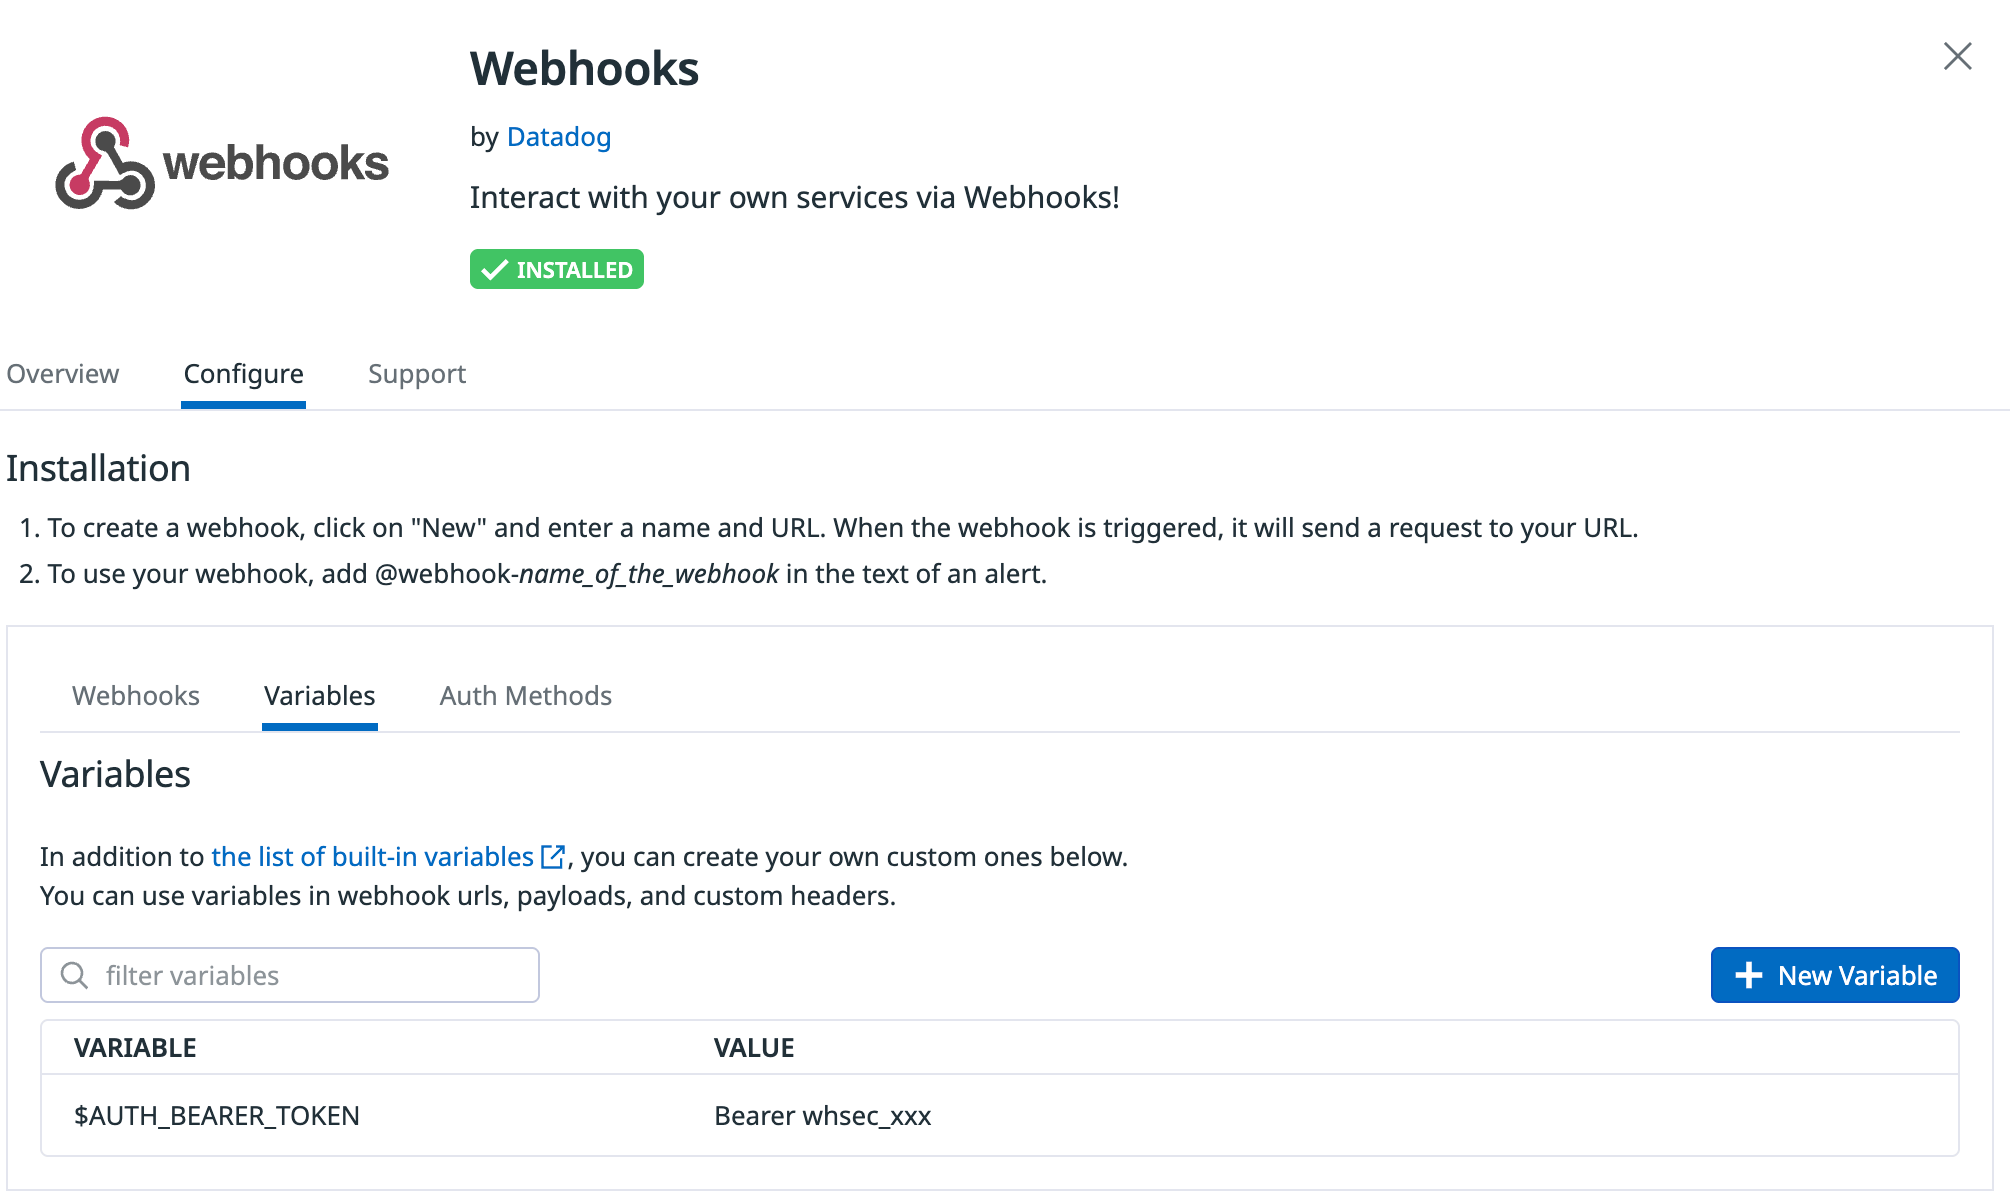
- Go to Integrations > search for Webhooks (ex: https://us5.datadoghq.com/integrations?search=webhook&integrationId=webhooks) > Configure tab
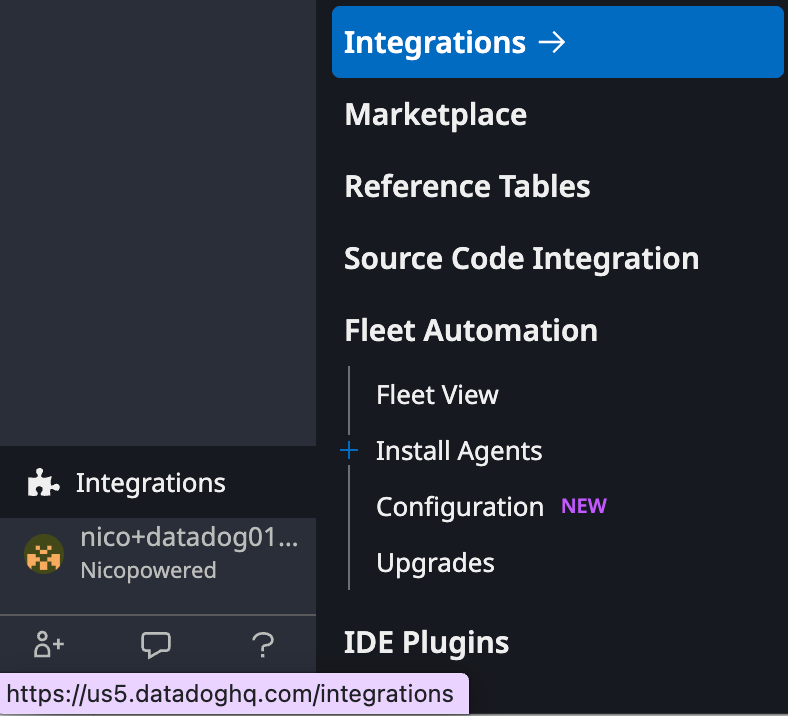
- Variables tab > New Variable and create variable $AUTH_BEARER_TOKEN with value Bearer <YOUR_COSMOS_WEBHOOK_BEARER_TOKEN>
- Webhooks tab > New > Add > Enter the Cosmos webhook url, keep auth method empty, select Custom header and add
text
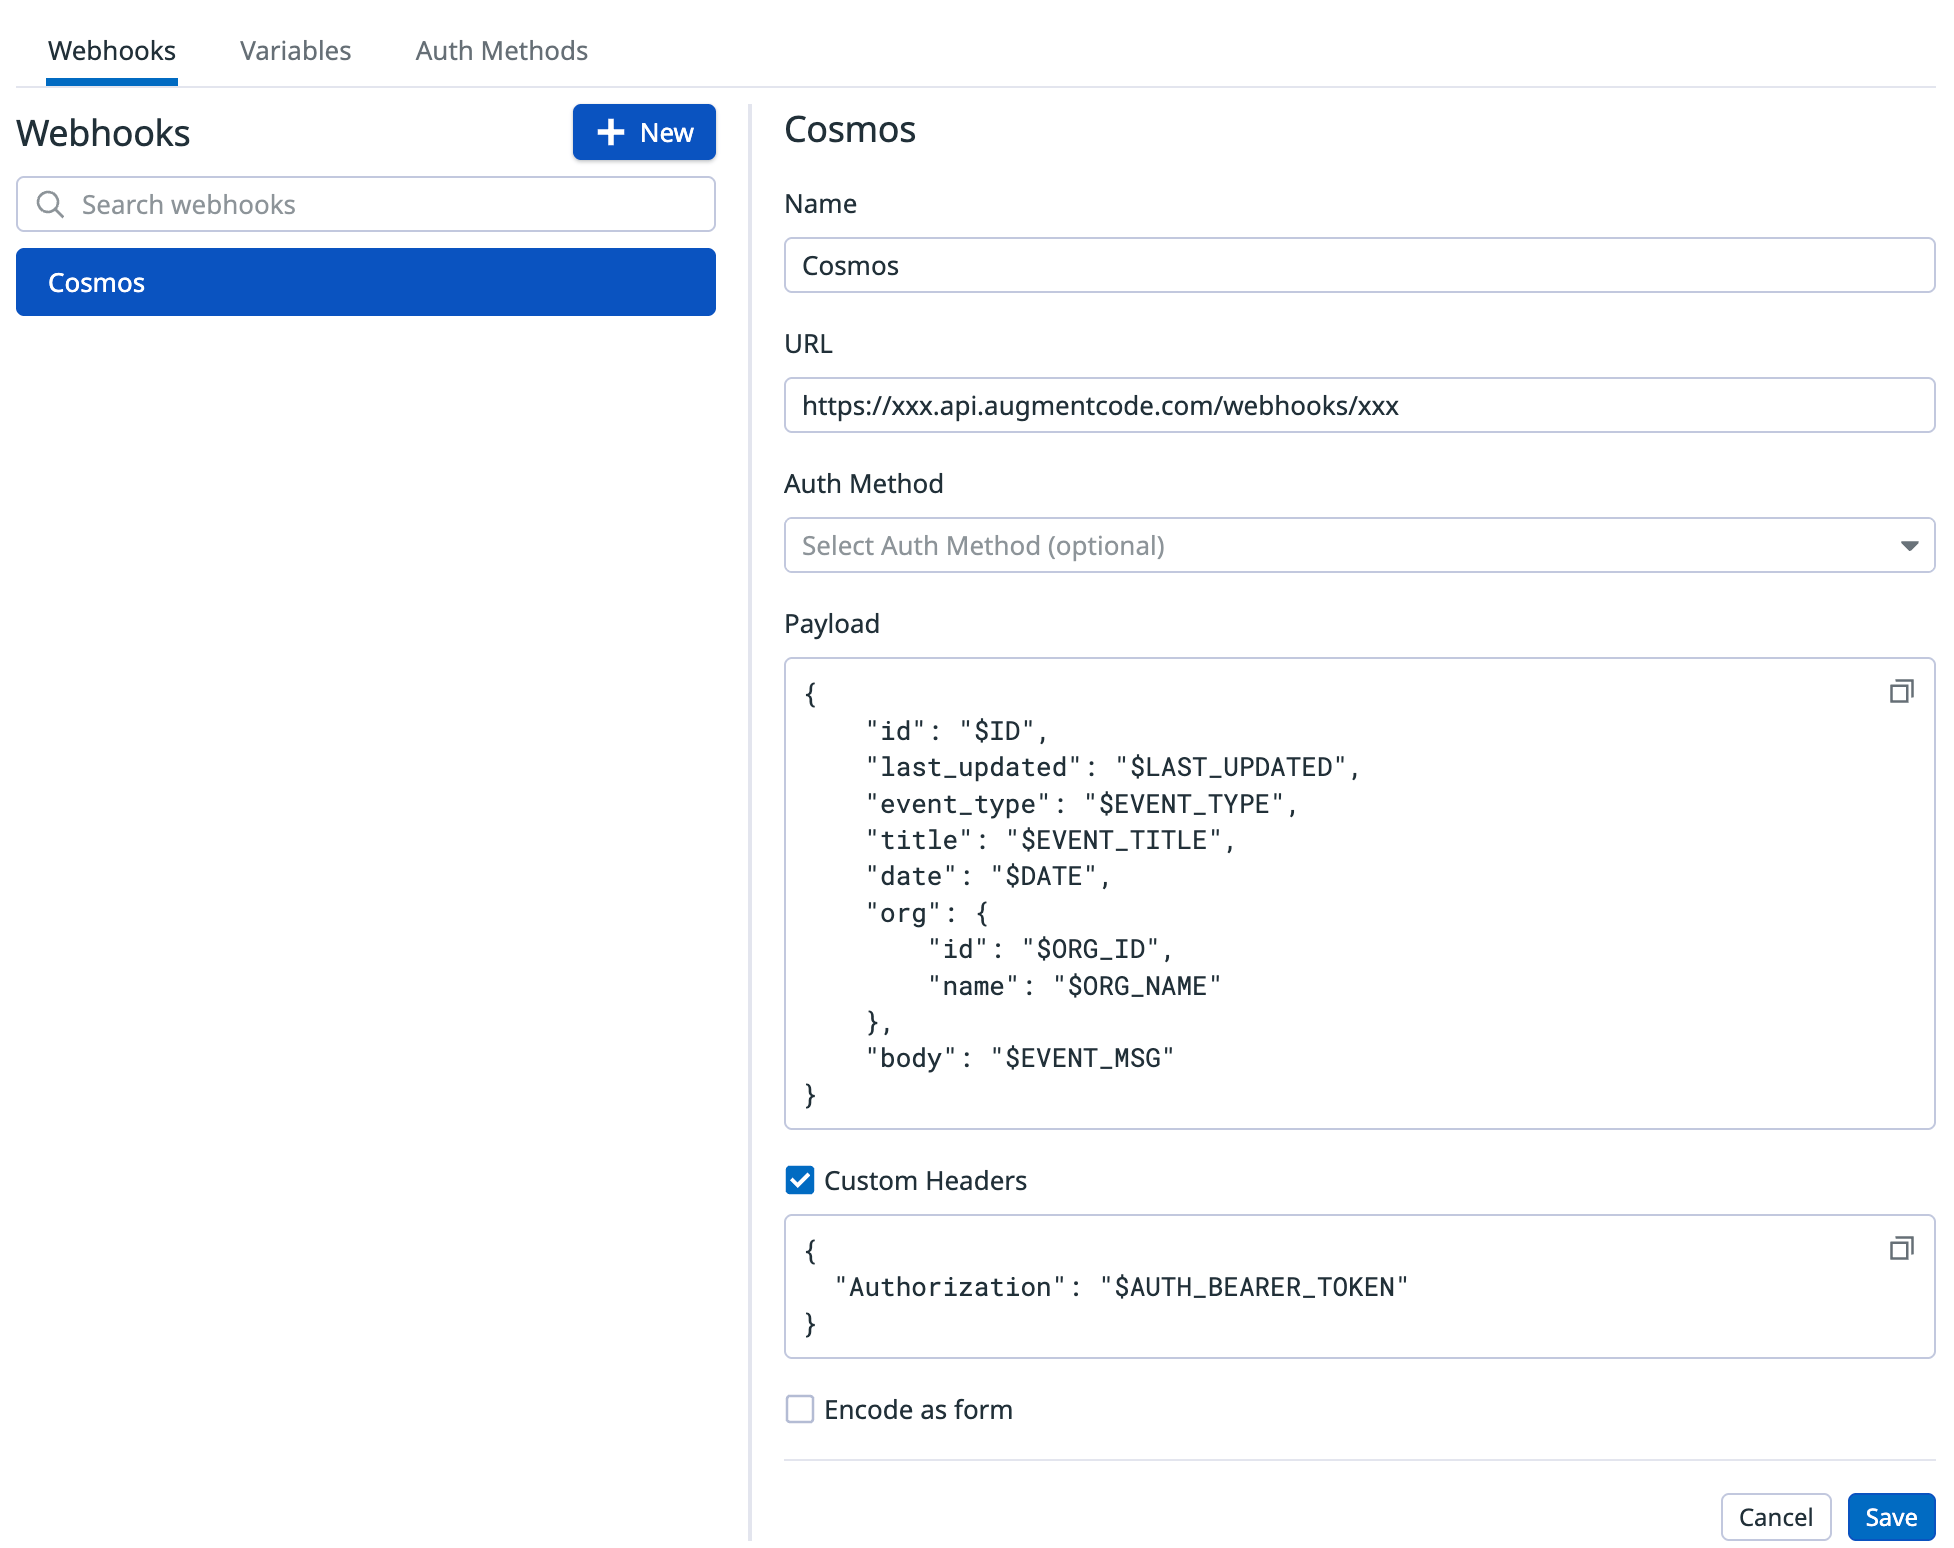
- Click on Save Now let’s run a test with a Datadog monitor:
- Datadog home > Monitoring > New monitor
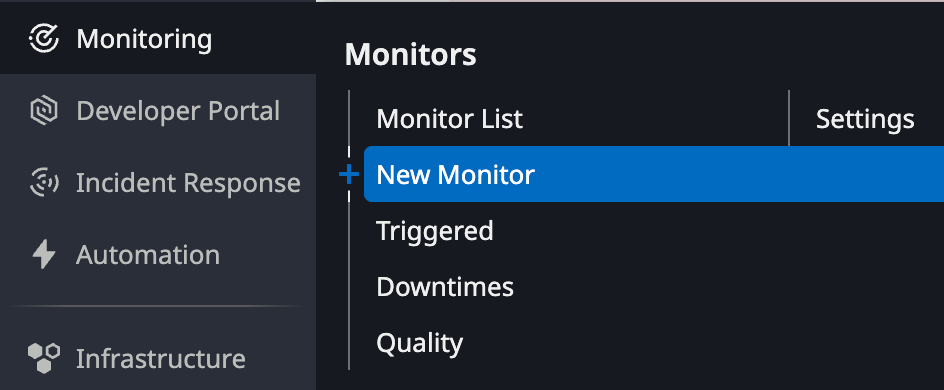
- Enter those parameters
- detection method: Threshold Alert
- Set alert conditions > Alert threshold > enter value “1”
- Configure notifications & automations
- Monitor name: Test Cosmos webhook config
- Edit section: type in @ and select your webhook name in the drop down list
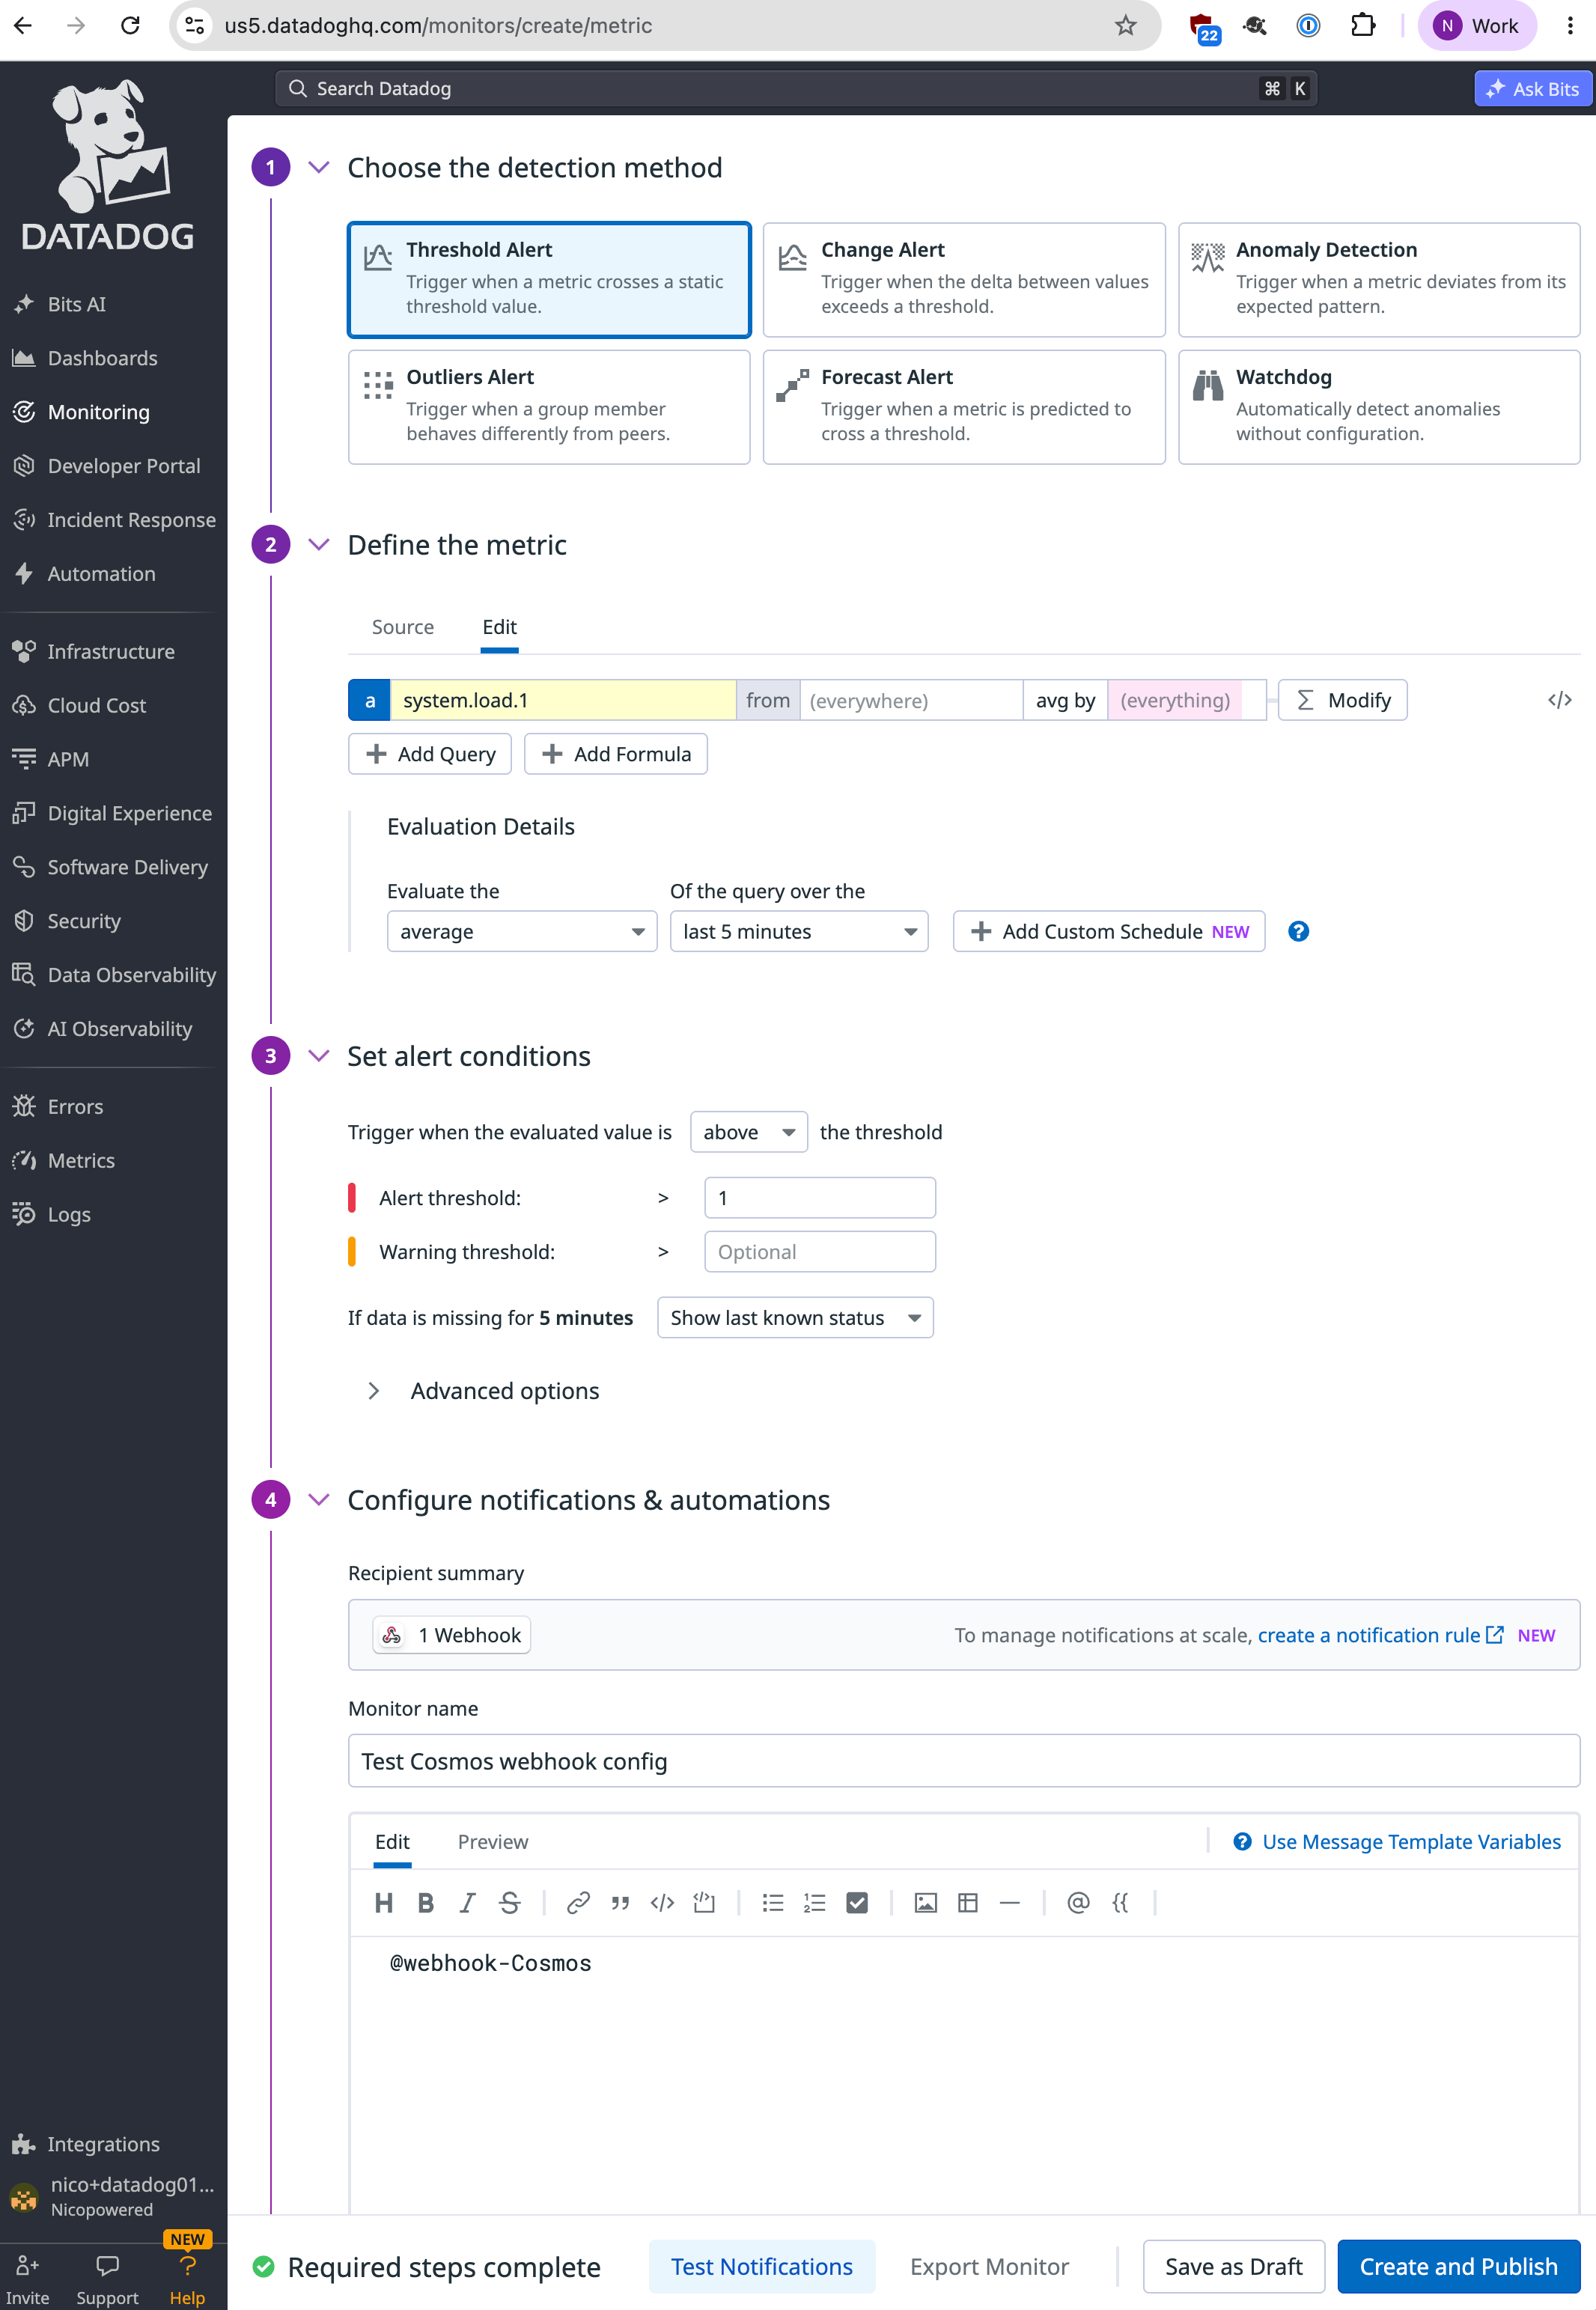
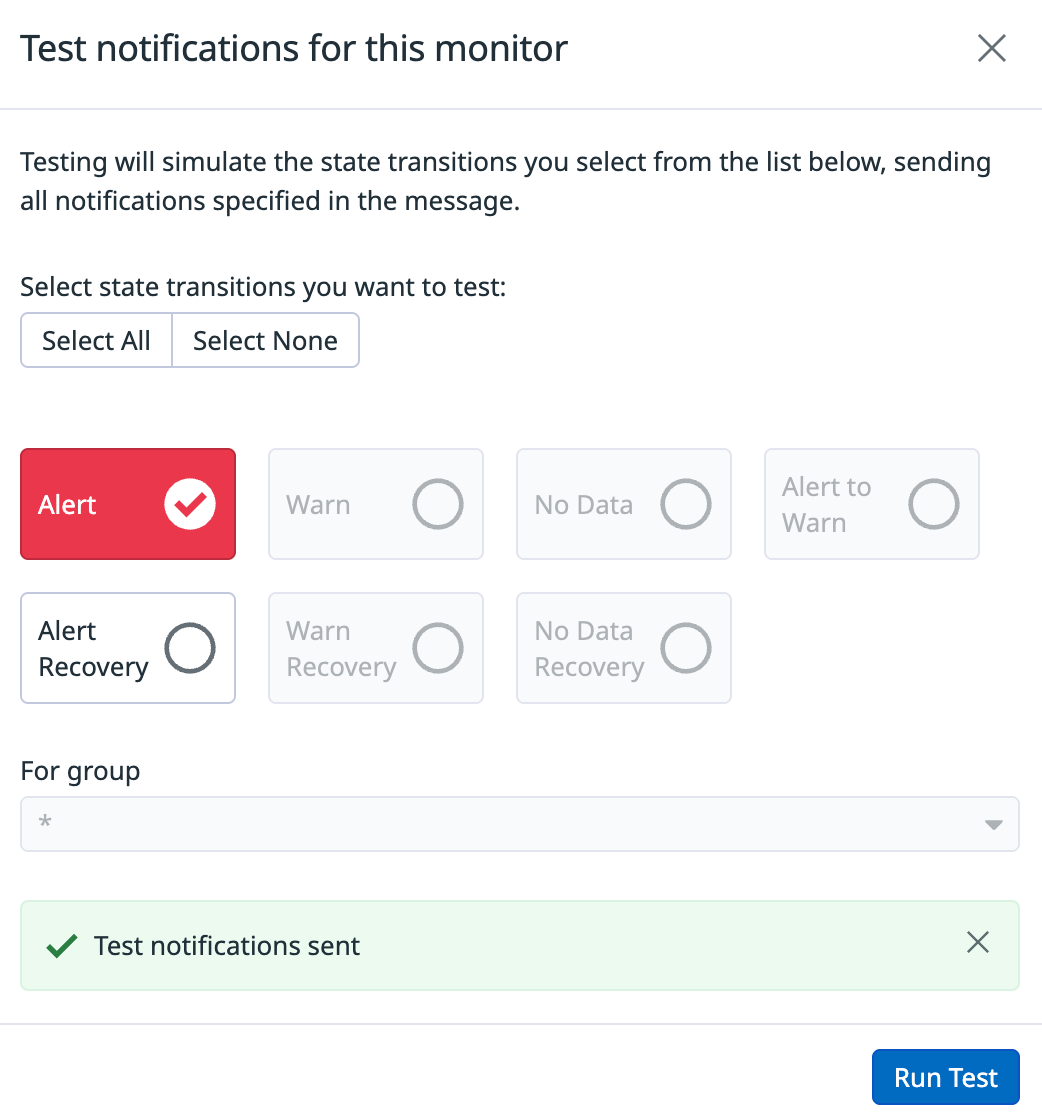
- Now click on Test Notifications > Run Test
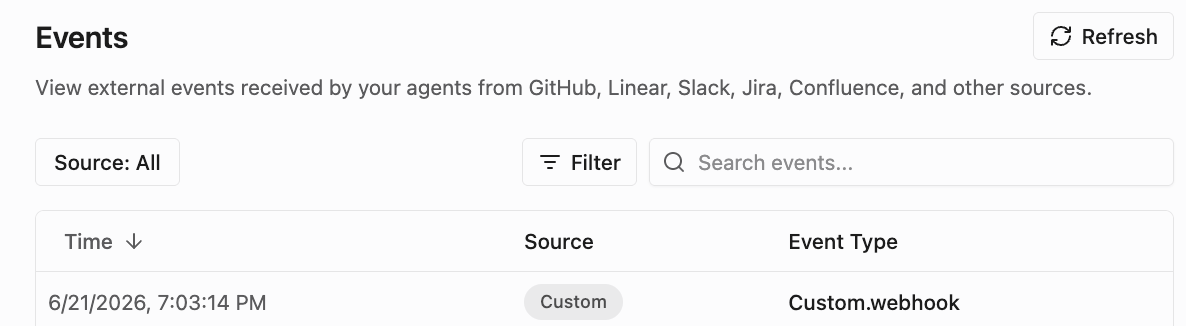
- Go to Cosmos cosmos.augmentcode.com > Settings > Automations > Event Log tab. You should see a new Custom.webhook entry
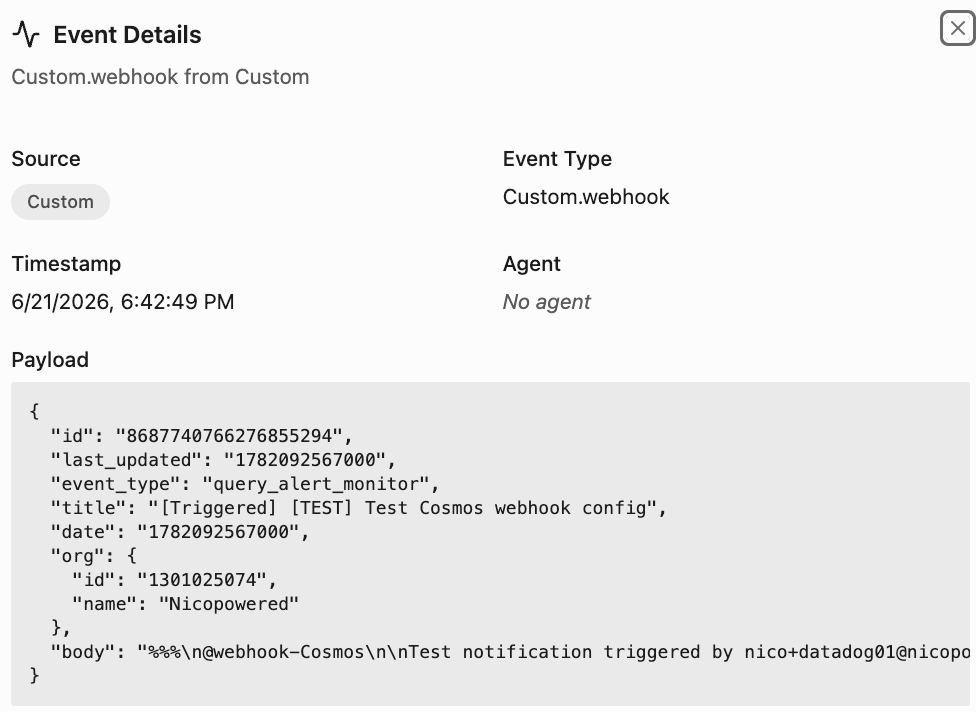
- Click on that event entry and you’ll see the test payload from Datadog
Step 2: Integrate with Datadog via a Service Account
For Cosmos to interact with Datadog via a Datadog service account we’ll leverage the Datadog remote MCP server and authenticate it with said service account as we’d want Cosmos to run headless automations. We’ll need 3 parameters:- A Datadog tenant region
- A Datadog organization API key
- A Datadog service account application key You should be able to tell what is your Datadog region from the dashboard url. If it’s https://us5.datadoghq.com/monitors/create/metric then your region is us5. We’ll use that value for the rest of this tutorial, just remember to replace it with yours. Now let’s create an organization API key:
- Click on your username bottom left > Organization Settings > API Keys
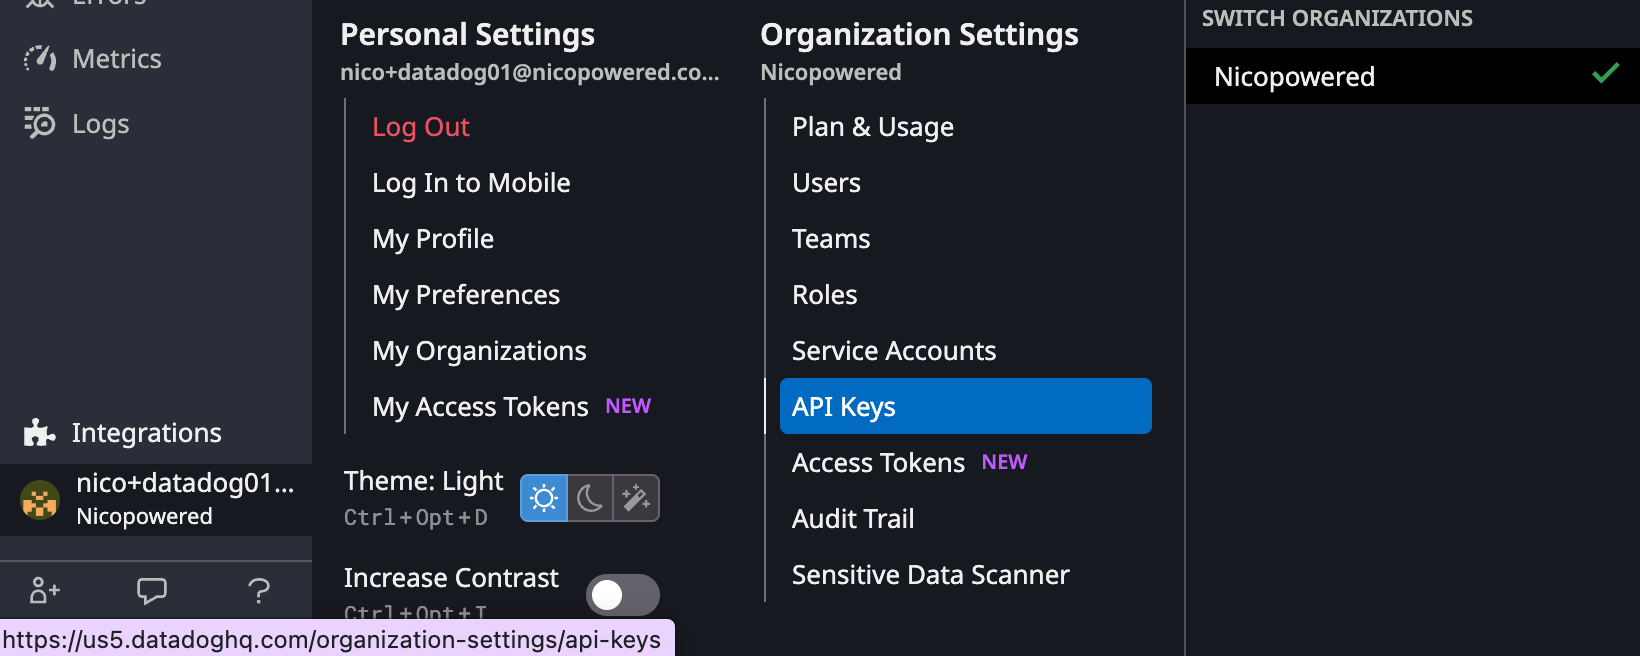
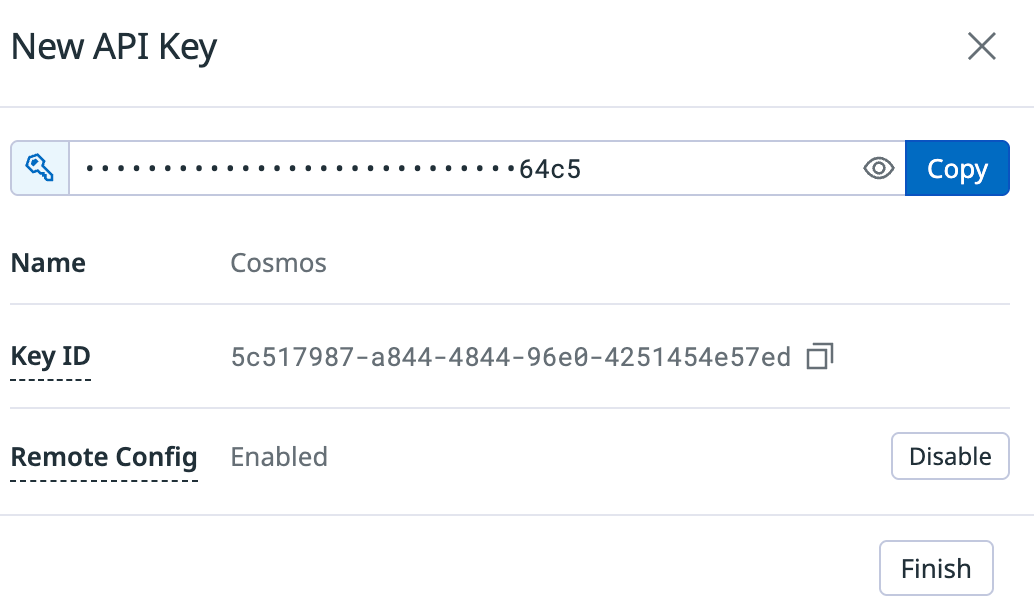
- Click on New Key > Enter name: Cosmos > Create Key
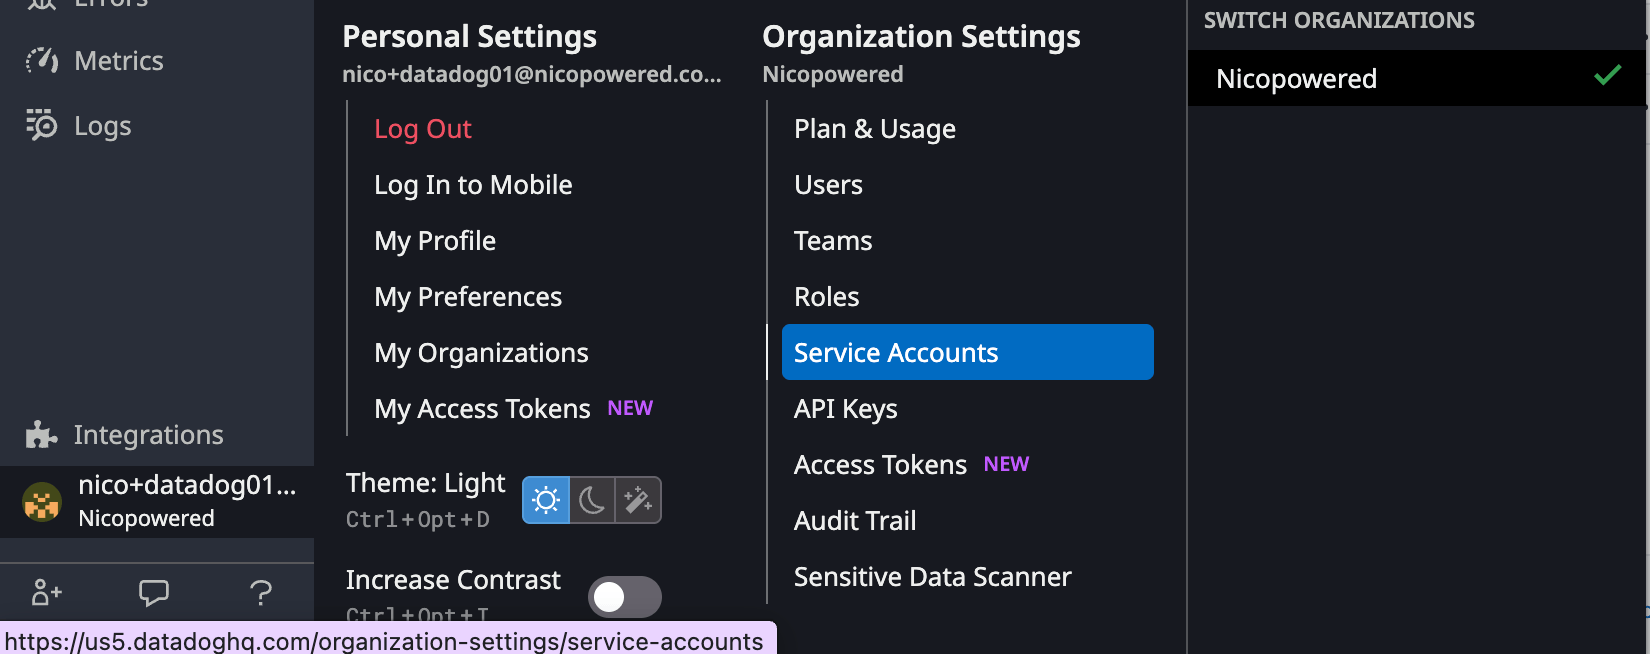
- Click on your username bottom left > Organization Settings > Service Accounts
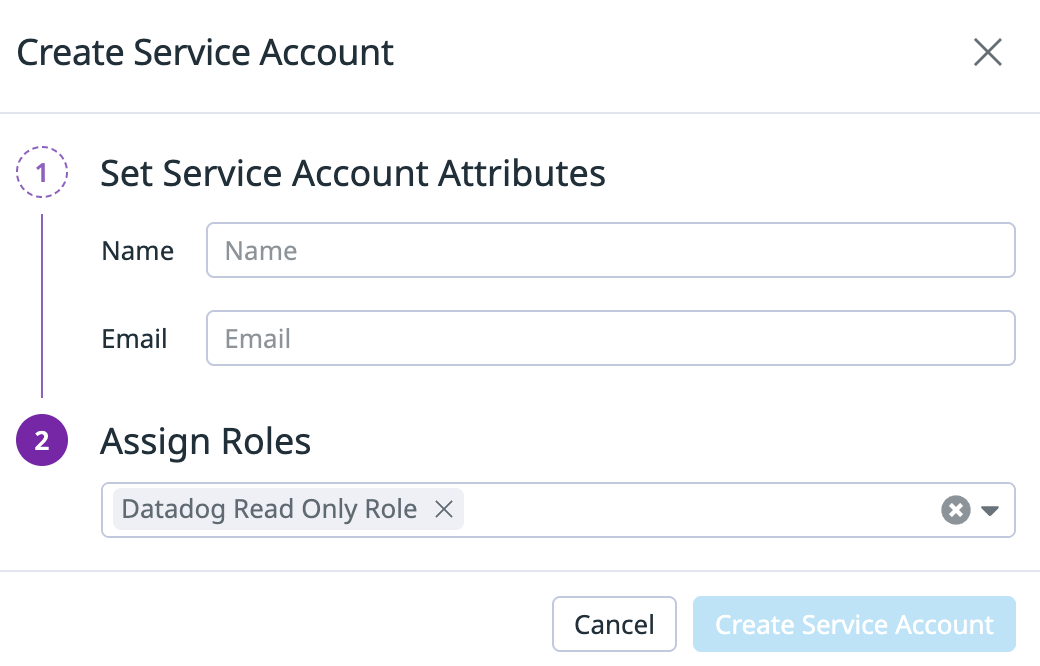
- Click on New Service Account > Enter a name, email, assign role **Datadog Read Only Role **> Create Service acccount
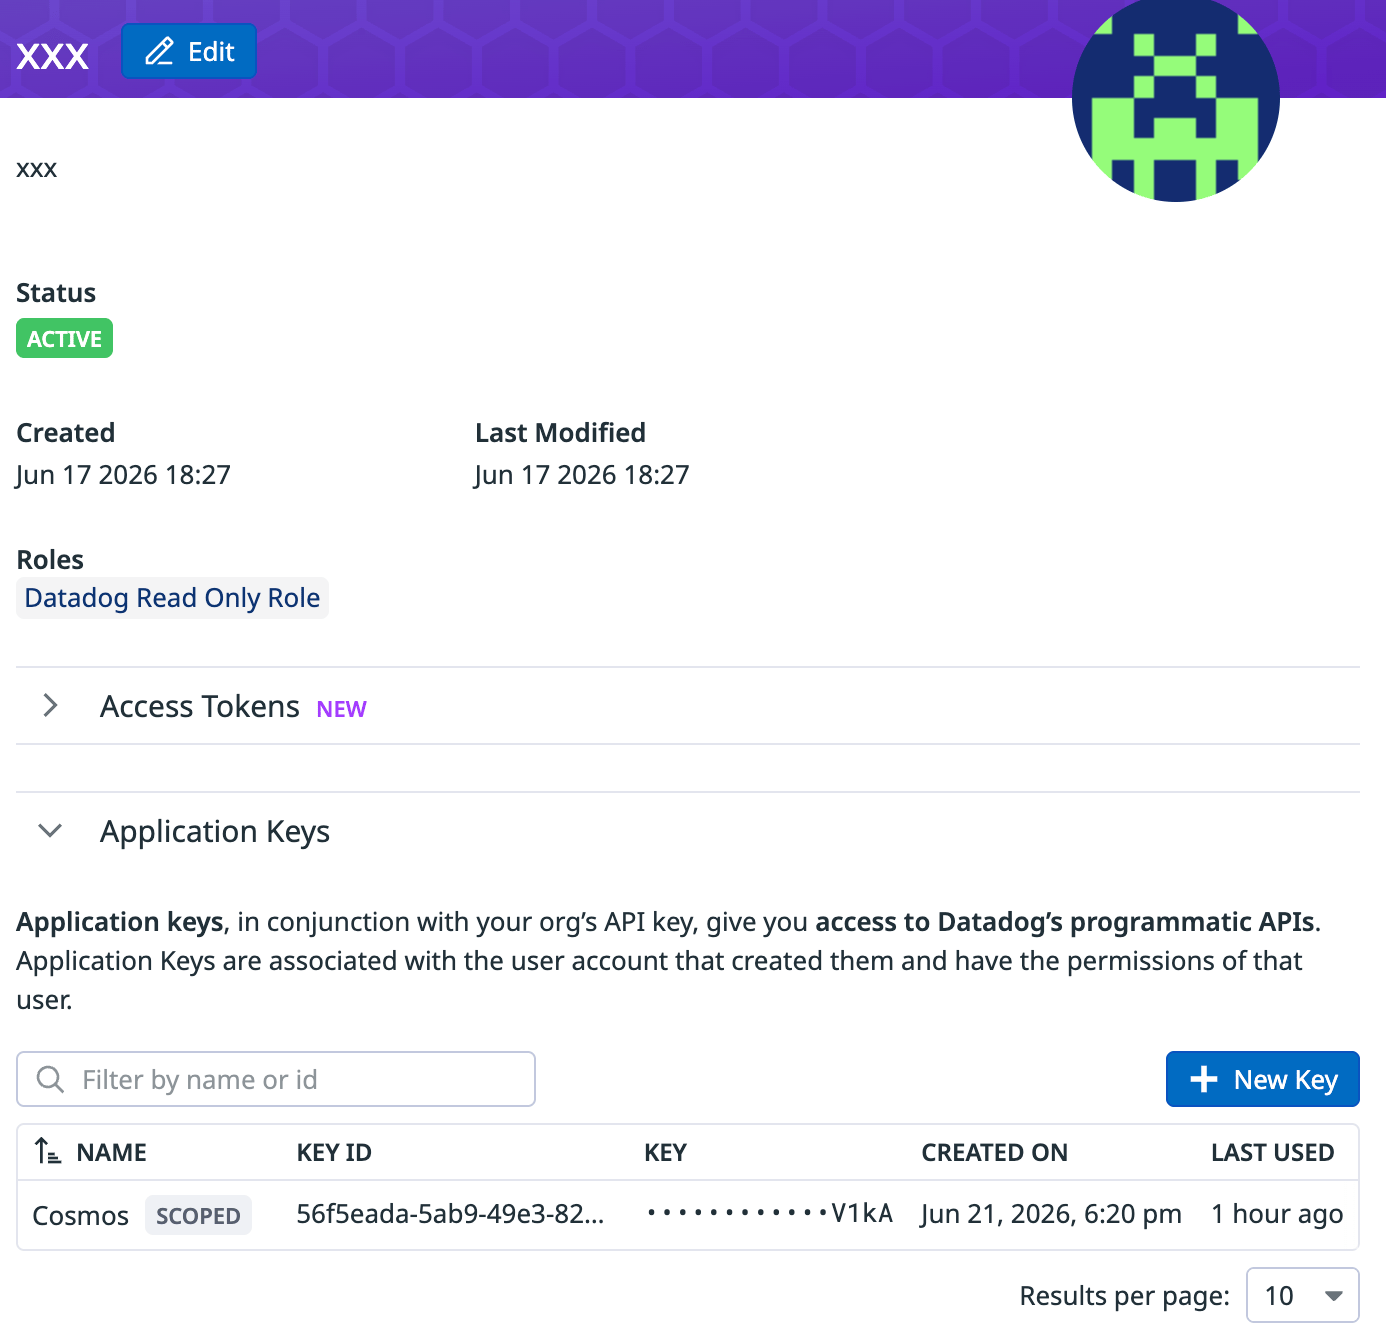
- In the section Application Keys > Click on New Key > Name: Cosmos > Click on Create Key
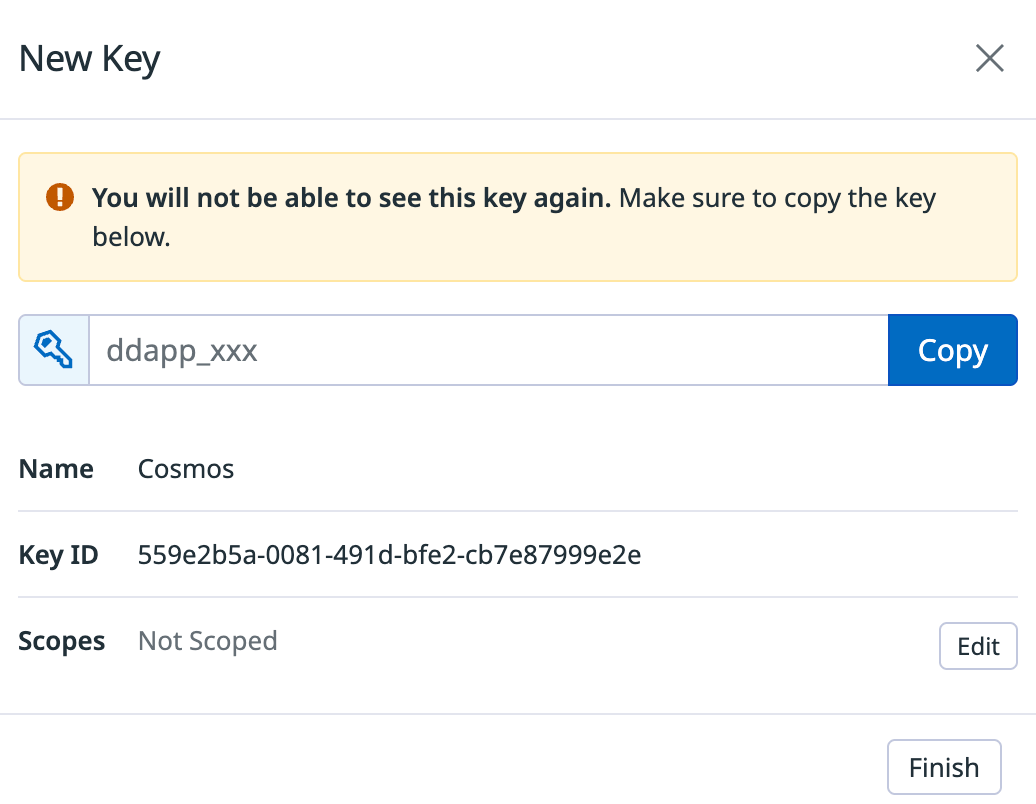
- Stay on that view. In front of Scopes click on Edit > make sure that all those scopes are selected:
- mcp_read
- monitors_read
- dashboards_read
- metrics_read
- events_read
- logs_read_data
- incident_read
- Then click on Save. You should see this:
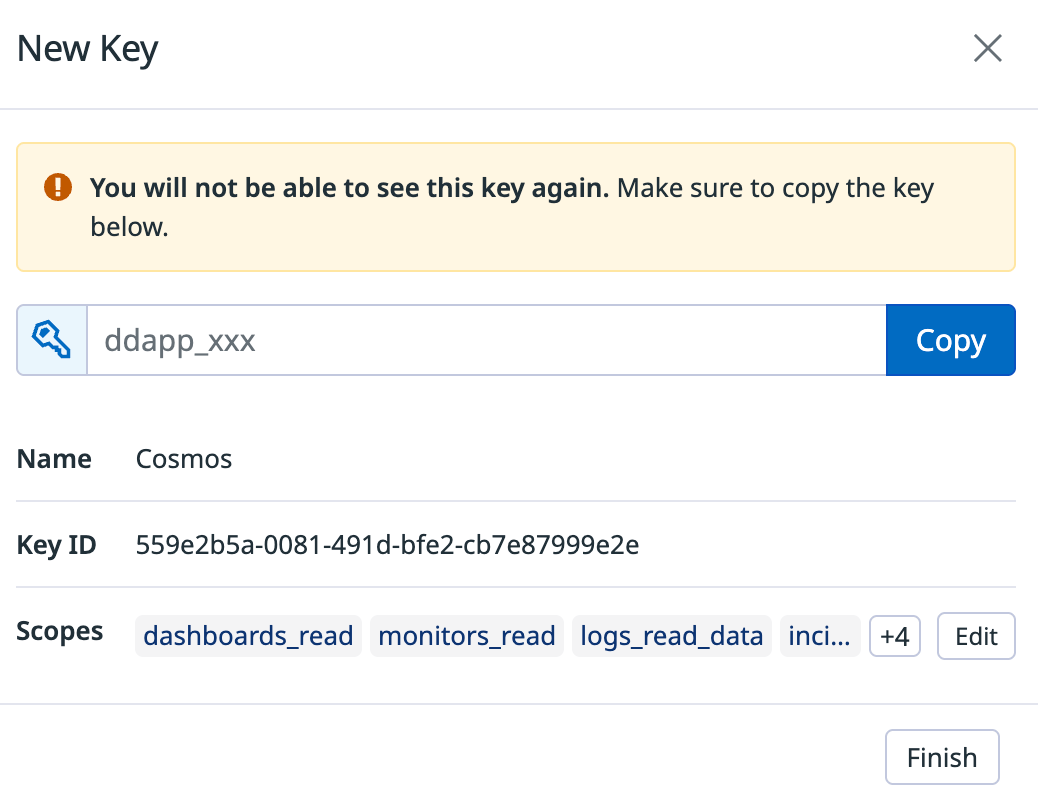
- Click on Copy to copy the application key (we’ll need it shortly), then click on Finish. Your Service account view should look like this:
- Go to Cosmos cosmos.augmentcode.com > Settings > Connectors > Add Connector > MCP > Select Remote MCP
- Name: Datadog
- Server URL: https://mcp.us5.datadoghq.com/api/unstable/mcp-server/mcp (make sure to edit your instance region)
- Authentication Type: Header > Add those 2 headers
- DD-API-KEY: <YOUR_DATADOG_API_KEY>
- DD-APPLICATION-KEY: <YOUR_DATADOG_APPLICATION_KEY>
- Add Server
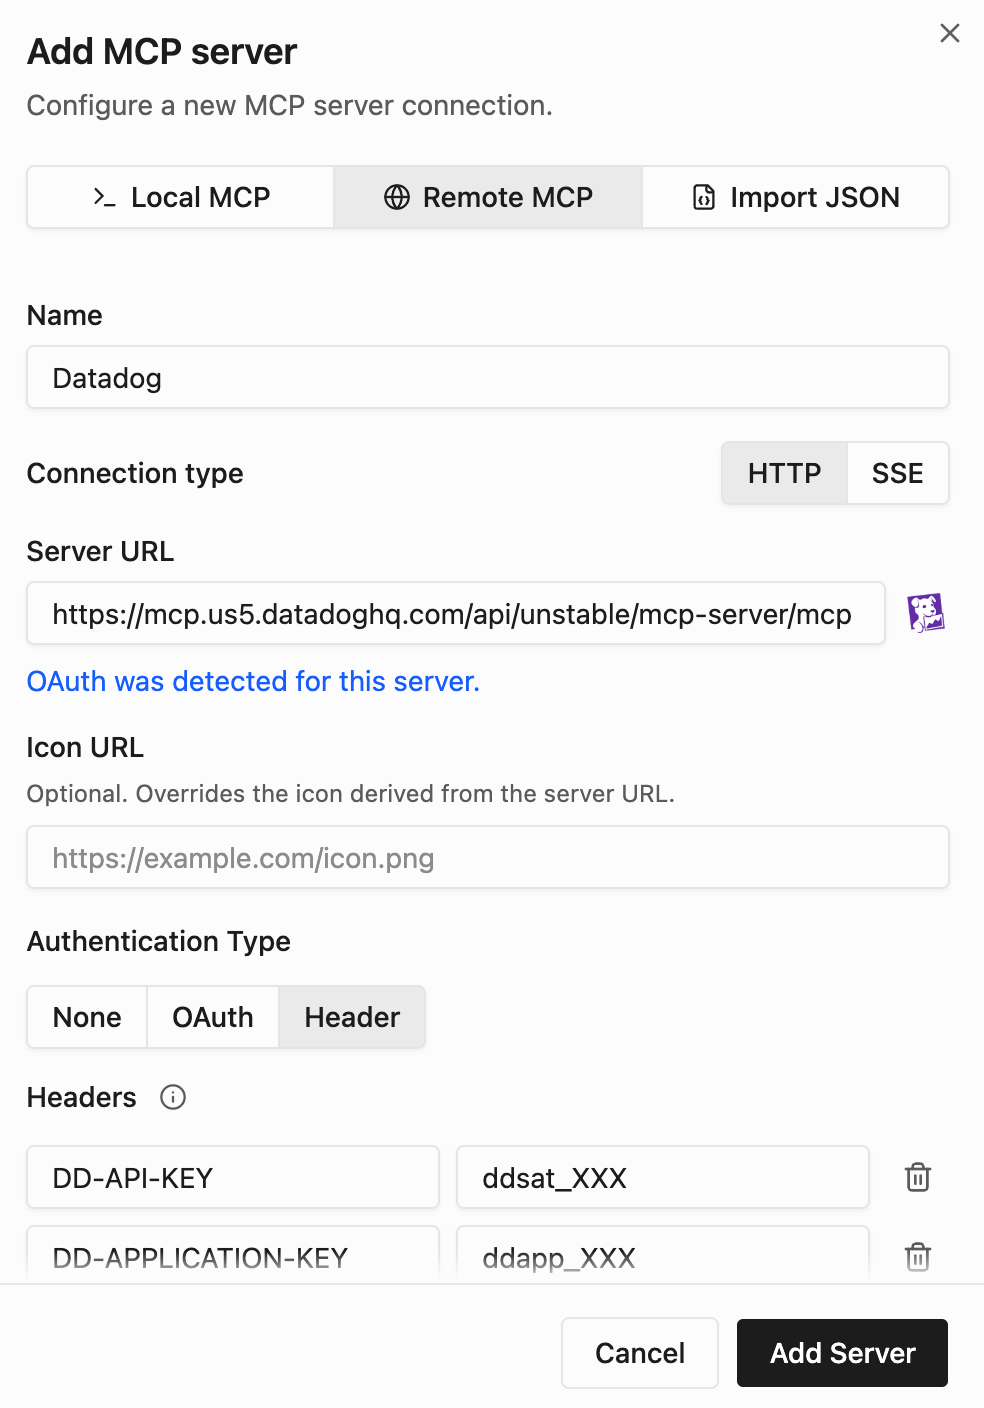
- Make sure Clients Cosmos and CLI are toggled on, then click on Save changes.
- Open Sharing → Manage access, grant Can use to the intended recipients (or Everyone → Can use for organization-wide use), and save the access changes. If prompted, choose Shared connection only if those recipients should use the service account’s Datadog permissions.
The screenshot below shows the older Shared toggle. Use Manage access in the current UI. If the headers reference separately created generic secrets, configure each secret’s use access and Used in coverage independently.
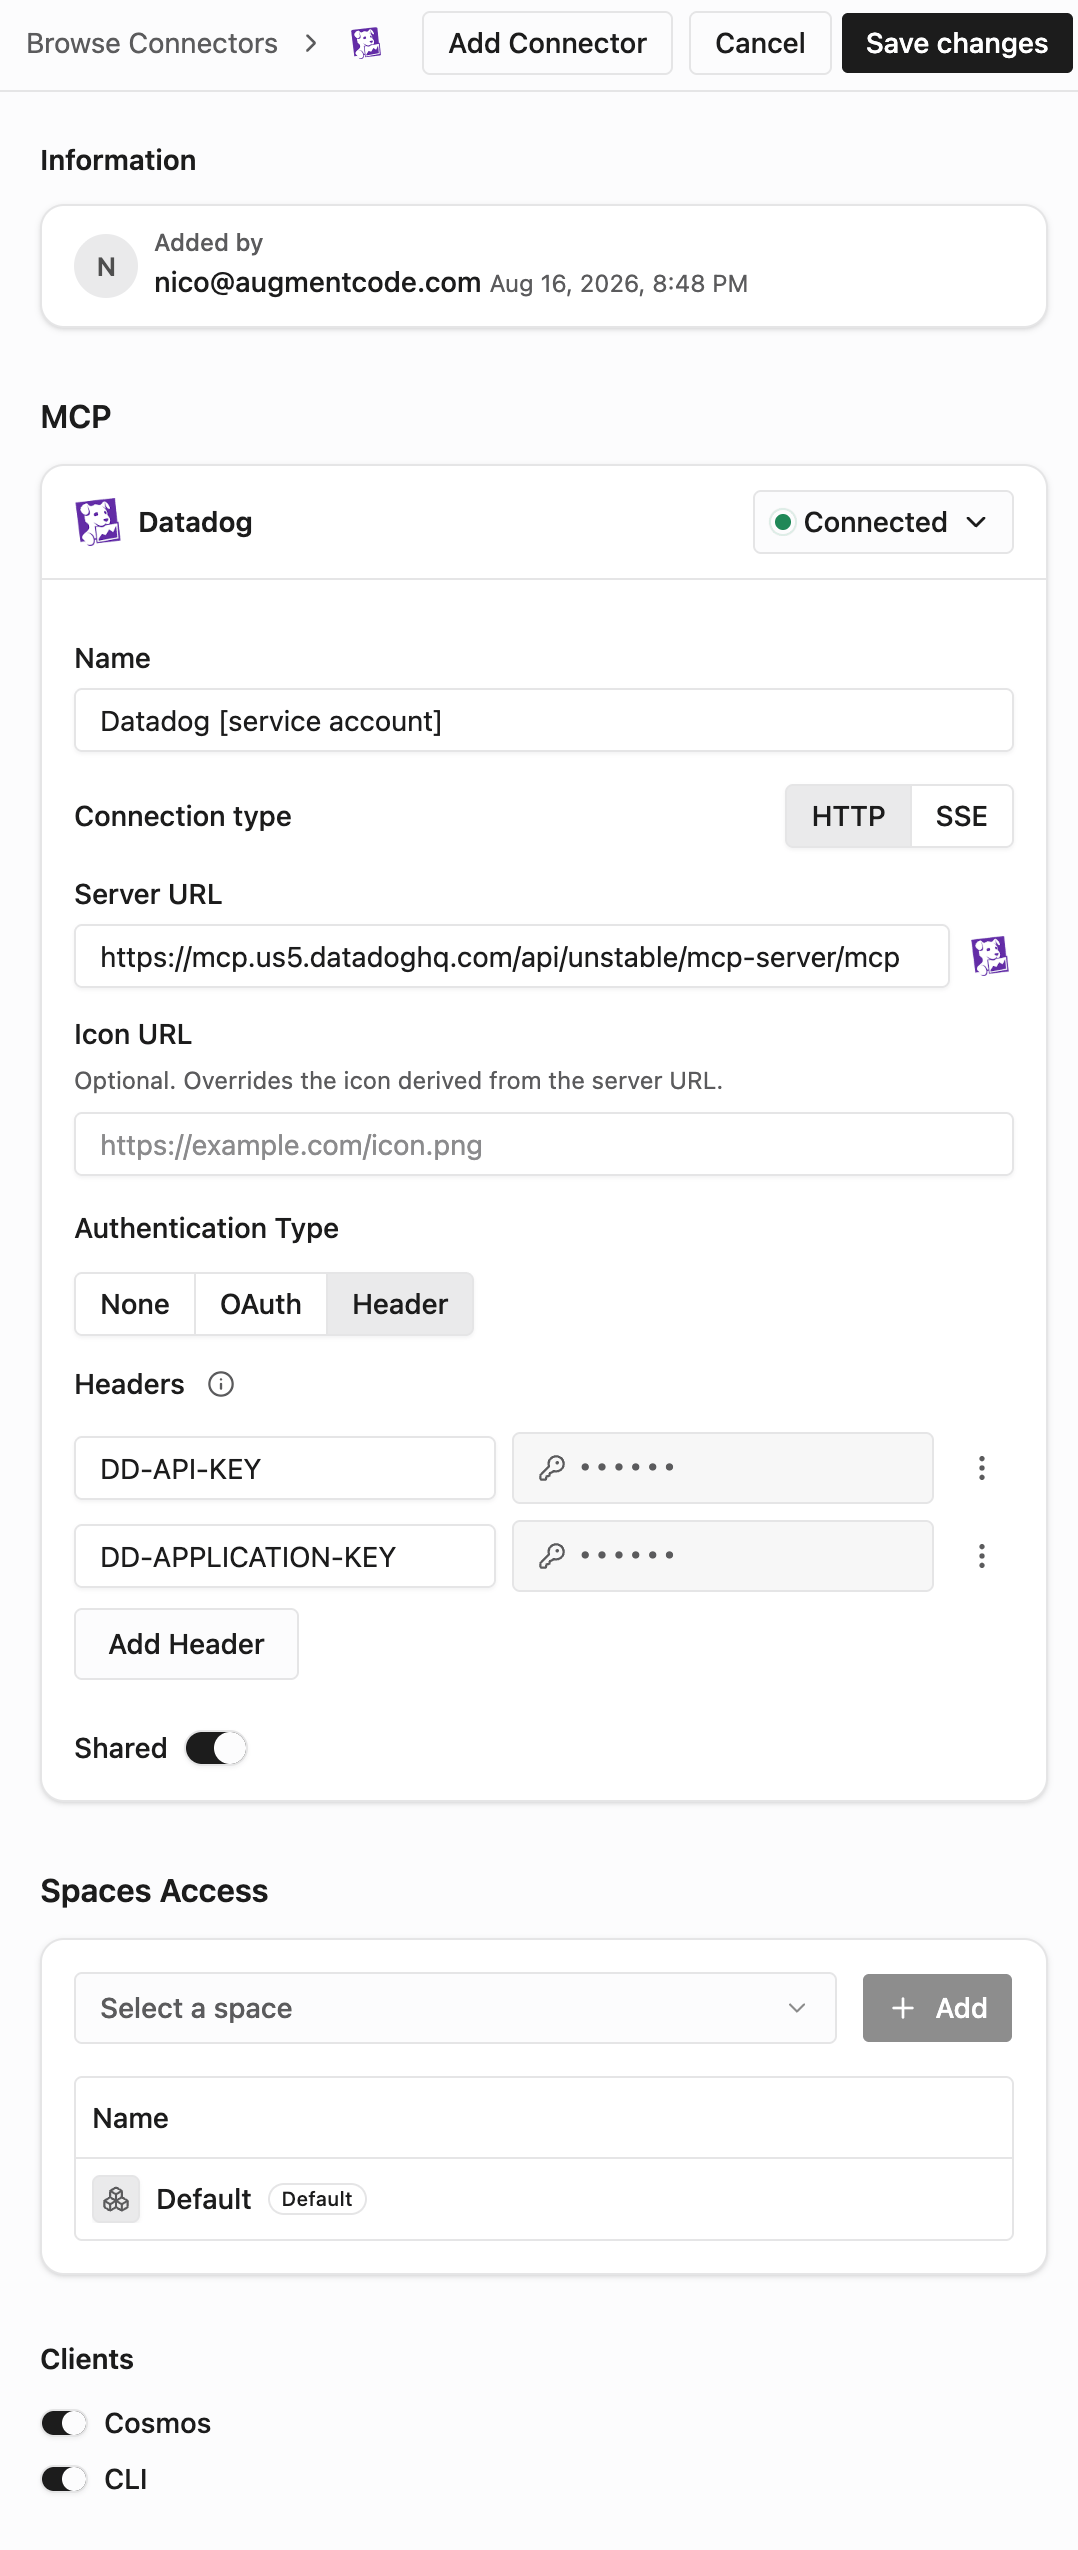
- Go to Cosmos https://cosmos.augmentcode.com > New session
- Make sure the Datadog MCP server is selected
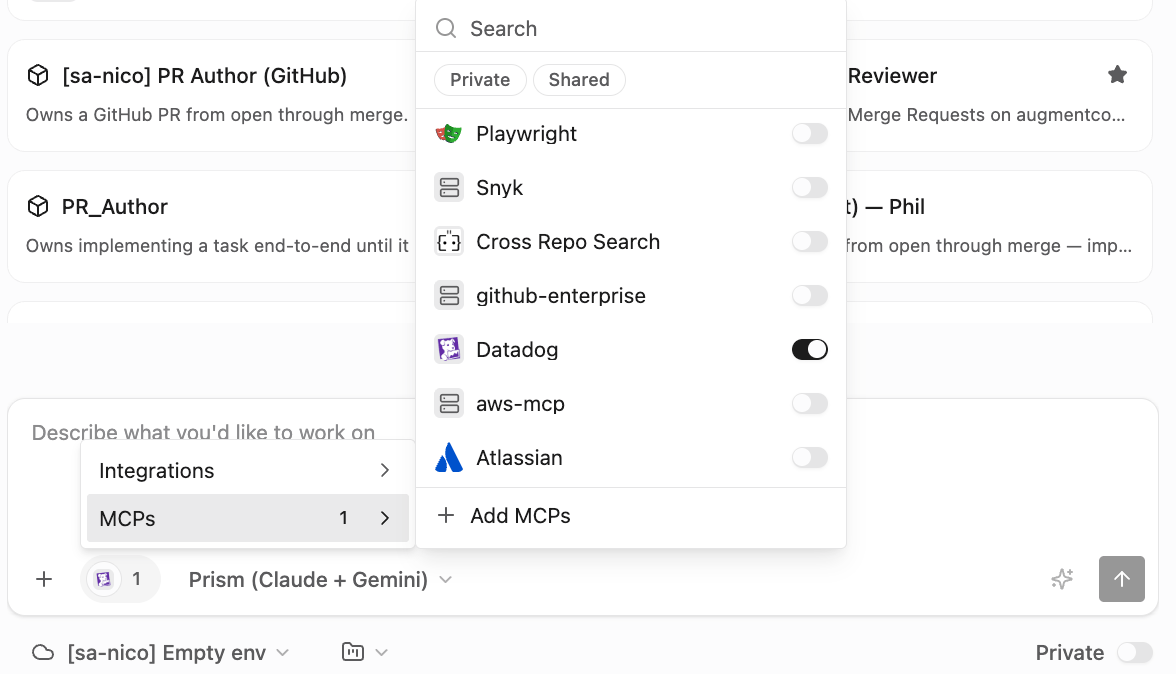
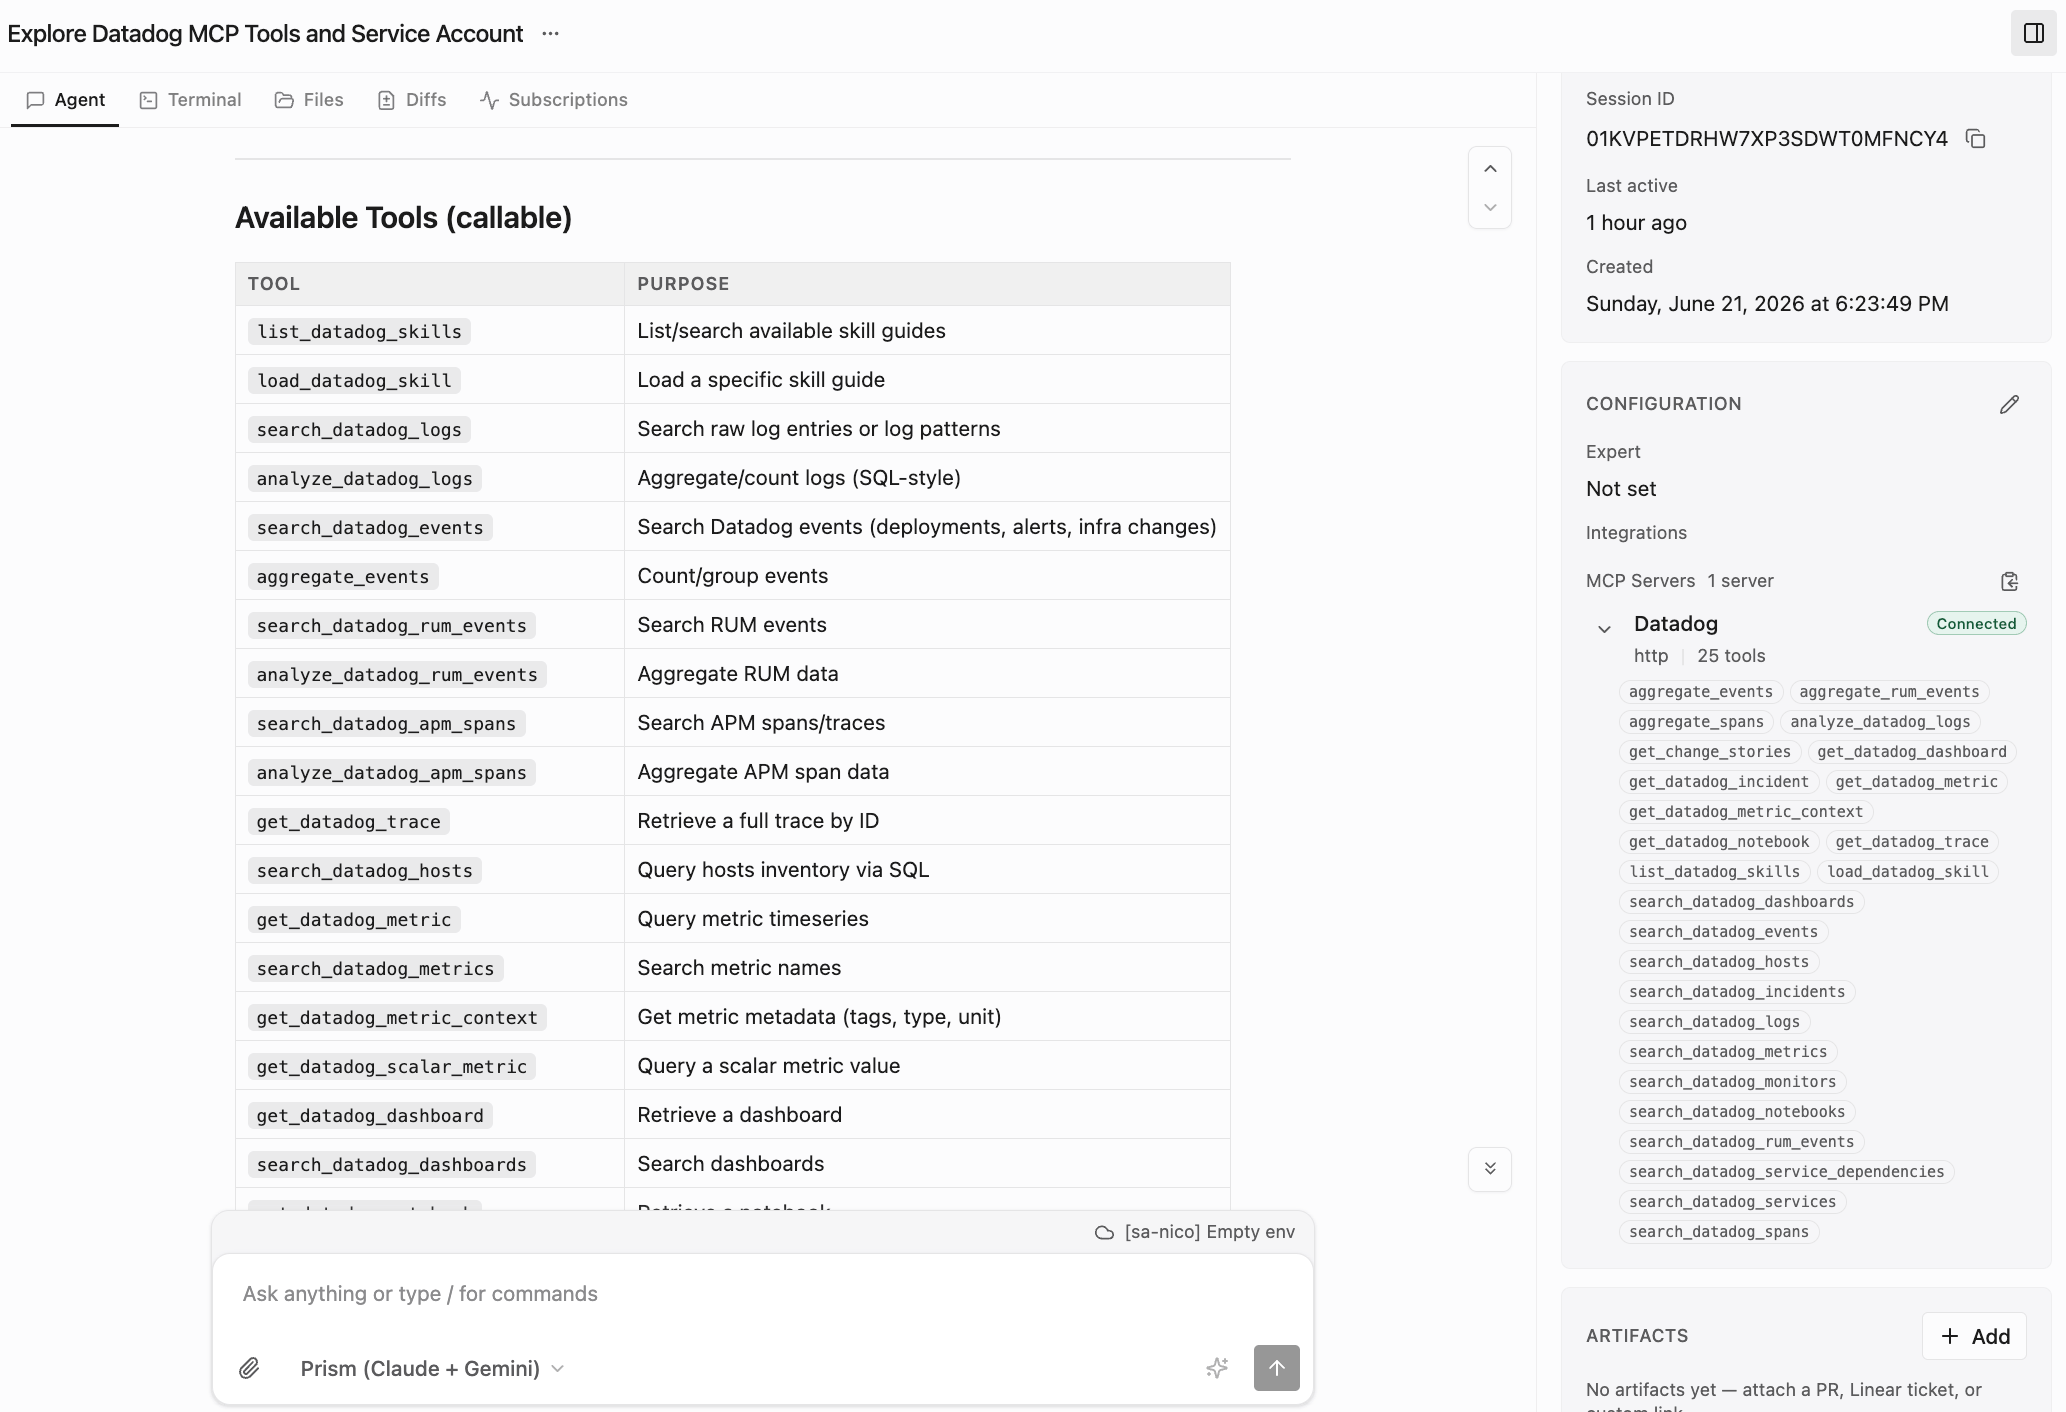
- Submit this prompt “What tools can I access with the connected datadog mcp? what user/service account it is using?”. In your session’s right drawer you should see the Datadog MCP tools: