About Model Context Protocol servers
Augment Agent can utilize external integrations through Model Context Protocol (MCP) to access external systems for information and integrate tools to take actions. MCP is an open protocol that provides a standardized way to connect AI models to different data sources and tools. MCP servers can be used to access local or remote databases, run automated browser testing, send messages to Slack, or even play music on Spotify.Easy MCP: One-Click Integrations
New: Easy MCP launched on July 30, 2025, making it easier than ever to connect popular developer tools to Augment Code.Easy MCP is a new feature in the Augment Code extension that transforms complex MCP server setup into a single click. Instead of manually configuring servers, hunting for GitHub repos, or editing JSON files, you can now connect popular developer tools with just an API token or OAuth approval.
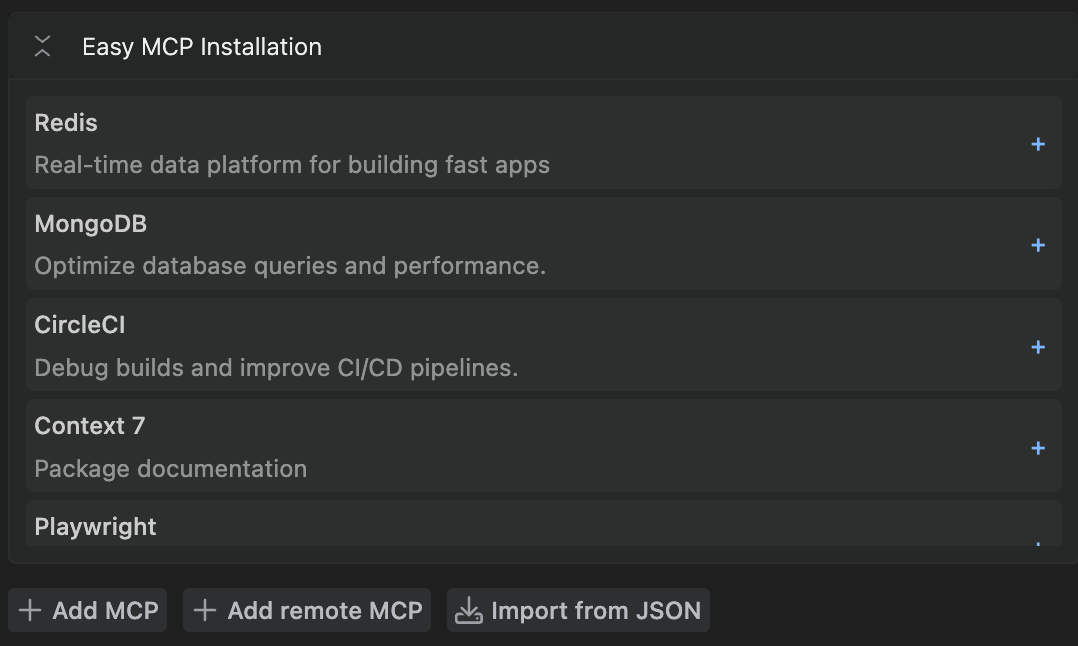
Available Easy MCP Integrations
Easy MCP provides one-click access to these popular developer tools:CircleCI
- Context: Build logs, test insights, flaky-test detection
- Sample prompt: “Find the latest failed pipeline on my branch and surface the failing tests.”
- Setup: Click ”+”, paste your CircleCI API token, and you’re connected.
MongoDB
- Context: Data exploration, database management, and context-aware code generation
- Sample prompt: “Analyze my user collection schema and suggest optimizations for our new search feature.”
- Setup: One-click OAuth connection to your MongoDB instance.
Redis
- Context: Keyspace introspection, TTL audits, and migration helpers
- Sample prompt: “Generate a migration script to move expiring session keys to the new namespace.”
- Setup: Connect with your Redis credentials in seconds.
Getting Started with Easy MCP
- Open the Augment Code extension in VS Code
- Navigate to the Easy MCP pane in the settings
- Click the ”+” button next to your desired integration
- Paste an API token or approve OAuth
- Start using the integration immediately in your Agent conversations
Advanced MCP Configuration
For developers who need custom MCP server configurations or want to use servers not available through Easy MCP, you can still configure MCP servers manually. There are three ways to configure MCP servers in Augment:- Easy MCP (recommended) - One-click integrations for popular tools
- Augment Settings Panel - Manual configuration with a GUI
- Import from JSON - Paste a JSON config to quickly add servers
Configure in the Augment Settings Panel
The easiest way to configure MCP servers is to use the Augment Settings Panel. To access the settings panel, open the options menu in the upper right of the Augment panel and click the Settings option. Once the settings panel is open, you will see a section for MCP servers.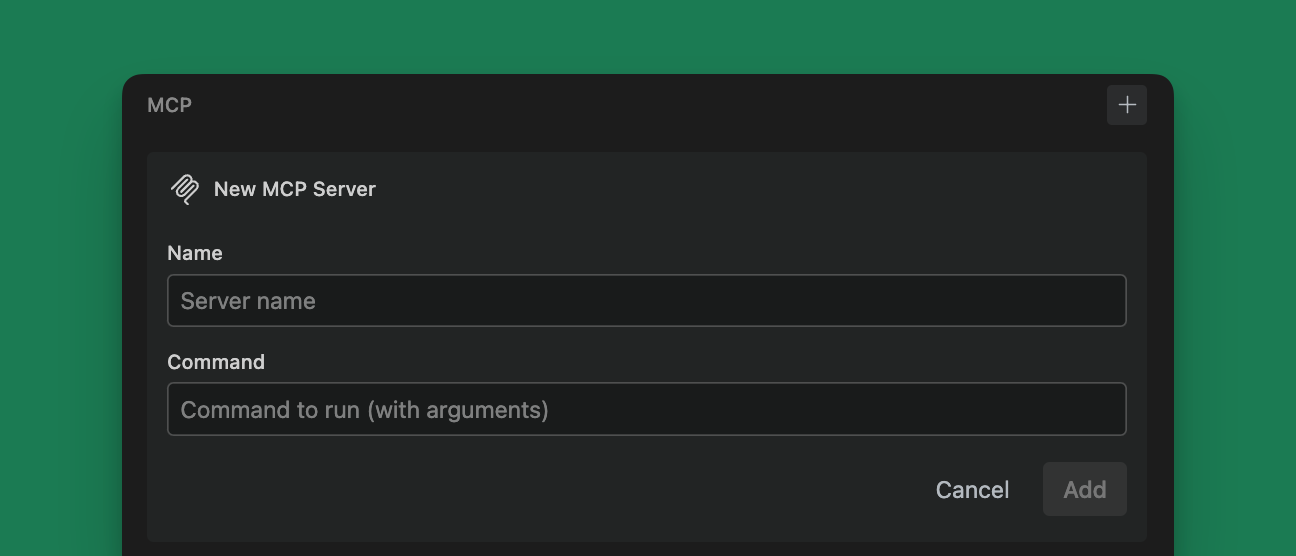
name and command fields. The name field must be a unique name for the server. The command field is the command to run the server. Environment variables have their own section and no longer need to be specified in the command.
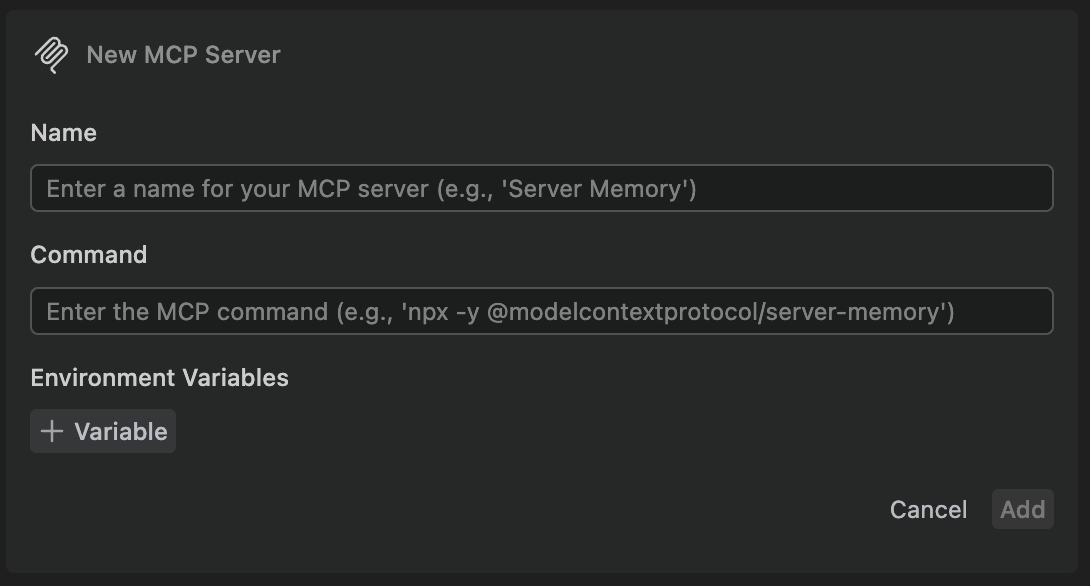
+ button next to the MCP header.
To edit a configuration, or to delete a server, click the ... button next to the server name.
Add a Remote MCP server
If your MCP server runs remotely (for example, a hosted service), click the ”+ Add remote MCP” button in the MCP section. Remote MCP connections support both HTTP and SSE (Server‑Sent Events).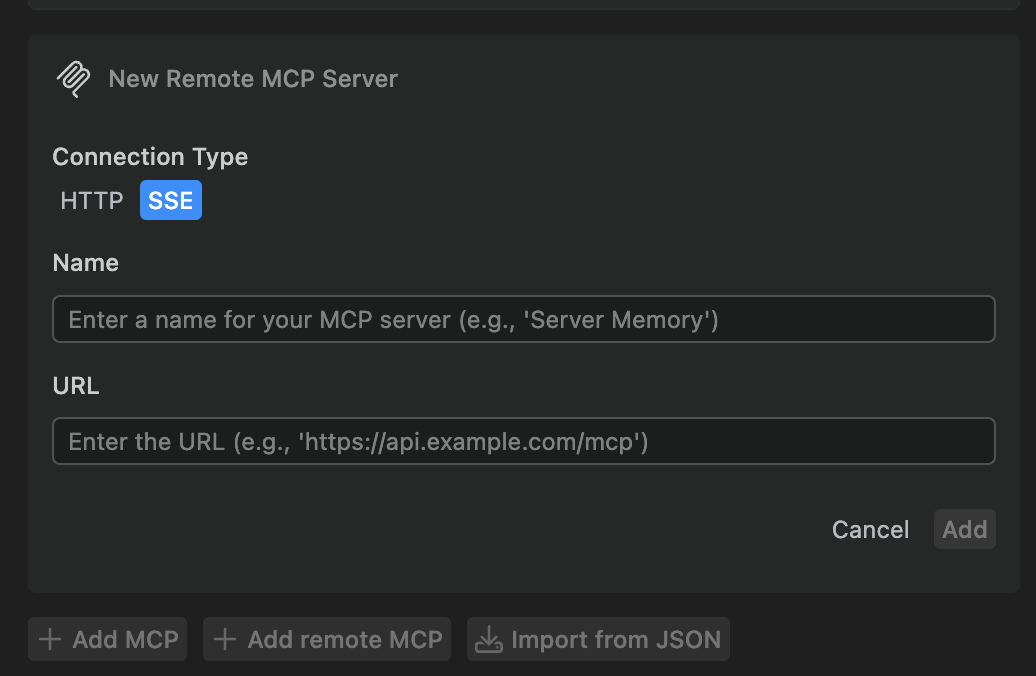
- Connection Type: choose HTTP or SSE
- Name: a unique display name for the server
- URL: the base URL to your MCP server (e.g., https://api.example.com)
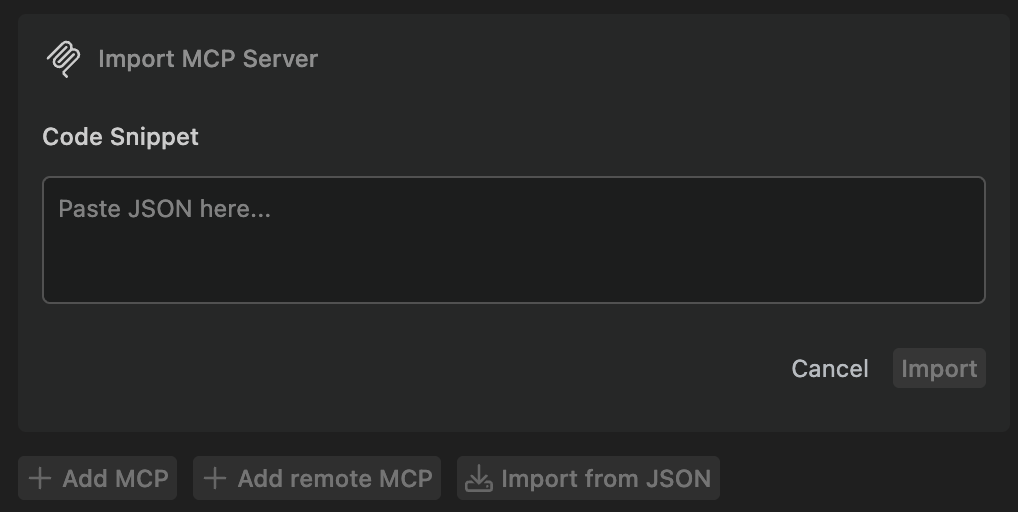
Import from JSON
You can quickly add MCP servers by importing a JSON configuration from the Augment Settings Panel:- Open the Settings Panel (gear icon in the Augment panel)
- In the MCP section, click Import from JSON
- Paste a configuration like the following and click Save
Variable Expansion
MCP server configurations support variable expansion for dynamic values. This is particularly useful when using Augment CLI (Auggie) in different workspace contexts.Supported Variables
Currently, the${workspaceFolder} variable is supported, which expands to the current workspace root path when running in a workspace context.
Example Usage
In command arguments:/Users/username/my-project, the args are expanded to:
Where Variables Work
Variable expansion is supported in:commandfield (for stdio transport)argsarray elements (for stdio transport)urlfield (for http and sse transports)
Important Notes
- Variables are only expanded when running in a workspace context (e.g., when using Auggie CLI in a project directory)
- If no workspace is available, the variable remains unexpanded
- This feature is available in both VS Code extension and Auggie CLI
MCP Tool Search
By default, every tool from every configured MCP server is exposed to Augment Agent up front. With many MCP servers configured, this can consume a significant portion of the agent’s context window before a conversation starts. MCP Tool Search changes this by hiding individual MCP tools from the agent and exposing two meta-tools instead:find-tool— the agent describes what it wants to do, and a lightweight model returns the best matching MCP tool.execute-tool— the agent calls this with the tool name returned byfind-toolto invoke the underlying MCP tool.
Enable MCP Tool Search
MCP Tool Search is disabled by default. Enable it in one of these ways:- Augment Settings Panel — open the Settings Panel, go to the MCP section, and toggle MCP Tool Search on.
- VS Code settings — set
augment.mcp.enableToolSearchtotruein your VS Code settings (either through the Settings UI or directly insettings.json).
Permissions
MCP Tool Search doesn’t change how permissions are evaluated. Permission rules still match against the underlying MCP tool names invoked byexecute-tool, so existing permission configurations continue to apply.
Billing
When MCP Tool Search is enabled,find-tool calls appear as a separate Tool Search activity in your usage dashboard. Tool invocations made through execute-tool are billed as part of normal agent usage.