Auggie runs commands and tools automatically. Only use integrations and MCP servers from trusted sources, and be aware of the risks of combining multiple tools with external data sources or production systems.
About Integrations and MCP
Auggie can utilize external integrations through native integrations like GitHub, Linear, and Notion and Model Context Protocol (MCP) to access external systems for information and integrate tools to take actions. MCP is an open protocol that provides a standardized way to connect AI models to different data sources and tools.Native Integrations
You’ll need to configure the integration in Augment for VS Code or JetBrains IDEs. Once configured, the integration will be available for use with Auggie automatically. See a full list and examples for native agent integrations.1. Setup in Augment extension
- Visual Studio Code: Click the settings icon in the top right of Augment’s chat window or press and select
- JetBrains IDEs: Click the Augment icon in the bottom right of your JetBrains IDE and select
2. Connect the integration
Click “Connect” for the integration you want to set up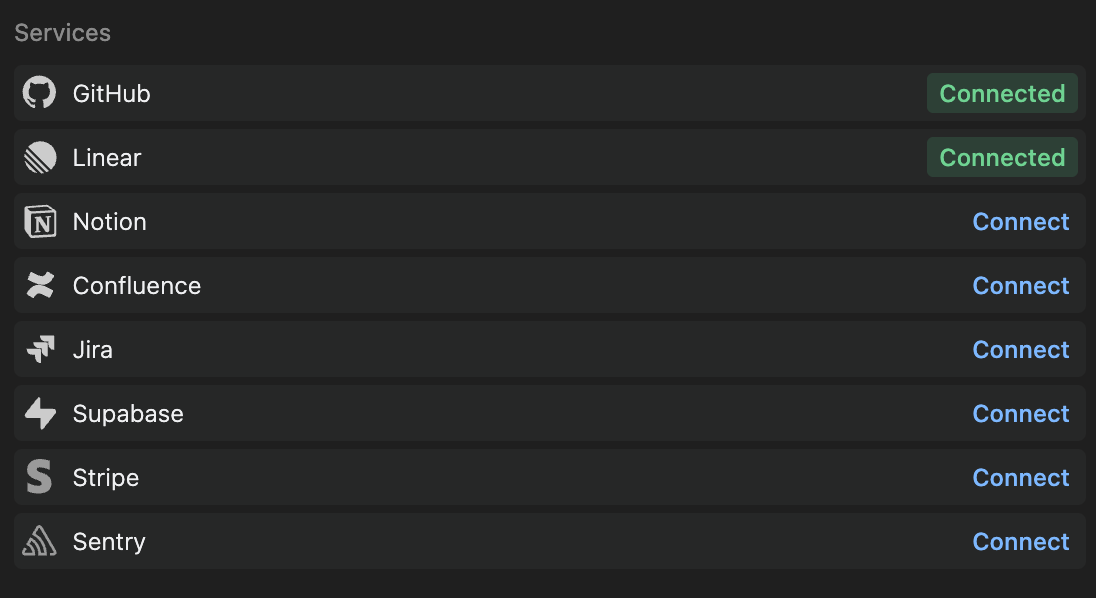
MCP Integrations
In addition to native integrations, Auggie can also access external systems through Model Context Protocol (MCP) servers. MCP servers enable Auggie to interact with external tools and services through a standardized protocol, such as accessing databases, running browser automation, sending messages to Slack, or integrating with APIs.Configure MCP via settings.json
You can persist MCP servers in the Augment settings file~/.augment/settings.json, which will initialize on startup and can be checked with /mcp.
Variable Expansion
MCP server configurations support variable expansion for dynamic values. Currently, the${workspaceFolder} variable is supported, which expands to the current workspace root path when running Auggie in a workspace context.
Example: Using ${workspaceFolder} in args
/Users/username/my-project, the args are expanded to:
commandfield (for stdio transport)argsarray elements (for stdio transport)urlfield (for http and sse transports)
- Variables are only expanded when Auggie is run within a workspace context
- If no workspace is available, the variable remains unexpanded
- Variable expansion works with both
settings.jsonconfigurations and--mcp-configoverrides
HTTP Transport with Headers
MCP servers using HTTP transport can include aheaders object for authentication or custom headers:
headers field accepts any valid HTTP headers as key-value pairs.
Common uses
- Authentication -
Authorizationheaders with bearer tokens or API keys - Custom parameters - Server-specific information that doesn’t fit into standard request parameters
- Session management -
Mcp-Session-Idheader for managing sessions in Streamable HTTP transport
- Transport type - Headers are relevant for HTTP and SSE transports only. Stdio transport uses standard input/output and does not use HTTP headers
- Server requirements - Required headers depend on the MCP server implementation
- Security - Avoid including sensitive information like API keys directly in configuration files. Consider secure credential management methods
Manage MCP servers with the Auggie CLI
You can add and inspect MCP servers is via Auggie subcommands, which will persist the configuration to your~/.augment/settings.json file:
Usage
Add MCP server:--command <path>- Executable path (for stdio transport)--args <args>- Arguments string for command-e, --env <KEY=VAL>- Environment variable (repeatable)-t, --transport <transport>- stdio|sse|http (default: “stdio”)-u, --url <url>- URL (required for —transport sse or http)-h, --header <KEY:VAL>- HTTP header (repeatable, for http and sse transports)-r, --replace- Overwrite existing entry without prompt
settings.json for MCP server configurations. This command uses the same mechanism as --mcp-config but provides a convenient way to add servers directly from the command line.
List MCP servers:
--json- Output JSON format
MCP overrides
You can define servers by passing ad‑hoc overrides with--mcp-config. The structure is the same as settings.json:
MCP Tool Search
By default, every tool from every configured MCP server is loaded into Auggie’s context up front. When many MCP servers are configured, this can consume a meaningful portion of the agent’s context window before your prompt is processed. MCP Tool Search hides individual MCP tools from the agent and exposes two meta-tools —find-tool and execute-tool — so the agent only loads the full schema for tools it actually uses.
MCP Tool Search is disabled by default. Enable it with either:
- Per run — pass
--enable-tool-searchwhen invoking Auggie. - Persistent — set
"enableToolSearch": truein your Auggiesettings.json.
find-tool calls appear as a separate Tool Search activity in your usage dashboard. Permissions continue to apply to the underlying MCP tool invocations made through execute-tool.
For conceptual background, see MCP Tool Search (VS Code) or MCP Tool Search (JetBrains).