
Quick Start with Zed

1. Install Auggie CLI (Pre-release version)

npm install -g @augmentcode/auggie@prerelease

2. Sign in to Augment

auggie login
This will open a browser window for authentication.

3. Get your authentication token (Only if you set it up remotely, this is not mandatory locally.)

auggie token print
This will output something like:
TOKEN={"accessToken":"your-access-token","tenantURL":"your-tenant-url","scopes":["read","write"]}
Copy the accessToken value (the long string after "accessToken":") and the tenantURL value for the next step.

4. Configure the MCP server in Zed

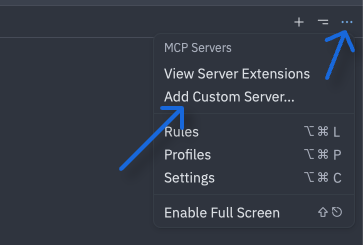
  • Click the … then Add Custom Server
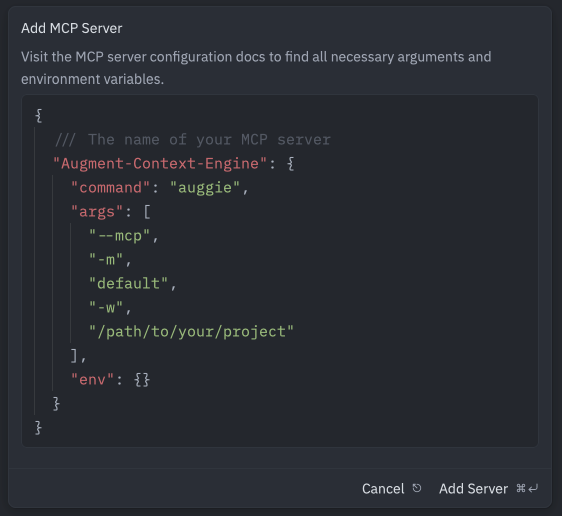
 Zed custom server
  • Paste the config and Update the /path/to/your/project this is mandatory in Zed for such MCP (easy copy paste is below the screenshot) Zed MCP
Local Setup (MacOS or Linux)
On MacOS or Linux, use this config:
{
  "Augment-Context-Engine": {
    "enabled": true,
    "command": "bash",
    "args": [
      "-c",
      "auggie -m default --mcp -w $(pwd)"
    ],
    "env": {}
  }
}
On Windows, use the config below. Update the /path/to/your/project. Local Setup (Windows)
{
  "Augment-Context-Engine": {
    "command": "auggie",
    "args": [
      "--mcp",
      "-m",
      "default",
      "-w",
      "/path/to/your/project"
    ],
    "env": {}
  }
}

5. Test the integration

Prompt : “What is this project ? Please use codebase retrieval tool to get the answer.”
Zed should confirm it has access to the codebase-retrieval tool.
Zed test